background image


IMPORTANT INSTRUCTIONS 

Read all instructions before installing or using this heater. 


2.  Keep  combustible  materials,  such  as  furniture,  pillows,  bedding,  papers,  clothes  and 

curtains at least 3 feet from the front of the heater; keep them away from sides and rear 

as well.   

3.  Always unplug heater when it

s not in use.   

4.  Do not operate the fireplace if it has a damaged cord or plug, after it has malfunctioned, or 

if the unit has been dropped or damaged in any way. 

5.  Do not use the heater outdoors. 

6.  This  heater  is  not  intended  for  use  in  bathrooms,  laundry  areas  and  similar  indoor 

locations.  Never  place  the  heater  where  it  may  fall  into  a  bathtub  or  other  water 

containers.   

7.  Do not run the cord under carpeting. Do not cover the cord with throw rugs, runners or 

anything else. Arrange the cord away from traffic areas where it could not be tripped over.   

8.  To disconnect the heater, turn the controls to "OFF" before removing the plug from the 

outlet.   

9.  Do not insert or allow foreign objects to enter any ventilation or exhaust opening, as this 

may cause an electric shock, fire or damage to the heater.   

10. To prevent a possible fire, do not block air intakes in any manner.   

11. A  heater  has  hot  and  arcing  or  sparking  parts  inside.  Do  not  use  it  in  areas  where 

gasoline, paint or flammable liquids are used or stored.   

12. Use this heater only as described in this manual. Any other use not recommended by the 

manufacturer may cause fire, electric shock or injury to persons.   

13. Avoid the use of an extension cord because the extension cord may overheat and cause 

a fire.   

14. Always use properly grounded fused and polarized outlets. 

15. Always use ground fault protection where it is required by electrical codes. 

16. Always disconnect the power before performing any cleaning, maintenance or relocation 

of the heater. 

17. To prevent a possible fire, do not burn wood or other materials in this heater. 

18. To prevent electric shock or fire, always use a certified electrician, should new circuits or 

outlets be required. 

When transporting or storing the heater, keep it in a dry place, free from excessive 

vibration.


1. 

19. 

Summary of Contents for WM-FM-50-BG

Page 1: ...ese instructions are not followed exactly a fire or explosion may result causing property damage personal injury or loss of life Do not store or use gasoline or other flammable vapors and liquids in the vicinity of this or any other appliance INSTALLER LEAVE THIS MANUAL WITH THE APPLIANCE CONSUMER RETAIN THIS MANUAL FOR FUTURE REFERENCE ...

Page 2: ...rvice from your Amantii product IMPORTANT INSTRUCTIONS 3 UNPACKING AND TESTING APPLIANCE 4 GROUNDING APPLIANCE 4 LOCATING THE FIREPLACE 4 WM FM 50 BG 5 INSTALLATION WALL MOUNT 7 INSTALLATION BUILT IN 8 HARD WIRE INSTALLATION 9 MEDIA OPTIONS 10 DECORATIVE MEDIA INSTALLATION 10 OPERATION 11 MANUAL OPERATION 11 REMOTE CONTROL OPERATION 12 INSTALLING WALL THERMOSTAT 13 REPLACEMENT PARTS 14 EXPLODED VI...

Page 3: ...o not insert or allow foreign objects to enter any ventilation or exhaust opening as this may cause an electric shock fire or damage to the heater 10 To prevent a possible fire do not block air intakes in any manner 11 A heater has hot and arcing or sparking parts inside Do not use it in areas where gasoline paint or flammable liquids are used or stored 12 Use this heater only as described in this...

Page 4: ...unded outlet box The adapter should not be used if a three slot grounded receptacle is available To disconnect appliance turn controls to off then remove plug from outlet LOCATING THE FIREPLACE Plan where to locate and frame the fireplace This will save time and money later when you install the fireplace Before installation consider the following 1 Where the fireplace is located must allow for wal...

Page 5: ...Opening Size 48 1 2 22 or 123 2 cm 55 9 cm This appliance has been tested in accordance with the UL Standard 2021 for fixed and location dedicated electric room appliances in the United States and Canada If you need assistance during installation please contact your local dealer NOTE This appliance must be electrically wired and grounded in accordance with local codes In the absence of local codes...

Page 6: ...nt glass from the 4 shoulder posts on the sides of the unit and remove the glass 2 To replace the glass lift onto the 4 shoulder posts For a Wall Mount installation replace the two screws to secure the glass For Flush Mount installs it is not possible to replace the screws Screw locations on uint Lift glass from shoulder posts The fireplace have 2 screws that secure the front glass in place 6 ...

Page 7: ...the area to be drilled Drill 8 or more holes 8mm diameter 40mm depth using a suitable size drill and put the wall plugs into the holes 4 Take out the hanger from the fireplace by unscrew the screw Referring to Fig 2 5 Referring to Fig 3 fix the hanger to the wall 6 Referring to Fig 4 avoid fireplace to move use screw fix fireplace to wall Warning Always ensure the fireplace is at least 350mm above...

Page 8: ...nd national codes and other applicable regulations Note Fireplace must stick out of the wall a minimum of 1 2 or 1 3 cm Prior to installing the appliance test to make sure the appliance operates properly by plugging the power supply cord into a conveniently located 120 Volt grounded outlet The rough wall opening size of the fireplace W D H WM FM 50 BG 48 1 2 5 22 1 Take the front glass off from th...

Page 9: ...be electrically connected and grounded in accordance with local codes if hard wired In the absence of local codes use the current CSA C22 1 CANADIAN ELECTRICAL CODE in Canada or the current ANSI NFPA 70 NATIONAL ELECTRICAL CODE in the United States 1 Remove the cover plate from the left side of the appliance by removing the two screws as shown below Unscrew and remove power cord 2 Attach the wirin...

Page 10: ...tched off Unscrew two screws both hand side to take off the front glass The log is shipped in place The log has tabs on each side that hold it secure There are two screws to fix the side panel Unscrew the screws to remove the side panels Remove both side panels to remove the log set Screw back the side panels after remove the log set Installing the decorative media Pour the fire glass media into t...

Page 11: ...hen the room temperature goes above 25 the heater will be turned off and the cycle will continue The LED indicator will be PURPLE in colour under this mode 4 Flame effect Press the button marked Flame to adjust the flame brightness The flame brightness will cycle through Low Medium High OFF NOTE If operated at the Low heat setting the fireplace will not provide as much heat output as in the High h...

Page 12: ...ff all the functions and the fireplace will be in standby mode DISPLAY ON OFF button Switching the fireplace flame and tray light ON OFF It has functions of setting memory DISPLAY BLUE button Adjust the blue color brightness of flame and tray DISPLAY YELLOW button Adjust the yellow color brightness of flame and tray DISPLAY ORANGE button Adjust the orange color brightness of flame and tray HEATER ...

Page 13: ...ermostat prior to installing the fireplace WALL THERMOSTAT WIRING 24 VAC Install Wall Thermostat per instructions provided with kit and per the following information 1 Turn off circuit breaker 2 Remove cover plate located on the left side of appliance 3 Pull the wire out and cut the inside thermostat Connect the wires to the wall thermostat as shown below Follow instructions provided with wall swi...

Page 14: ...1 7 602067B BLOWER AND HEATER ASSEMBLY 1 8 3095006C BLACK PLASTIC 1 9 3093003 BLOWER MOUNT 1 10 GLASS BRACKET 2 11 LED BRACKET 1 12 10702145 BOTTOM GLASS 1 13 10101225 FLAME MOTOR 1 14 3095502 FLICKER ASSEMBLY 1 15 BOTTOM GLASS HOLDER 1 16 10103007 POWER CORD 1 17 BOTTOM PANEL 1 18 601136B LED STRIP 4 19 601136B TRAY LED STRIP 4 20 10701163C FRONT GLASS 1 10105064 REMOTE Not shown ...

Page 15: ...15 EXPLODED VIEW ...

Page 16: ...plugged into an electrical outlet Check plug and plug in Appliance has overheated and safety device has caused the thermal switch to disconnect Turn off the main switch allow appliance to cool for 10 minutes then turn it on Appliance will not come on when switch is flipped to ON Circuit board is burnt out Inspect the circuit board and replace it if necessary No warm air coming out of appliance Hea...

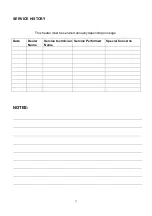
Page 17: ...17 SERVICE HISTORY This heater must be serviced annually depending on usage Date Dealer Name Service technician Name Service Performed Special Concerns NOTES ...

Page 18: ...se of the cover is required for any warranty claims Service Under Limited Warranty Defects must be brought to the attention of Amantii Technical Service by contacting Amantii at 1 888 406 8764 or at 502 1027 Davie Street Vancouver BC V6E 4L2 Please have your proof of purchase catalogue model and serial numbers available when calling any and all service under the limited warranty requires a proof o...

Reviews: