background image


LP-007s Manual


AMARI Audio equipment co.,LTD


www.amari.cc


Email:

amari@vip.163.com


Summary of Contents for LP-007s

Page 1: ...LP 007s Manual AMARI Audio equipment co LTD www amari cc Email amari vip 163 com ...

Page 2: ... of damage during transportation Do not open the motor cover In order to avoid electric shock and damage the record player Do not pour water on the player or leave it in an excessively humid environment Packing List Aluminium Platter 1 Record Mat 1 Vinyl Strobe Disc 1 Record Clamp 1 Bearing 1 Power Supply 2 Belt 1 Tonearm Cable 1 integrated with Tonearm Tonearm Counterweight 1 Bearing Oil 1 Tube S...

Page 3: ...LP 007s Record Player Additional tonearm counterweight suitable for cartridge heavier than 6 grams ...

Page 4: ...e level 2 Remove the protective plug of the bearing sleeve and use the supplied syringe to inject a small amount of lubricant into the lower sleeve of the shaft the lower sleeve is filled with oil at the factory Then place the bearing shaft vertically into the lower sleeve and let it sink in naturally note that you must insert vertically and careful to avoid damage to the shaft also do not push th...

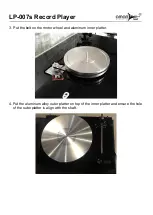
Page 5: ...s Record Player 3 Put the belt on the motor wheel and aluminum inner platter 4 Put the aluminum alloy outer platter on top of the inner platter and ensure the hole of the outer platter is align with the shaft ...

Page 6: ...ight of the end of the tonearm by turning the VTA adjustment screw so the tonearm is parallel to the surface of the record Lock the tonearm in place by tightening the base collar screw 6 Align the two small holes on the dust cover with the steel bars on the back of the turntable base install the dust cover gently ...

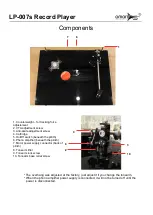
Page 7: ...will not be turned off until the power is disconnected 5 1 6 7 9 8 2 3 10 1 Counterweight for tracking force adjustement 2 VTA adjustment screw 3 Anti skate adjustment screw 4 Cartridge 5 On Off switch beneath the plinth 6 Phono amplifier beneath the plinth 7 Motor power supply connector back of plinth 8 Tonearm lifter 9 Tonearm lock screw 10 Tonearm base collar screw ...

Page 8: ...07s Record Player 1 Support foot lock nut 2 Motor start stop switch 1 Phono amplifier power input DC24V 2 Phono amplifier output 3 MM MC switch 4 Phono amplifier input 5 Phono amplifier ground 1 2 1 2 3 4 5 ...

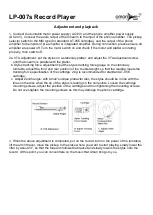
Page 9: ...e on the stationary turntable adjust the front and rear position of the counterweight so that the reading meets the tracking force specification of the cartridge 2 0g is recommended for standard AT 95E cartridge c Adjust Zenith angle with Amari s unique protractor disc the stylus should be in line with the lines on the disc when the tip of the stylus is resting on the null points Loosen the cartri...

Page 10: ...g shaft Therefore the bearing rotation is smooth and without noise 3 Bearing shaft is made of zirconia ceramics which is smooth hard and wear resistant 4 Lower sleeve is made of copper is covered with an oil containing copper sleeve and special powder is sintered with copper 5 The magnetic levitated bearing uses a magnetic leakage prevention mechanism to prevent magnetic leakage 6 The pressure of ...

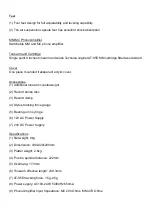
Page 11: ...e piece mounded transparent acrylic cover Accessories 1 Additional tonearm counterweight 2 Record strobe disc 3 Record clamp 4 Stylus tracking force gauge 5 Bearing oil in syringe 6 12V AC Power Supply 7 24V DC Power Supply Specifications 1 Net weight 9kg 2 Dimensions 430x320x200mm 3 Platter weight 2 6kg 4 Pivot to spindle distance 222mm 5 Overhang 17 3mm 6 Tonearm effective length 239 3mm 7 AT 95...

Reviews: