background image

11 

2. Choose program and 
confirm 

           3. Adjustment 

4. Set 

Control Functions   

Do not use 

Do not adjust 

Do not use


Do not adjust 

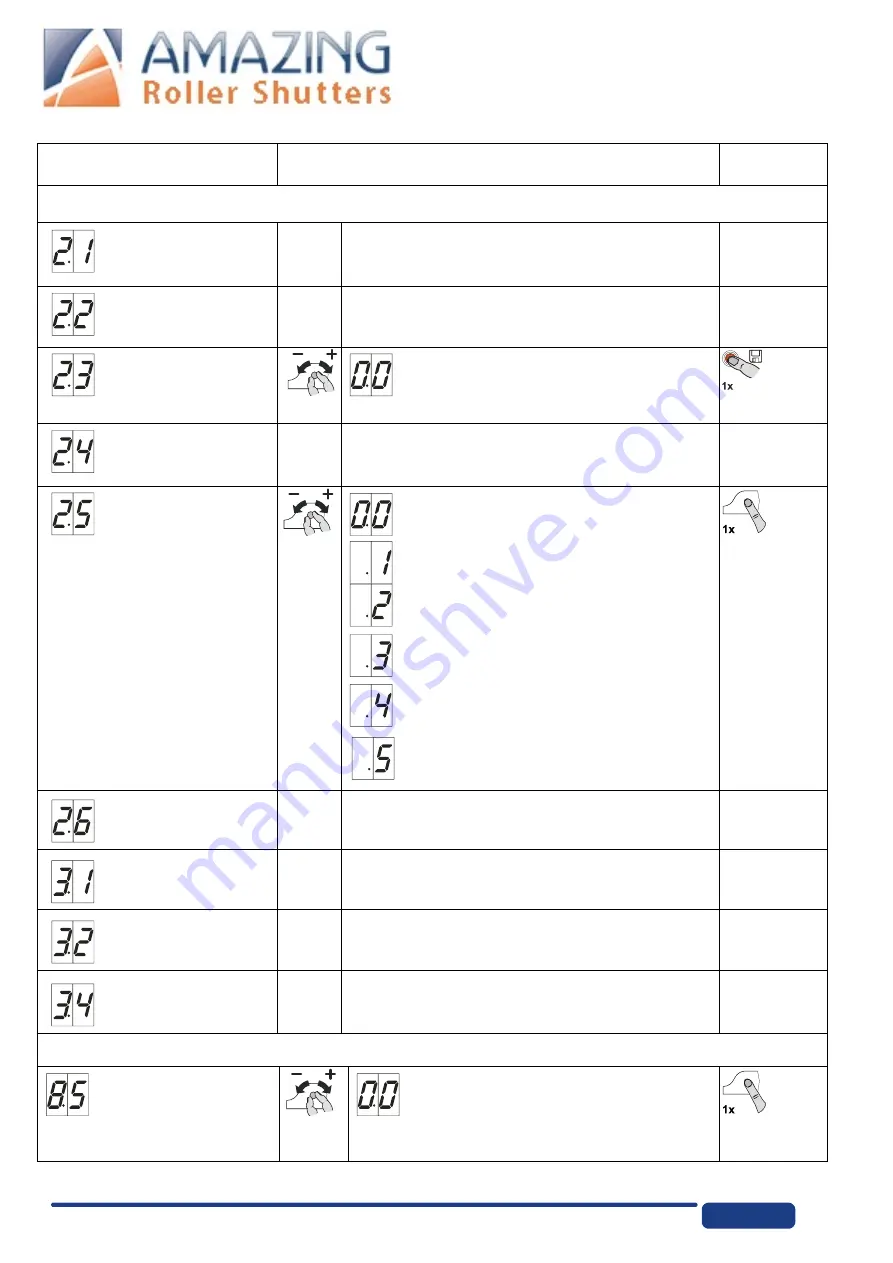
Automatic closing 
feature


Time can be set between 1-240 sec. 

Ex. 1-6.2 = 162 sec.  

Press 

stop 

button


Do not use


Do not adjust 

Relay Output  
“9.1, 9.2, 9.3“ 

*See program 1.6 and 1.7 to 
move switch contact position* 

Off/Not used 

Switch contact impulse signal 

Switch contact continuous 

Pre-Flash Open & Close 3 seconds with 
flash on movement 

Pre-Flash Close three seconds with flash 
on movement 

Constant pressure open & close three 
seconds constant movement 

Press 

selector 

Do not use


Do not adjust


Do not use 

Do not adjust 

Do not use 

Do not adjust 

Do not use 

Do not adjust 

Maintenance cycle counter 


Counter adjustment 

01-99 correspond from 1,000 up to 
99,000 count down cycles 

Press 

selector 

Summary of Contents for SE14.21 CP 970

Page 1: ...Wolf eEN n en e Installation Instructions SE 14 21 25 40 ER CP970 115VAC 1PH Date 21 10 2013 Version 1 1 SE115V 1PH...

Page 2: ...f themanufacturer Original replacement parts and accessories authorized by the manufacturer guarantee safety Liability ceases to apply if other parts are used The operational safety of the unit is onl...

Page 3: ...AND MOTOR CONNECTION 6 ELECTRICAL CONNECTIONS 7 SETTING THE LIMITS 8 WIRING THE ACCESSORIES 9 PROGRAMMING THE UNIT 10 OPERATING STATUS DISPLAY 13 MANUAL OPERATION 14 HARDWARE OVERVIEW 15 WIRING DIAGR...

Page 4: ...nt 2 6 AMPS Operating frequency 60 Hz Maximum movement per hour 16 Class of protection IP 65 Fuses 1 x 2AMP Secondary 1 x 1AMP Accessories Temperature range 5 40 C Operator Dimensions Control Panel en...

Page 5: ...ing the Operator The descriptions below apply to general door specifications The specifications of the door manufacturer must also be observed during installation Warning During installation be sure t...

Page 6: ...lace 4 Remove motor cover 5 Verify wiring of motor cables Note After verifying proper connections re instal limit and motor cover Electrical i nstallati on Danger Switch the power OFF and check that t...

Page 7: ...edicated 15AMP outlet within 3 of control panel Motor cable connection to operator control panel overview Fit cable through the provided strain relief Wire motor cables into CP 970 panel Limit cable c...

Page 8: ...t Push Hold the STOP button for 3 seconds until the display changes C Program the CLOSE limit Push Hold the CLOSE button to close the door to the desired close final limit position Memorise the CLOSE...

Page 9: ...o install a normally closed contact photocell to the CP 970 If not used Jumper 6 1 6 2 B Safety Edge It is recommended to install a normally closed contact Safety Edge to the CP 970 If used with photo...

Page 10: ...ry close without installing a Safety Photocells and or Safety Edge Dead man OPEN Dead man CLOSE Momentary OPEN Dead man CLOSE Momentary OPEN Momentary CLOSE Do Not Use Press Selector Door Position Fin...

Page 11: ...switch contact position Off Not used Switch contact impulse signal Switch contact continuous Pre Flash Open Close 3 seconds with flash on movement Pre Flash Close three seconds with flash on movement...

Page 12: ...ck Info cycle counter 7 digit selector M HT ZT T H Z E The cycles would be displayed as follow M 1 000 000 H 100 HT 100 000 Z 10 ZT 10 000 E 1 Info last 2 faults selector Last 2 faults would be altern...

Page 13: ...onnecting cable are not broken Consult factory Limits not adjusted Adjust limits Safety open limit operated Turn mains supply OFF and move the door downwards with the manual operator until the limit i...

Page 14: ...opped at lower limit Note If any other fault codes appear please consult factor 9 MANUAL OPERATION ER release The manual operation is provided as a means of opening or closing the door when power is u...

Page 15: ...5 1 5 2 4 Photocell or Safety edge N C If not used Jumper 6 1 6 2 5 Radio control N O 7 1 7 2 6 Jumper Do not remove 3 1 3 2 7 Selector switch 8 7 Segment display 9 Relay output for warning light or a...

Page 16: ...16 12 ACCESSORIES WIRING DIAGRAM...

Page 17: ...25mm SOCKET HEAD CAO SCREW X2 29 EMERGENCY RELEASE 30 ROPE EXTENSION 31 MOUNTING BRACKET 32 STRAIN RELIEF PART DESCRIPTION 1 ENCLOSURE 2 CP970 CONTROLLER 3 CONTACTOR 24VAC 4 FUSE HOLDER 5 FUSE 2 AMP...

Page 18: ...18...

Reviews: