10
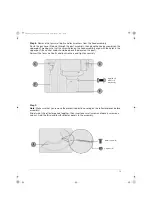
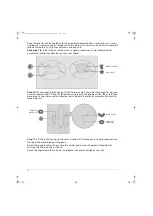
Step 8:
Remove the four small bolts and lock washers from the head assembly.
Route the gas hose (E) down through the post assembly, then place the head assembly on the
upper post, making sure that the screw holes on the head assembly align with the holes in the
upper post (the control knob should be above the decal on the post).
Reinsert the four small bolts and lock washers and tighten securely.
Step 9:
Note
:
Make sure that you remove the protective plastic covering on the reflector pieces before
assembly!
Slide two of the reflector panels together, then insert one small screw and loosely screw on a
cap nut. Add the third and fourth reflector panels to the assembly.
Small bolt
with lock
washer (4)
Small screw (9)
Cap nut (9)
Patio Heater_15-0285_V6_ENG.book Page 10 Friday, March 6, 2015 7:55 AM
Summary of Contents for B00LILH3V4
Page 2: ...2 English 5 Patio Heater_15 0285_V6_ENG book Page 2 Friday March 6 2015 7 55 AM...
Page 3: ...3 Safety and compliance Patio Heater_15 0285_V6_ENG book Page 3 Friday March 6 2015 7 55 AM...
Page 4: ...4 Patio Heater_15 0285_V6_ENG book Page 4 Friday March 6 2015 7 55 AM...
Page 18: ...18 Patio Heater_15 0285_V6_ENG book Page 18 Friday March 6 2015 7 55 AM...
Page 19: ...19 Patio Heater_15 0285_V6_ENG book Page 19 Friday March 6 2015 7 55 AM...
Page 20: ...V6 15 0285 Made in China Patio Heater_15 0285_V6_ENG book Page 33 Friday March 6 2015 7 55 AM...


