background image


Version 1.0  


©Copyright 2018, Ambient LLC. All Rights Reserved. 


Page 8 

Note: 

  Press the 

ALARM

 button to turn off the alarm.    If no button is pressed during the alarm 

period, the alarm will  turn off  automatically  in two  minutes. To temporarily  silence the alarm, press 
the 

SNOOZE/LIGHT

 button on the top of the clock. The alarm bell icon will keep flashing. 

 
Once the snooze function is turned on, the 4-step crescendo alarm will sound every five minutes. Press 
the 

ALARM

 button to silence the alarm. 

5.2.2


  Setting the Pre-Alarm 

The  purpose  of  the  pre-alarm  is  to  allow  extra  time  for  preparation  when  the  temperature  is  below 
26 °F (-3 °C).    To set the pre-alarm: 
 

1.


Press the TIME button to display the ALARM1 or ALARM2 time. 

2.


Press the ALARM button once to turn on the ALARM 

.     

3.


Press the ALARM button again to turn on the pre-alarm. The icon 

LO

 will appear next to the 

alarm time. 

4.


Press the ALARM button again to turn off both the alarm and pre-alarm. 

5.3


Projector and Backlight 

5.3.1


Using the Projector and Backlight 

Note: 

  The  projector  and  backlight  are  temporary  when  operating  on  batteries  only,  to  save 

battery life. 
 
1.  When  the  clock  is  powered  by  the  battery.  Press  the 

SNOOZE/LIGHT

  button  to  turn  on  the 

projector and backlight for 5 seconds. 
 
2.


When the clock is powered by the AC adapter, the projector is always on. 
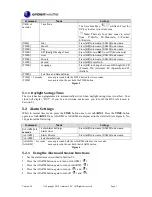
5.3.2


Projector Backlight Rotation 

1.


Press 

SNOOZE/LIGHT

 button to turn on the projector and backlight if currently off. 

2.


Press the 

REVERSE

 button 

  to reverse the projected data 180 degrees. 


Figure 7 

5.3.3


Adjusting Backlight Focus 

Adjust the focus of the projected data by rotating the focus knob on the projector. 

5.4


  Console Low Battery Indictor 

When the battery  is full, no battery icon will  be displayed.  When the battery is low, the low  battery 

indicator 

  will  be  displayed.    Replace  with  3  new  AA  size  batteries.  Pay  attention  to  the 

polarity. 

Summary of Contents for RC-8365

Page 1: ...Snooze Functions 7 5 2 2 Setting the Pre Alarm 8 5 3 Projector and Backlight 8 5 3 1 Using the Projector and Backlight 8 5 3 2 Projector Backlight Rotation 8 5 3 3 Adjusting Backlight Focus 8 5 4 Console Low Battery Indictor 8 5 5 Wireless Sensor Display 9 5 6 Wireless Sensor Low Battery Indictor 9 5 7 Viewing the Wireless Sensor Channels 9 5 8 Resyncing the Wireless Sensor 9 5 9 Adding Multiple W...

Page 2: ...ption No Description 1 NIGHT LIGHT SENSOR The night light will turn on automatically when dark and the feature is activated 10 MAX MIN Button Press to display the min and max values since reset 2 SNOOZE LIGHT Button Turn on the projector and backlight for 5 seconds Stop the current alarm when sounding and enter into snooze mode 11 PROJECTOR Projects the time and indoor outdoor temperature automati...

Page 3: ...and pre alarm function Press to stop the current alarm when the alarm is ringing and turn off the alarm and snooze function In alarm time mode press and hold for 2 seconds to enter alarm time setting mode In alarm time setting mode press to step through the different time and date settings 16 BACKLIGHT AUTO OFF ON slide switch Slide to AUTO to activate auto night light function Slide to OFF to tur...

Page 4: ...Up Note The power up sequence must be performed in the order shown in this section remote transmitter FIRST Display Clock SECOND to avoid the Clock synchronization time out The Transmitter 1 Remove the battery door on the back of the transmitter and insert 2 new AA batteries according to the polarity information marked on the battery compartment and replace the battery door as shown in Figure 2 Pl...

Page 5: ...ime The farther you are from Colorado the weaker the signal Urban environments can also affect the signal strength 3 1 1 2 RCC Operation Eight seconds after power up the clock begin radio controlled clock RCC reception and the RCC search icon will turn on The RCC will continue to search for six minutes It will try again every two hours RCC Icon Description RCC Icon Description No signal Acceptable...

Page 6: ... Description No Description 1 Time 7 Outdoor Temperature 2 Date or Alarm1 Time or Alarm2 Time 8 Outdoor Temperature Rising or Falling 3 Indoor Temperature 9 Radio Controlled Clock RCC Reception 4 Indoor Temperature Rising or Falling 10 Alarm 1 or Alarm 2 5 Channel Number default 1 and Reception Icon on when searching flashes when updates 11 Time Zone 6 Outdoor Temperature Reception 12 Day of Week ...

Page 7: ...igure 5 5 1 1 Daylight Savings Time The clock has been programmed to automatically switch when daylight saving time is in effect Your clock will display DST If you live in Arizona make sure you turn off the DST referenced in Section 5 1 5 2 Alarm Settings While in normal time mode press the TIME button once to set ALARM1 Press the TIME button again to set ALARM2 Once ALARM1 or ALARM2 are displayed...

Page 8: ... LO will appear next to the alarm time 4 Press the ALARM button again to turn off both the alarm and pre alarm 5 3Projector and Backlight 5 3 1 Using the Projector and Backlight Note The projector and backlight are temporary when operating on batteries only to save battery life 1 When the clock is powered by the battery Press the SNOOZE LIGHT button to turn on the projector and backlight for 5 sec...

Page 9: ...seconds 5 8 Resyncing the Wireless Sensor If you lose synchronization from the remote wireless sensor for an extended period of time or you replace the batteries in the wireless sensor you may need to reset the console To reset the console disconnect from AC power and remove the batteries for 10 seconds then reinsert the batteries and reconnect AC power Alternately you can press the reset button o...

Page 10: ...Line of sight wireless transmission in open air 150 feet Frequency 433 MHz Update Rate 60 seconds 6 2 Measurement Specifications The following table provides specifications for the measured parameters Measurement Range Accuracy Resolution Indoor Temperature 32 to 140 F 2 F 0 1 F Outdoor Temperature 4 to 140 F alkaline batteries 40 to 140 F LiIon e2 Energizer batteries 2 F 0 1 F 6 2 Power Consumpti...

Page 11: ...tter at night due to solar interference during the daytime The farther you are from Colorado the weaker the signal Urban environments can also affect the signal strength Locate the console at night near a window or outer wall and away from other radiating sources like wireless routers or TVs This will insure the best reception possible If running on battery power only test and replace the batterie...

Page 12: ... location Move the remote sensor to a closer location Radio Frequency RF Sensors cannot transmit through metal barriers example aluminum siding or multiple thick walls The clock does not respond to commands Press the reset button on the back of the clock with an open ended paper clip or sharp tool The projection is fuzzy Adjust the focus setting 8 Accessories Accessory Description TX 8300 Addition...

Page 13: ...e is no guarantee that interference will not occur in a particular installation If this equipment does cause harmful interference to radio or television reception which can be determined by turning the equipment off and on the user is encouraged to try to correct the interference by one or more of the following measures Reorient or relocate the receiving antenna Increase the separation between the...

Page 14: ...ty to receive a signal due to any source of interference or metal obstructions and 7 extreme acts of nature such as lightning strikes or floods This warranty covers only actual defects within the product itself and does not cover the cost of installation or removal from a fixed installation normal set up or adjustments claims based on misrepresentation by the seller or performance variations resul...

Reviews: