background image

Version 1.0


©Copyright 2013, Ambient  LLC.        All Rights Reserved.


Page 11

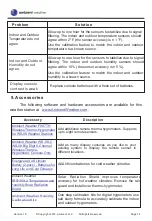
Official stations recalibrate or replace humidity sensors on a yearly basis.  Due 
to manufacturing tolerances, the humidity is accurate to ± 5%. To improve this 
accuracy, the indoor and outdoor humidity can be calibrated using an accurate 
source, such as a sling psychrometer:


or  one  step  humidpak  calibration  kits  (reference  Section  9  ).    You  can 
also use common table salt, water and a plastic bag: 


5.8.2  Temperature Calibration

Prior  to  entering  the  calibration  mode,  press  the 

C

  button  to  select 

the temperature you wish to adjust.

To  enter  the  temperature  calibration  mode,  press  and  hold  the 

SET/ADJUST 

and C  

buttons at the same time for 5 seconds and the temperature 

value  will  begin  flashing.  Press  the 

C

  button  to  increase  the 

temperature  and  the 

CLEAR/-

  button  to  decrease  the  temperature  reading  in 

0.1°  increments.  To  rapidly  increase  (or  decrease)  the  temperature  reading, 
press and hold the 

C

 or 

CLEAR/-

 button.

To return the temperature to the actual or uncalibrated measurement, press the 

ADJUST

 button.

Once the displayed temperature equals the calibrated source, press and 
hold  the 

ADJUST 

button  for  three  seconds,  or  wait  15  seconds  for 

timeout, and the temperature value will stop flashing.

          Discussion

: Temperature errors can occur when a sensor is placed too 

close  to  a  heat  source  (such  as  a  building  structure,  the  ground  or  trees).

To  calibrate  temperature,  we  recommend  a  mercury  or  red  spirit  (fluid) 
thermometer.  Bi-metal  (dial)  and  other  digital  thermometers  are  not  a  good 
source and have their own margin of error. Using a local weather station in your 
area  is  also  a  poor  source  due  to  changes  in  location,  timing  (airport  weather 
stations are only updated once per hour) and possible calibration errors (many 
official weather stations are not properly installed and calibrated). 

Place  the  sensor  in  a  shaded,  controlled  environment  next  to  the  fluid 
thermometer,  and  allow  the  sensor  to  stabilize  for  48  hours.  Compare  this 
temperature to the fluid thermometer and adjust the console to match the fluid 
thermometer.

http://www.ambientweather.com/mafaredspslp.html 

http://ambientweather.wikispaces.com/ws08 

Summary of Contents for WS-08

Page 1: ... 8 5 5 9 5 6 9 5 7 9 5 8 10 5 8 1 Humidity Calibration 10 5 8 2 Temperature Calibration 11 6 Glossary of Terms 12 7 Specifications 12 7 1 Wireless Specifications 12 7 2 Measurement Specifications 12 7 3 Power Consumption 12 8 Troubleshooting Guide 12 9 Accessories 14 10 Liability Disclaimer 15 11 FCC Statement 15 12 Warranty Information 16 Set Mode Day Month Year Alarm Display Time Alarm Reset Max...

Page 2: ...hygrometer remote transmitter 2 1 Parts List 2 2 Recommend Tools Hammer and nail for hanging remote thermo hygrometer transmitter 2 3 Thermo Hygrometer Sensor Set Up Note Do not use rechargeable batteries We recommend fresh alkaline batteries for outdoor temperature ranges between 4 F and 140 F and fresh lithium batteries for outdoor temperature ranges between 40 F and 140 F 1 Remove the battery d...

Page 3: ...annel 1 change Dip Switches 1 2 and 3 as referenced in Table 1 4 Temperature Units of Measure To change the transmitter display units of measure F vs C change Dip Switch 4 as referenced in Table 1 Table 1 displays all four switches in the OFF position factory default setting Version 1 0 Copyright 2013 Ambient LLC All Rights Reserved Page 3 DIP SWITCH FUNCTION Channel 1 Channel 2 Channel 3 Channel ...

Page 4: ...asket around the battery compartment is properly seated in its trace prior to closing the door Tighten the set screw 2 4 Display Console Set Up 1 Move the remote thermo hygrometer s about 5 to 10 away from the display console if the sensor is too close it may not be received by the display console If you have more than one thermo hygrometer make sure they are all powered up and transmitting on dif...

Page 5: ...ll be constantly displayed If you have more than once remote sensor up to eight remotes are supported the display will automatically toggle between sensors until all sensors have reported in Do not touch any buttons until the remote sensor has reported in or the radio search icon is no longer on otherwise the remote sensor search mode will be terminated When the remote sensor temperature and humid...

Page 6: ... location about 5 to 10 apart The sensors should be within 2 F the accuracy is 1 F Allow about 30 minutes for both sensors to stabilize The temperature can be adjusted or calibrated later to match each other or a known source 3 Remote Sensor Installation It is recommended you mount the remote sensor on a north facing wall in a shaded area Direct sunlight and radiant heat sources will result in ina...

Page 7: ...rate of 2 F per 30 minutes or greater or humidity is increasing at a rate of 5 per 30 minutes or greater If the arrow points downward the temperature is decreasing at a rate of 2 F per 30 minutes or less or humidity is decreasing at a rate of 5 per 30 minutes or less 5 Console Operation Note The console has three buttons for easy operation CLEAR button SET ADJUST button and CHANNEL button 5 1 Set ...

Page 8: ... the SET key to advance to the next setting 8 Alarm Hour Press the or key to increase or decrease the alarm hour Press the SET key to advance to the next setting 9 Alarm Minute Press the or key to increase or decrease the alarm minute Press the SET key to advance to the next setting 10 Temperature Units of Measure Press the key to switch between F and C units of measure Press the SET key to advanc...

Page 9: ...nutes Once the signal is reacquired the remote search icon will turn off and the current values will be displayed 5 7 Best Practices for Wireless Communication Wireless communication is susceptible to interference distance walls and metal barriers We recommend the following best practices for trouble free wireless communication 1 Electro Magnetic Interference EMI Keep the console several feet away...

Page 10: ...tion is to measure conditions of your surroundings which vary significantly from location to location 5 8 1 Humidity Calibration Prior to entering the calibration mode press the CHANNEL button to select the humidity sensor you wish to adjust To enter the humidity calibration mode press and hold the SET ADJUST and CLEAR buttons at the same time for 5 seconds and the humidity value will begin flashi...

Page 11: ...ton To return the temperature to the actual or uncalibrated measurement press the ADJUST button Once the displayed temperature equals the calibrated source press and hold the ADJUST button for three seconds or wait 15 seconds for timeout and the temperature value will stop flashing Discussion Temperature errors can occur when a sensor is placed too close to a heat source such as a building structu...

Page 12: ...or use lithium batteries in cold weather climates less than 4 F 8 Troubleshooting Guide If your question is not answered here you can contact us as follows 6 Glossary of Terms Version 1 0 Copyright 2013 Ambient LLC All Rights Reserved Page 12 Term Definition Accuracy is defined as the ability of a measurement to match the actual value of the quantity being measured Range is defined as the amount o...

Page 13: ...erved Page 13 There are dashes on the display console If the sensor assembly is too close less than 5 move the sensor assembly away from the display console Make sure the remote sensor LCD display is working and the transmitter light is flashing once per 60 seconds Install a fresh set of batteries in the remote thermo hygrometer For cold weather environments install lithium batteries Make sure the...

Page 14: ... software and hardware accessories are available for this weather station at www AmbientWeather com Accessory Description AAA lithium batteries for cold weather climates Energizer AAAS Lithium Battery 2 pack Batteries for Long Life and Cold Climates Solar Radiation Shield improves temperature accuracy for hot weather climates Remove the rain guard and install over thermo hygrometer Ambient Weather...

Page 15: ...NCIDENTAL CONSEQUENTIAL PUNITIVE OR OTHER SIMILAR DAMAGES ASSOCIATED WITH THE OPERATION OR MALFUNCTION OF THIS PRODUCT 11 FCC Statement Statement according to FCC part 15 19 This device complies with part 15 of the FCC rules Operation is subject to the following two conditions 1 This device may not cause harmful interference 2 This device must accept any interference receive including interference...

Page 16: ...ranty service can only be performed by a Ambient LLC The original dated bill of sale must be presented upon request as proof of purchase to Ambient LLC Your Ambient LLC warranty covers all defects in material and workmanship with the following specified exceptions 1 damage caused by accident unreasonable use or neglect lack of reasonable and necessary maintenance 2 damage resulting from failure to...

Reviews: