Version 1.0
©Copyright 2013, Ambient LLC. All Rights Reserved.
Page 3
Parts List
QTY
Item
1
Display Console
Frame Dimensions (LxHxW): 4.50 x 5.0 x 1.00 in
LCD Dimensions (LxW): 3.75 x 3.50”
LCD Segment Height: 1.25 inches
2.2 Display Console Set Up
1.
Move the remote thermometer(s) about 5 to 10’ away from the display console (if the sensor
is too close, it may not be received by the display console). If you have more than one probe
thermometer, make sure they are all powered up and transmitting on different channels.
2.
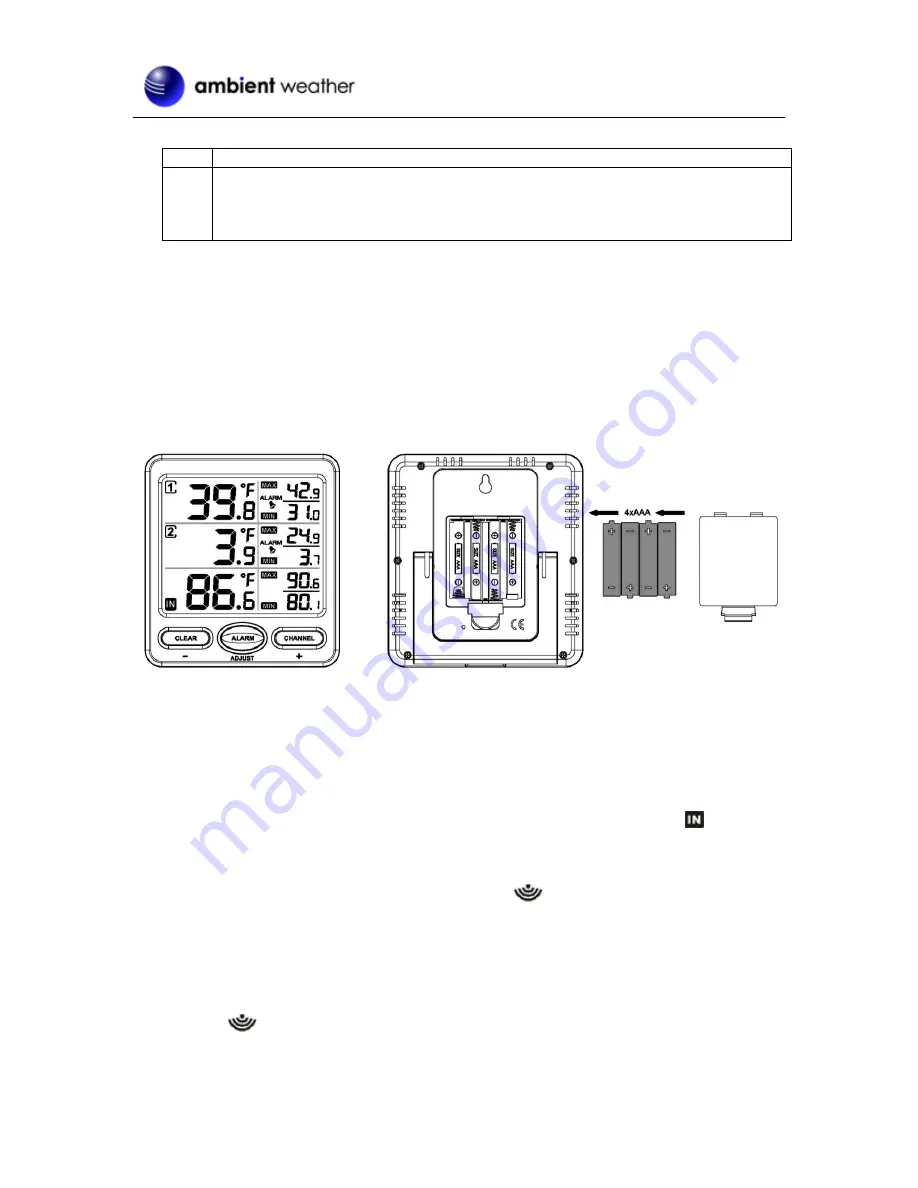
Remove the battery door on the back of the display, as shown in Figure 1. Insert four AAA
(alkaline or lithium, avoid rechargeable) batteries in the back of the display console.
Figure 1
All of the LCD segments will light up for a few seconds to verify all segments are operating properly.
3.
Replace the battery door, and fold out the desk stand and place the console in the upright
position.
The console will instantly display indoor temperature as designated by the
icon. The
remote temperature probes will update on the display within a few minutes on the
appropriate channel.
While in the search mode, the remote search icon
will be constantly displayed for each
sensor.
If you have more than two remote sensors (additional channels 3-8 are supported), the
display will automatically toggle between sensors until all sensors have reported in.
Do not touch any buttons until all of the remote sensors has reported in, or the radio search
icon
is no longer visible, otherwise the remote sensor search mode will be terminated.
When the remote sensor temperature has been received, the console will automatically
switch to the normal mode, and all further settings can be performed.


