background image

50D0093 Rev 3  May 2005

Page 3 of 11

 Ambient Technologies

A Division Of

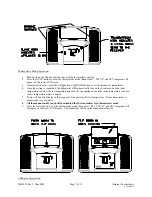
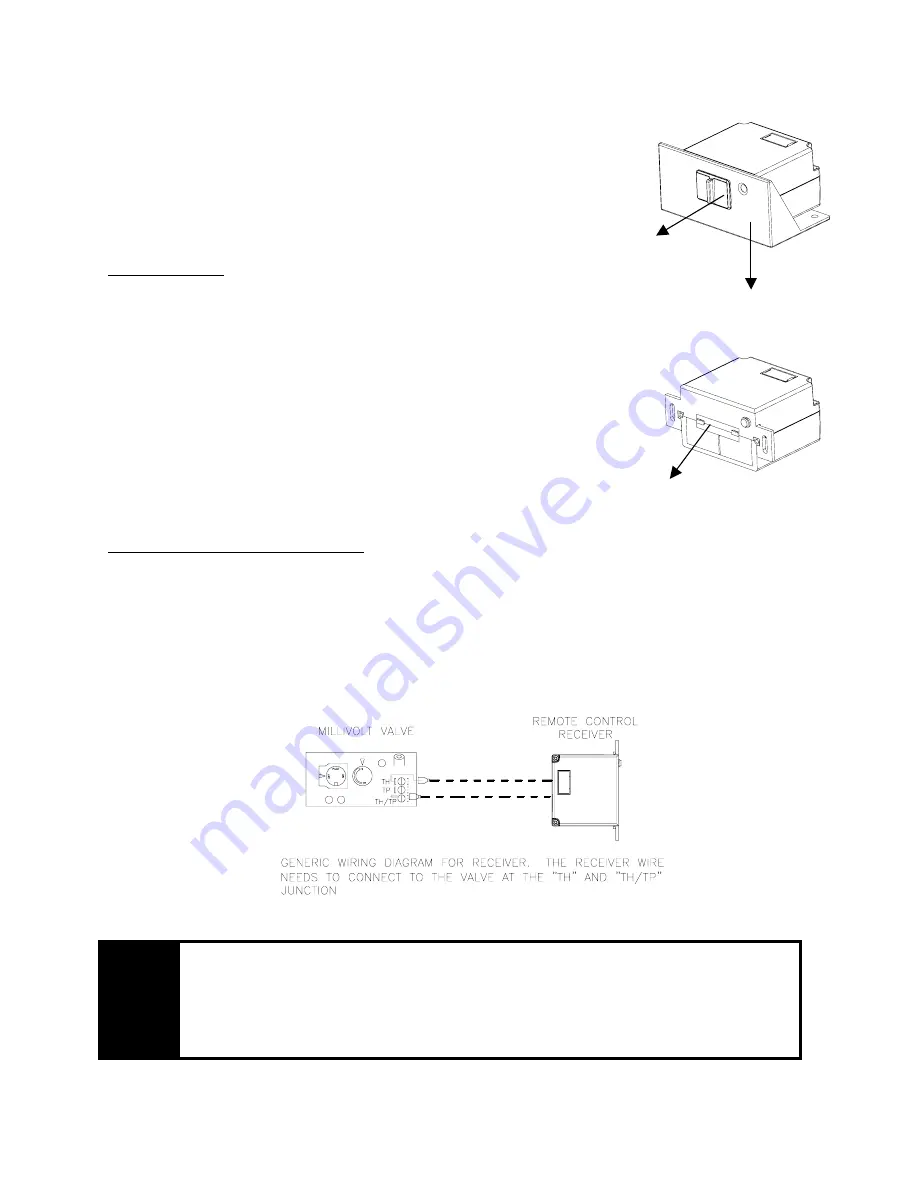
L-Bracket

Slide Switch

Battery Door

Remote Receiver:

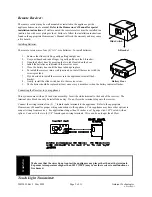
The remote receiver may be wall mounted or installed in the appliance per the
appliance homeowner’s manual. 

Refer to the Homeowner’s Manual for special

installation instructions. 

 If wall mounted, the remote receiver must be installed in a

junction box with cover plate provided.  Failure to follow the installation instructions
found in the appropriate Homeowner’s Manual will void the warranty and may cause
a fire hazard.

Installing Batteries:

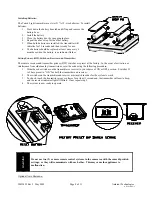
The remote receiver uses four (4) “AA”- size batteries.  To install batteries,

1.


Remove the slide switch by gently pulling straight out.

2.


Use your thumb and index finger to gently pull down the L-bracket.

3.


Open the battery door by pressing the two tabs located on the door.

4.


Install the batteries as indicated in the receiver cover.

5.


Close the battery door until the door tab snaps in place.

6.


To install the receiver into a wall junction box, install the receiver with the
screws provided .

7.


If you decided to install the receiver into the appliance, reinstall the L-
bracket.

8.


Gently, install the slide switch back to the receiver stem.

9.


The batteries should be replaced at least once every 6 months or when the battery indicator flashes.

Connecting the Receiver to your appliance:

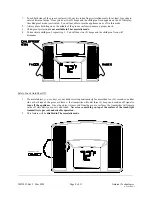
This system comes with an 18 inch wire assembly.  Insert the white terminal to the back of the receiver.  The
terminal wire block can only be installed one way.  Do not force the terminal plug onto the receiver.

Connect the wiring terminal two (2) _” female spade terminals to the appliance.  Refer to the appropriate
Homeowner’s Manual for proper wiring connections to the appliance.  Your appliance may have other options to
connect wiring from receiver.   For applications longer than 18 inches, use 18 gauge wire, 105ºC rated, with no
splices.  Connect to the two (2) 1/4“ female spade wiring terminals.  Wire can be no longer than 20 feet.

WARNING

Make sure that the wires do not contact the appliances any place other than at the terminals.
Exposure to temperatures higher than 105C (250ºF) may cause the receiver to malfunction or
fire hazard.

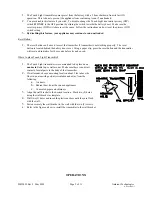
Touch Light Transmitter:

Summary of Contents for TOUCH LIGHT

Page 1: ...ood condition Please keep this booklet for future reference CONTENTS OF KIT Description Qty Touch Light Transmitter 1 Battery Alkaline AA for Transmitter and receiver 6 Receiver Assembly consists of 1 Receiver Box Slide Button Black On RS Off L Bracket Floor Mount Wall Cover Plate Black 1 Wall Cover Plate White 1 Slide Button White On RS Off 1 Screws for Wall Cover Plate 2 Plug In Wiring Assembly ...

Page 2: ... described in this manual Any other use is not recommended and will void the warranty NOTE Due to the sensitive temperature monitoring components in the transmitter it is necessary to allow the transmitter to stabilize to room temperature before accurate room temperatures are displayed If the transmitter is activated from a severe cold condition allow 15 minutes for accurate temperature readings t...

Page 3: ...nction box install the receiver with the screws provided 7 If you decided to install the receiver into the appliance reinstall the L bracket 8 Gently install the slide switch back to the receiver stem 9 The batteries should be replaced at least once every 6 months or when the battery indicator flashes Connecting the Receiver to your appliance This system comes with an 18 inch wire assembly Insert ...

Page 4: ...ansmitter privacy DIP switches are preset at the factory In the event of activation or interference from other nearby transmissions reset the code using the following procedure 1 Slide the code switches on the transmitter or receiver to your choice of ON or OFF position Switches 1 to 4 are preset to ON for both the transmitter and receiver 2 The switches on the transmitter and receiver must match ...

Page 5: ...et button is located behind the battery door cover Using a paper clip press the reset button and the transmitter will reset and initialize for 10 seconds before it can be used Where to place Touch Light Transmitter 1 The Touch Light transmitter is recommended to be placed on a non metal table top or wall mount Make sure there is no direct contact of metal parts to the body of the transmitter 2 If ...

Page 6: ...ll hear a beep during this time 3 After reset only the room temperature will be displayed on the LCD display Manual Mode On or Off Operation 1 Since Touch Light transmitter is touch sensitive equipment we recommend to use only your index finger to touch Do not use any metal object to contact or touch the surface The transmitter will recognize a valid touch if either side of the surface area are co...

Page 7: ...transmitter will automatically turn on the fireplace when the room temperature is below the set temperature and turn off the appliance when the room temperature is above the set temperature within 1 degree 5 There will be a slight delay in the response of the unit on off to a temperature Room temperature is monitored every 3 minutes 6 All the manual on off touch will be disabled the the transmitte...

Page 8: ...is not available in Thermostatic mode 4 To deactivate child proof repeat step 1 You will hear two 2 beeps and the child proof icon will disappear Safety Touch Auto Shut Off 1 If a metal object i e car key or your hand is resting continuously for more than ten 10 seconds on either side or both side of the groove surfaces the transmitter will emit three 3 beeps and send an off signal to turn off the...

Page 9: ...renheit 3 If transmitter measures a room temperature less than 40 degrees Fahrenheit the LCD will display LO and no signals will be sent to turn on the appliance Receiver Slide Switch 1 ON position the system will remain on until the slide switch is placed in the OFF or RS position 2 RS position the system will only operate if the remote receiver receives a signal from the transmitter 3 OFF positi...

Page 10: ...tance between the transmitter and receiver is more than 20 feet 1 Make sure the operating distance is less than 20 feet 5 Receiver cannot receive signal 1 Receiver is installed in an enclosure 1 Make sure the receiver is not located inside an enclosure WARNING Changes or modifications to this unit not expressly approved by the party responsible for compliance could void the user s authority to ope...

Page 11: ...and our liability does not apply to batteries nor does it include damage to merchandise or the remote control resulting from accident alteration neglect misuse improper installation or any other failure to follow Ambient Technologies installation and operating instructions Ambient Technologies agrees to repair or replace at its option any Ambient Technologies remote control under warranty provided...

Reviews: