


DIP - SWITCH
5 POLI
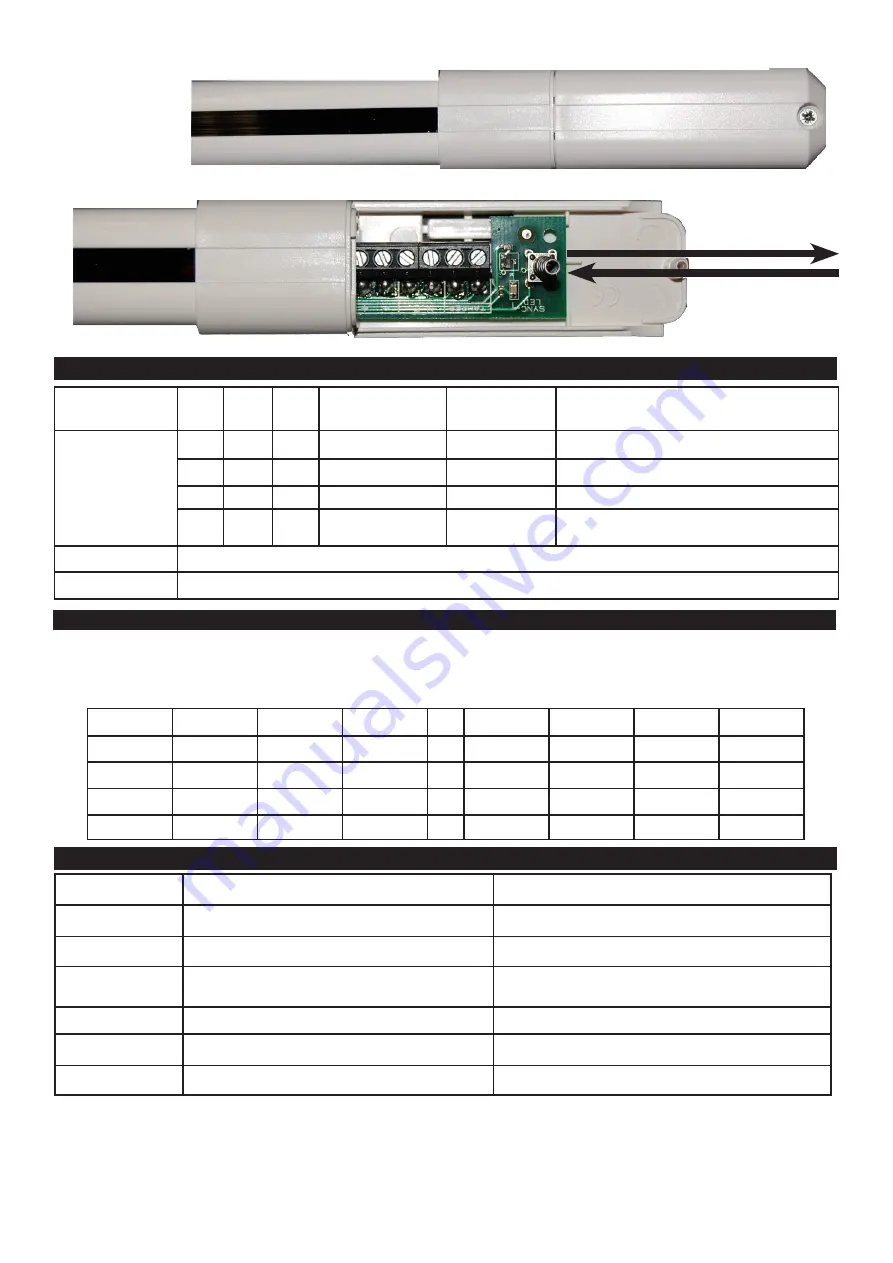
(FIG2):
DIP
1
DIP
2
DIP
3
INTERNO
ESTERNO
ESTERNO CON SOLE FRONTALE
DIP
off
off
off
0.5
⇨ 6 m
0.5
⇨ 2 m
0.5
⇨ 2 m
off
off
on
6
⇨ 8 m
2
⇨ 4 m
2
⇨ 3 m
off
on
on
8
⇨ 12 m
4
⇨ 6 m
3
⇨ 6 m
on
off
off
12
⇨ 15 m
6
⇨ 12 m
6
⇨ 10 m
DIP 4
⇒ on
antistrappo disabilitato
⇒ off
antistrappo abilitato
DIP 5
⇒ on
antiapertura e antistrappo disabilitati
⇒ off
antiapertura e antistrappo abilitati
DIP - SWITCH:
OFF
ON
1
segnalazione acustica (buzzer) disabilitata
segnalazione acustica (buzzer) abilitata
2
antistrisciamento lato morsetti disabilitato
antistrisciamento lato morsetti abilitato *
3
antistrisciamento lato opposto morsetti
disabilitato
antistrisciamento lato opposto morsetti abilitato *
4
sensibilità normale
sensibilità alta**
5
antiapertura e antistrappo abilitati
antiapertura e antistrappo disabilitati
6
antistrappo abilitato
antistrappo disabilitato
✸
questa funzione è utilizzata per permettere ad animali di piccola taglia (es. gatti ) di passare attraverso una finestra
protetta da una barriera armata.
✸✸
questo parametro diminuisce il tempo di reazione delle barriere al mascheramento dei fasci infrarossi e dell’antistri-
sciamento, pertanto è necessario utilizzarlo con cautela, e in ambienti non esposti direttamente ai raggi solari.
✸✸✸ I tappi sono realizzati in modo tale da non aderire completamente alle barriere per permettere la traspirazione
all’interno e quindi impedire il formarsi di condensa causata dalle variazioni termiche.
5. CONFIGURAZIONE DIP SWITCH TRASMETTITORE - PORTATA E TAMPER
7. CONFIGURAZIONE DIP - SWITCH RICEVITORE:
6.
CONFIGURAZIONE DIP SWITCH TRASMETTITORE - SETTAGGIO N° OTTICHE
DIP 1
DIP 2
DIP 3
N° OTTICHE
DIP 1
DIP 2
DIP 3
N° OTTICHE
Off
Off
Off
2
On
Off
Off
6
Off
Off
On
3
On
Off
On
7
Off
On
Off
4
On
On
Off
8
Off
On
On
5
On
On
On
8
DIP - SWITCH
3 POLI (FIG.2):
Attenzione
: dopo aver effettuato la configurazione dei DIP è necessario
togliere e ridare alimentazione alle barriere.


