15
1. Using a 9/16” wrench, remove 10 bolts that are in the top plate. Clean both the chain case
and top plate removing old gasket.
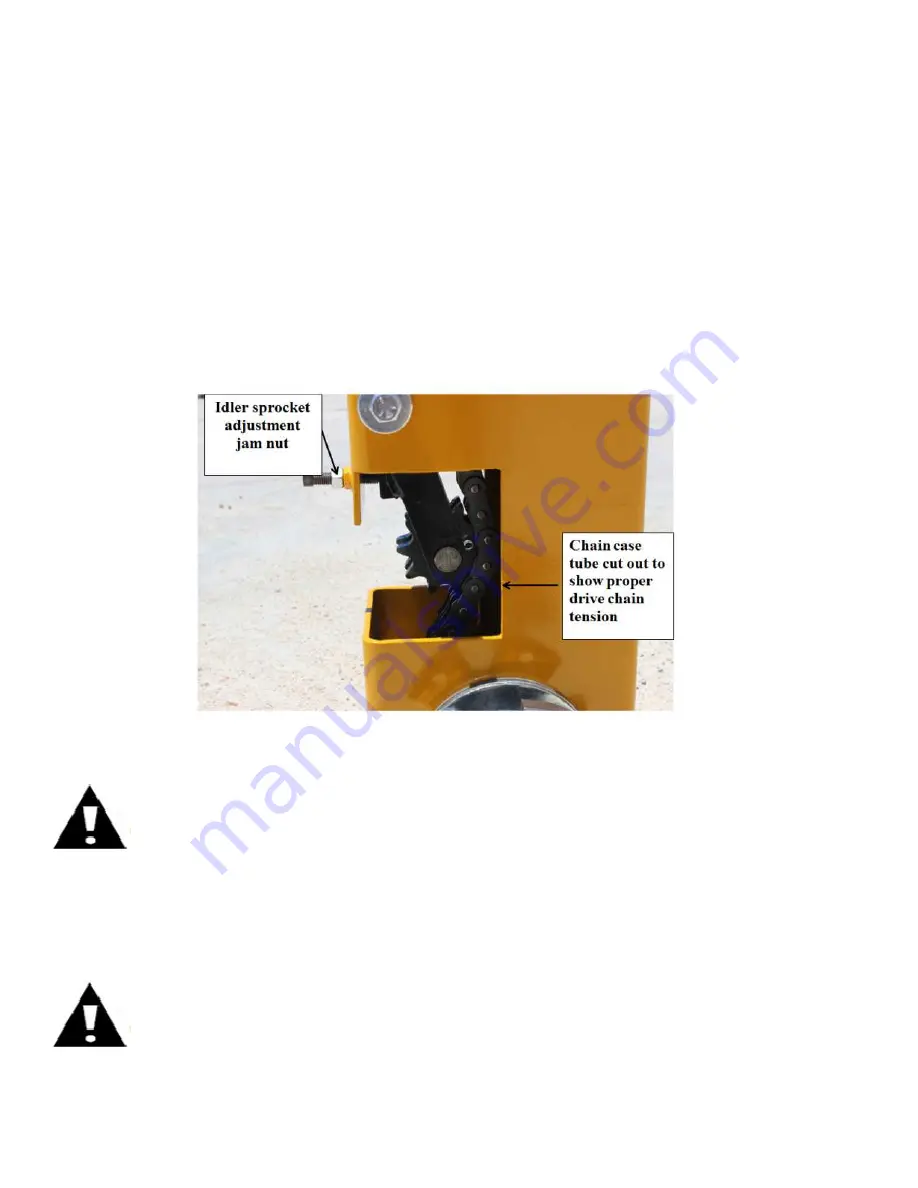
2. Inspect drive chain, sprockets, and idler bracket for wear. If worn, replace with new parts.
3. To tighten the drive chain, first loosen the idler sprocket jam nut located on the right hand
side of the vertical ditcher and on the bottom side of the offset ditcher. This requires a ¾”
wrench. Back the jam nut off to allow set screw adjustment.
4. Using a small ½” wrench, turn the set screw clockwise to tighten the idler sprocket against
the drive chain.
5. There will be very little slack in the drive chain. Rotate the cutter head to make sure chain
is tight.
*NOTE*
over tightening of the drive chain can cause major damage to the ditcher
drive mechanism.
6. Once the drive chain is set to the correct tension, turn the set screw 1/4 turn counter
clockwise.
7. Holding the set screw with a 1/2" wrench, tighten the jam nut using a 3/4’’ wrench.
8. Apply a new top plate gasket.
9. Reinstall the 10 bolts and tighten with a 9/16” wrench.
LEVELING THE DITCHER
WARNING
Before making any adjustments, lubricating or repairing:
First, disengage the tractor’s PTO and wait for the cutter head and cutting blades to come to a
complete stop. Then slowly lower the ditcher until skid shoe is touching the ground. Before
dismounting from the tractor shut off the engine set the parking brake and remove the key.
CAUTION
Never tilt the ditcher backwards. Operating the ditcher tilted back will result in excessive wear on
the back side of the cutter head. Plus, it will increase horsepower requirements.


