21
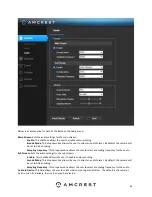
Below is an explanation for each of the fields on the Video tab in the Video menu item:
Encode Mode
: This dropdown box allows the user to select a compression protocol.
Smart Codec:
This option allows the user to enable or disable the smart codec.
Smart codec is a function in most
Amcrest cameras which aim to reduce bandwidth consumption without losing visible image quality by intelligently
increasing compression where it will not make a visible difference in the scene.
Resolution
: This dropdown box allows the user to set the resolution. The system supports various resolutions and
they can be selected from this dropdown list.
Frame Rate (FPS)
: This dropdown box allows the user to select a frame rate. Frame rate settings are measured in
frames per second (FPS) and can range from 1f/s to 25f/s in PAL mode and 1f/s to 30f/s in NTSC mode.
Bit Rate Type
: This dropdown box allows the user to select a bit rate type. The system supports two-bit rate types:
CBR and VBR. In VBR mode, video quality can be set.
Reference Bit Rate
: This is the recommended bit rate value according to the resolution and frame rate selected.
Bit Rate
: This dropdown box allows the user to select a bit rate.
Frame Interval
: This field allows the user to set the P frame amount between two I frames. The value ranges from
1 to 150 seconds. Default value is 50. Recommended value is frame rate *2.
Watermark Settings
: This function allows the user to verify if the video has been tampered with.
Watermark Character
: This field allows th
e user to set the watermark’s text. The default string is Digital CCTV. The
maximum length is 85 characters. This string can only include numbers, characters, and underscores.
Sub Stream
is a lower quality stream that allows the feed to take up less resources and bandwidth when
streaming. The Mainstream and the Sub Stream have the same fields. Sub Stream can be enabled by checking the
box next to Enable.
To reset to default settings, click the
Reset Defaults
button. To refresh the screen, click on Refresh. To save the
settings, click the
Save
button.
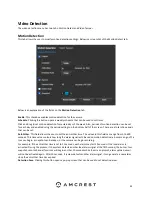
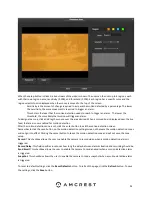
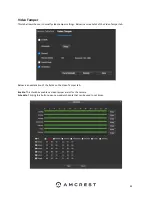
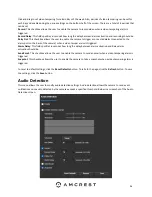
Snapshot
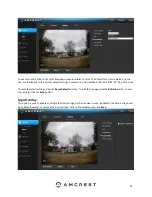
Below is a screenshot that shows the Snapshot tab in the Video menu item:
Below is an explanation for each of the fields on the Snapshot tab in the Video menu item:
Snapshot Type
: This dropdown box allows the user to select a snapshot mode. There are two snapshot modes:
General:
Snapshots are taken as scheduled.
Event:
Snapshots occur when a motion detection alarm or tampering alarm is triggered
Image Size
: This dropdown box shows the image size. By default, the screenshot size is the same size as the video
feed’s resolution.
Quality
: This dropdown box allows the user to select image quality. Quality is adjusted on a scale of
1-6 (Best).
Interval
: This is to set snapshot frequency. The value ranges from 1 to 7 seconds. The maximum setting for a
customized interval is 3600s/picture.
To reset to default settings, click the
Reset Defaults
button. To refresh the screen, click on Refresh. To save the
settings, click the
Save
button.
Overlay
Below is a screenshot that shows the
Overlay
tab:


