background image


13. 

Disconnect the high pressure hose from the argon cylinder valve.  Securely install the service kit 
Argon/Nitrogen Cylinder Pressure Check Gauge Assembly to the nitrogen cylinder valve outlet 
and verify the indicated cylinder gauge pressure.  Argon  pressure should conform to the 
temperature correction chart provided in the Troubleshooting section of this manual.  Close the 
nitrogen cylinder valve and disconnect the Pressure Check Gauge Assembly.


WARNING: 

IF THE NITROGEN CYLINDER VALVE HAS A "T" HANDLE QUICK OPENING 

OR A HANDWHEEL QUICK OPENING TRIP RELEASE, THE SAFETY VENT PLUG 
SHIPPED WITH THE EXTINGUISHER, OR THE TEST KIT SAFETY VENT PLUG MUST BE 
INSTALLED TO PROTECT SERVICE PERSONNEL FROM A HIGH VELOCITY DISCHARGE 
IN CASE THE LEVER IS ACCIDENTALLY OPENED. 


14. 

Install a new Amerex Moisture Seal per instructions in the package.  Securely connect the 
discharge hose to the extinguisher.  

When assembling the hose to the agent cylinder or 

nozzle to the hose, tighten the coupling ¼ turn after contacting the hose gasket

.


15. 

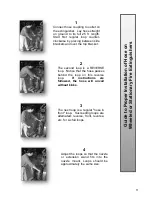
Coil the hose on to the extinguisher hose rack using the Reverse Loop Procedure (see 
instructions in this manual).  Install shut-off nozzle (and/or extension wand) with the lever in the 
Closed (forward) position into the nozzle mount. 
 

16. 

Remove the safety vent plug from the argon  cylinder.  Reconnect the high pressure hose 
securely to the nitrogen  cylinder valve.  Wipe the extinguisher clean.  Record service data on 
the inspection tag according to NFPA-10 requirements and attach to extinguisher.  Return 
extinguisher to its proper location.   


RECHARGE 


NFPA 10 –  Recharging is the replacement of the extinguishing agent and also includes the 
expellant for this type of extinguisher. 


RECHARGING PROCEDURE 


WARNING: 

BEFORE ATTEMPTING TO RECHARGE,  BE SURE THIS EXTINGUISHER IS 
COMPLETELY DEPRESSURIZED.  THERE IS A CHECK VALVE IN THE SYSTEM 
WHICH PREVENTS ARGON  PRESSURE FROM ESCAPING FROM THE AGENT 
CYLINDER WHEN THE ARGON  HOSE IS DISCONNECTED.  THE AGENT 
CYLINDER MAY BE PRESSURIZED EVEN THOUGH NO PRESSURE ESCAPES 
FROM THE CYLINDER ARGON CONNECTION. 


NOTE: 

Proper procedure for recharging any dry chemical extinguisher includes the use of a 
“closed recovery system (NFPA-10).  The Getz Model SV1 400 VACU-FILL SYSTEM is 
ideal for this application –  it provides for the recovery of the remaining agent by direct 
discharge into the system, trapping the “fines” while allowing the nitrogen to escape and 
provides a more accurate fill of the extinguisher.   


IF A “CLOSED RECOVERY SYSTEM” IS NOT AVAILABLE PROCEED AS 
FOLLOWS: 


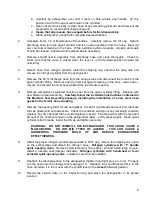
1. 

To depressurize: 

a.  Close the argon cylinder valve. 

Summary of Contents for 450

Page 1: ...ry parts available to insure proper maintenance USE OF SUBSTITUTE PARTS RELEASES AMEREX OF ITS WARRANTY OBLIGATIONS Amerex parts have machined surfaces and threads that are manufactured to exacting tolerances O rings hoses nozzles and all metal parts meet precise specifications and are subjected to multiple in house inspections and tests for acceptability There are substitute parts available that ...

Page 2: ... 13 9 mPa at 70ºF 21ºC ambient temperature See the Troubleshooting Guide for pressure temperature allowances The lockwire seal should be intact 6 Remove and save the Safety Vent Plug installed on all T handle nitrogen valves Connect the nitrogen supply hose firmly to the nitrogen cylinder valve Make sure that there are no kinks in this hose 7 Disconnect the discharge hose assembly from the agent c...

Page 3: ... back 20 feet from the fire and aim at base of fire nearest you 4 Open hose and nozzle firmly and be prepared for discharge recoil Open nozzle by pulling the handle fully toward you Slowly sweep side to side across the base of the fire and past both edges Progressively follow up until the fire is extinguished DISCHARGE TIME APPROXIMATE See extinguisher nameplate label EFFECTIVE RANGE OF THE AGENT ...

Page 4: ...t it is completely out 1 Confirm that the nozzle lever is in the CLOSED position 2 Close the argon valve move T handle to CLOSED position 3 Remove ring pin and CLOSE agent cylinder valve Valve A in Fig 1 to prevent further chemical from entering the hose 4 Remove ring pin and OPEN pressure vent valve Valve B in Fig 1 to allow argon gas to by pass the chemical and pressurize the hose 5 Open dischar...

Page 5: ...6 R a thru R d for Amerex Regulated Wheeled Models 467 468 469 470 471 472 and Regulated Stationary Models 484 485 and 486 NOTE The Getz Manufacturing Universal Wheeled Extinguisher Service Kit is available so that NFPA 10 required maintenance functions can be performed AMEREX CORPORATION DOES NOT SERVICE MAINTAIN OR RECHARGE FIRE EXTINGUISHERS THIS MANUAL IS PUBLISHED AS A GUIDE TO ASSIST QUALIFI...

Page 6: ... and nitrogen supply hose must be hydrostatically tested every 12 years Test pressure a Agent Cylinder 500 psi 3447 kPa b Hose Assembly 300 psi 2068 kPa 4 Check the hydrostatic test date on the crown of the nitrogen cylinder The nitrogen cylinder must be retested in accordance with DOT regulations 5 Check the gauge on the nitrogen cylinder If the pressure is below 1700 psig 11 7 mPa repressurize t...

Page 7: ...m Flow Pressure Victor SR 450L 225 245 psi 140 psi MECO P 600 235 255 psi 140 psi Victor SR 450E 225 245 psi 140 psi WARNING IF THE PRESSURE READING EXCEEDS THE GIVEN PARAMETERS QUICKLY CLOSE THE NITROGEN CYLINDER T HANDLE OR HANDWHEEL VALVE AND VENT THE PRESSURE BY OPENING THE FLOW CHAMBER BALL VALVE REGULATORS CANNOT BE FIELD ADJUSTED THEY MUST BE REPLACED IF FOUND TO BE OUT OF TOLERANCE R c Obs...

Page 8: ...cylinder cap threads must be clear and the cap securely installed onto the vent spacer and agent cylinder to allow pressure to slowly vent after performing the siphon tube clearing and gas tube integrity checks 12 To perform a siphon tube clearing and gas tube integrity check a Remove the service kit Agent Hose Adapter from the discharge hose assembly and install it securely onto the agent cylinde...

Page 9: ...and with the lever in the Closed forward position into the nozzle mount 16 Remove the safety vent plug from the argon cylinder Reconnect the high pressure hose securely to the nitrogen cylinder valve Wipe the extinguisher clean Record service data on the inspection tag according to NFPA 10 requirements and attach to extinguisher Return extinguisher to its proper location RECHARGE NFPA 10 Rechargin...

Page 10: ...re Seal Assembly Carefully follow the installation instructions contained in the Moisture Seal Assembly package including the installation of a new clear hose gasket in the female hose coupling 7 Remove the agent cylinder fill cap and gasket Clean fill cap threads and vent port lubricate the cap gasket and set parts aside Check the condition and type of any remaining chemical replace any dry chemi...

Page 11: ... Valve seat has leaked and has pressurized the agent cylinder Follow Recharge Procedure for restoring the extinguisher to service 3 Nitrogen pressure is too low Valve is closed Tamper seal is intact No pressure observed in the agent cylinder Leakage in the nitrogen valve at other than the valve seal Replace with a properly charged nitrogen cylinder 4 Shutoff nozzle does not move freely Disassemble...

Page 12: ...side brackets and over the top bracket 2 The second loop is a REVERSE loop Notice that the hose passes behind the loop on this reverse loop If instructions are followed the hose will uncoil without kinks 3 The next loop is a regular hose in front loop Succeeding loops are alternated reverse front reverse etc for six full loops 4 Adjust the loops so that the nozzle or extension wand fits into the n...

Page 13: ...plete 1 5C 10213 Gauge 3000 psi 1 5D 09897 Valve Stem Assembly 6 5E 00501 Spring 6 6 04128 Nitrogen Cylinder 110 cu ft Charged with Cap Valve Gauge 1 7 02234 Nitrogen Hose Assembly 1 8 11024 Retaining Strap w Hose Hanger 1 9 11021 Retaining Strap Bottom Nitrogen Cylinder 1 10 16483 Bolt Washer Wing Nut 1 11 07485 07484 Pictogram 467 470 485 Pictogram 468 469 471 472 486 487 1 12 07025 Wheel Asy 36...

Page 14: ... Handle Quick Release 1 6B 06373 Valve Lever T Handle Complete 1 6C 10213 Gauge 3000 psi 1 6D 09897 Valve Stem Assembly 6 6E 00501 Spring 6 7 03817 Nitrogen Cylinder 23 cu ft Charged with Cap Valve Gauge 1 8 04072 Saddle Clamp WUS 1 9 16483 Bolt Washer Wing Nut 1 10 07485 07484 Pictogram 450 Pictogram 451 452 1 11 07751 Wheel Asy 16 with Hub Cap Washer Retaining Pin Semi Pneu 1 12 04945 Hub Cap 16...

Reviews: