background image

PN 05615


04/2020


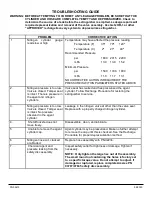
TROUBLESHOOTING GUIDE


WARNING:


BEFORE ATTEMPTING TO CORRECT ANY LEAKAGE PROBLEM, BE SURE THAT THE 

CYLINDER AND HOSE ARE COMPLETELY EMPTY AND DEPRESSURIZED. Check to 

determine the source of a leak before the extinguisher is emptied. Leakage repairs will 

require depressurization and removal of the valve assembly. Use Getz HR

-

1 or other 

"APPROVED" recharge/recovery system to depressurize extinguisher.


PROBLEM


CORRECTIVE ACTION


1.


Nitrogen 

cylinder 

gauge      

reads low or high


Temperature may have affected the pressure reading


Temperature (F)


35º


70º


120º


Temperature (C)


 2º


21º


 49º


Recommended Pressure


psi


1880


2015


2200


mPa


13.0


13.9


15.2


Minimum Pressure


psi


1590


1700


1900


mPa


11.0


11.7


13.1


NO CORRECTIVE ACTION IS REQUIRED IF THE 

PRESSURE IS WITHIN PARAMETERS STATED ABOVE.


2.


Nitrogen pressure is too low. 

Valve is closed. Tamper seal 

is intact. There is pressure in 

the agent and nitrogen 

cylinders.


Valve seat has leaked and has pressurized the agent 

cylinder. Follow Recharge Procedure for restoring the 

extinguisher to service.


3.


Nitrogen pressure is too low. 

Valve is closed. Tamper seal 

is intact. No pressure 

observed in the agent 

cylinder.


Leakage in the nitrogen valve at other than the valve seal. 

Replace with a properly charged nitrogen cylinder.


4.


Shutoff nozzle does not 

move freely.


Disassemble, clean, and lubricate.


5.


Unable to remove the agent 

cylinder cap.


Agent cylinder may be pressurized. Make no further attempt 

to remove the cap until this is checked. See the Recharge 

Procedure for proper depressurization method.


6.


Nitrogen hose cut, cracked 

or abraded.


Replace hose assembly with PN 02234.


7.


Chemical agent and 

pressure leaking from the 

safety disc assembly.


Inspect safety outlet for tightness or damage. Tighten if 

necessary.


NOTE:  Only tighten the large hex nut of the assembly. 

The small round nut containing the holes is factory set 

to a specific torque value. Do not attempt to adjust. If 

damaged or ruptured, replace complete Amerex PN 

03787/07665 safety disc assembly.


Summary of Contents for 630

Page 1: ...ATERIAL IS TO BE HOLE PUNCHED 3 EACH 1 4 HOLES DOWN LEFT SIDE FOR STD 3 RING BINDER 7 CURENT REVISION DATE 4 20 PART TITLE DATE CREATED CREATED BY REV CK D 05615 MANUAL SERVICE OWNERS 630 2 3 98 MS G THIS DRAWING IS THE EXCLUSIVE AND CONFIDENTIAL PROPERTY OF AMEREX CORPORATION IT SHALL NOT BE DUPLICATED USED OR DISCLOSED TO OTHERS REV DRAWING CHANGE BY ECN DATE E Update Manual in Publisher JH B000...

Page 2: ...TELY AFTER ANY USE OWNER S SERVICE MANUAL INSTALLATION OPERATING SERVICING INSTRUCTIONS MANUAL PN 05615 33 GALLON FOAM WHEELED EXTINGUISHER MODEL 630 AMEREX CORPORATION P O BOX 81 TRUSSVILLE ALABAMA 35173 0081 Phone 205 655 3271 Fax 800 654 5980 e mail sales amerex fire com Web Page http www amerex fire com AMEREX CORPORATION DOES NOT SERVICE MAINTAIN OR RECHARGE FIRE EXTINGUISHERS THIS MANUAL IS ...

Page 3: ...LACING IT INTO SERVICE 1 Remove all wrappings straps and pallet retaining bolts 2 Examine the extinguisher for shipping damage Check to make sure that you have received the Model 534 2 gal AFFF foam concentrate charge that is packaged with the extinguisher 3 Fill the extinguisher by carefully following the Recharge instructions Page 6 4 Remove the nitrogen cylinder protective shipping cap Save the...

Page 4: ...on and in the proper fire fighting technique Familiarize all personnel with this information before an emergency occurs 1 Move the extinguisher to within approximately 50 feet 15 meters of the fire site and remove pull pin Pull T handle to open nitrogen valve This will pressurize the extinguisher 2 Remove nozzle from the mount and with the nozzle lever in the closed position pull hose from rack 3 ...

Page 5: ...NCE SERVICE PROCEDURE WARNING BEFORE SERVICING BE SURE THE EXTINGUISHER AGENT CYLINDER IS NOT PRESSURIZED THIS PROCEDURE IS BEST ACCOMPLISHED WITH THE EXTINGUISHER IN AN UPRIGHT POSITION AND ON A LEVEL SURFACE 1 Clean extinguisher to remove dirt grease or foreign material Check to make sure that the instruction nameplate is securely fastened and legible Inspect the cylinders for corrosion abrasion...

Page 6: ...h a stiff bristle nylon brush Remove the fill cap gasket and check for wear cracks or tears replace if necessary Lightly lubricate the gasket with V 711 and reinstall 10 Check the condition of the chemical solution The level of the solution shall be 9 inches 23 cm below the top of the fill opening Recharge if contaminated if the solution level is down or if the charge is over three years old See R...

Page 7: ...the Closed forward position into the nozzle mount 16 Remove the safety vent plug from the nitrogen cylinder Reconnect the high pressure hose securely to the nitrogen cylinder valve Wipe the extinguisher clean Record service data on the inspection tag according to NFPA 10 requirements and attach to extinguisher Return extinguisher to its proper location RECHARGE CAUTION THE FIRE EXTINGUISHING AGENT...

Page 8: ...SE A MALFUNCTION OR PREMATURE RUPTURE OF THE SAFETY DISC 6 Install an Amerex PN 03817 23 cu Ft nitrogen cylinder pressurized to 2015 psi Remove the shipping cap tighten the wing nuts securely and attach the nitrogen hose Remove the remainder of the ruptured moisture seal from the agent cylinder fitting Replace with a new PN 07411 Moisture Seal Assembly Carefully follow the installation instruction...

Page 9: ...rogen cylinders Valve seat has leaked and has pressurized the agent cylinder Follow Recharge Procedure for restoring the extinguisher to service 3 Nitrogen pressure is too low Valve is closed Tamper seal is intact No pressure observed in the agent cylinder Leakage in the nitrogen valve at other than the valve seal Replace with a properly charged nitrogen cylinder 4 Shutoff nozzle does not move fre...

Page 10: ... placing between side brackets and over the top bracket 2 The second loop is a REVERSE loop Notice that the hose passes behind the loop on this reverse loop If instructions are followed the hose will uncoil without kinks 3 The next loop is a regular hose in front loop Succeeding loops are alternated reverse front reverse etc for six full loops 4 Adjust the loops so that the nozzle fits into the no...

Reviews: