99
HELIX™
Manual (P/N 26291)
Chapter 6: Recharge
Rev A (February 2018)
HELIX™
PCU Fire Suppression System
6.2.2 Purging the Agent Distribution Network:
The Agent Distribution Network must be purged following a system discharge or during routine
maintenance. Perform the following:
1.
Remove the Discharge Fitting Kit (P/N 10199
-
R) from the Agent Cylinder Valve (See Figure
4.2.1). Install Anti
-
Recoil Plate (P/N 10646) in place of Discharge Fitting Kit (See Figure 2.1a).
2.
Inspect and clean the Discharge Fitting Kit (P/N 10199
-
R). Inspect O
-
ring for cuts/nicks.
Replace the entire Discharge Fitting Kit if any damage is found.
3.
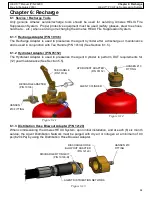
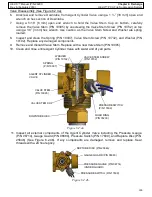
Attach the Discharge Hose Blowout Adapter (P/N 12129) to the Discharge Fitting Kit using 1/4”
or 5/16” bolts/nuts (See Figure 6.1.3). Purge the Agent Distribution Network with dry air or
nitrogen at a minimum of 90 psi (620 kPa). Continue to purge the system until all Dry Chemical
Agent or any debris is free from the network and only air or nitrogen is free flowing from each
Nozzle in the network. If any section is found to be blocked, disconnect and either unblock
obstructions or replace the section of the Agent Distribution Network.
4.
Reinstall all Protective Nozzle Blow Off Caps (P/N 10167).
6.2.3 Agent Cylinder Removal
1.
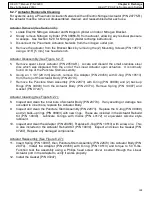
Disconnect the Pressure Switch from the Agent Cylinder Valve (See Figures 4.8.4a and
4.8.4b). Do not attempt to remove Low Pressure Switch from Agent Cylinder Valve.
2.
Ensure Shipping and Anti
-
Recoil Plates are installed on Agent Cylinder Valve. (See Figure
2.1a).
3.
Remove Agent Cylinder from its Cylinder Bracket.
4.
Cap Agent Distribution Network to prevent contamination if the recharge cannot be done
immediately.
6.2.4 Agent Cylinder Valve Removal & Cleaning
Perform the following for Agent Cylinder Valve removal, disassembly, cleaning, and reassembly
instructions.
Valve Removal:
1.
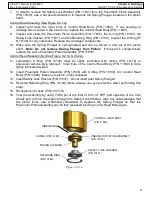
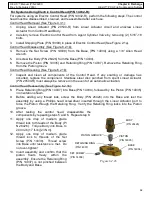
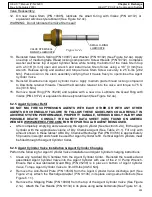
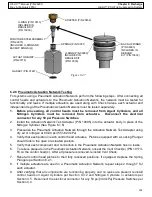
If any pressure remains, depressurize the Agent Cylinder by slowly unscrewing the Agent
Cylinder Valve using the 2 ½” Pump Wrench until the collar O
-
ring seal releases (See Figure
6.1.5).
2.
After any pressure in the Agent Cylinder is relieved, finish removing the Agent Cylinder Valve
from the Agent Cylinder.
3.
Empty the Agent Cylinder of any remaining Dry Chemical Agent.
4.
Vacuum any remaining Dry Chemical Agent from the inside bottom and sidewalls of the Agent
Cylinder.
5.
Inspect the Agent Cylinder and Agent Cylinder threads for any damage.

