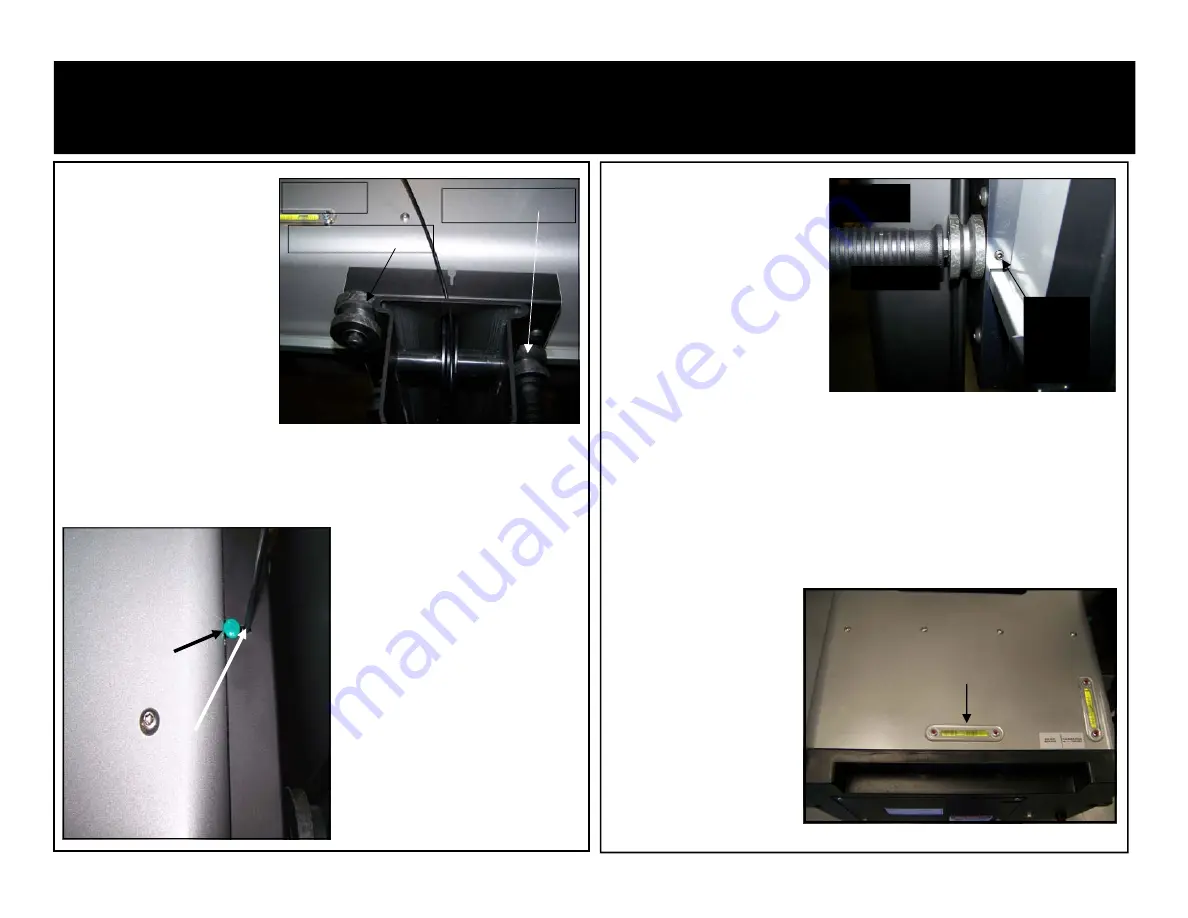
The tension on the rollers is pre-
set at the factory, however, if the
unit does not roll smoothly or
rocks and wobbles, adjustments
can be made if necessary.
If adjustment is required, simply
loosen the Tension Wheel Lock-
ing Nut, loosen or tighten the Ten-
sion Adjustment Set Screw as
needed, and tighten down the
Tension Wheel Locking Nut.
Screw Brake Handle on to the Tension Adjusting Wheel bolt. The Brake Handle
only needs to be turned lightly to lock Aimer Head in position.
LEVELING HEAD, Left To Right
Place assembled unit on a known level surface. With the Aimer Head setting in the
operating position, move the Aimer Head up or down on the Mast so it is approxi-
mately in the center.
Locate the horizontal level on
the back edge of Aim Head
as shown in Picture 9.
Reading the level,
adjust the Base sections
by loosening the bolts and
moving the Mast Left or right
until the Aimer Head is level;
then tighten bolts.
6. Place the Aimer Head over
the top of the Mast. Align the
guide rollers with the mast groove
and pull down into position as
shown. (Picture 6)
Note: It is
recommended to use two peo-
ple for this step —1 person to
hold the Mast from moving,
and the other to put the Aimer
Head on the Mast.
I
Insert the Counterweight Cable into the
Cable Support Notch. Lightly place the
Cable Plug into the Cable Support
Notch, to prevent the cable from pop-
ping out of the hole when the Aimer
Head is in the raised position.
(Picture 7)
Picture 6
Guide Roller Groove
Guide Roller Groove
Picture 7
Cable Plug
Cable
Notch
Picture 8
Brake Handle
Tension
Wheel Set
Screw
Vision
II
Pro
Optical Headlamp Aimer
Assembly Procedure
1.2.
3
Page 8 of 28
Horizontal Level
Picture 9


