background image

Quick Setup Guide 

vi

COPYRIGHT

The Software is a proprietary product of Sensormatic and is protected by both the United States and 
International copyright laws.

LIMITED WARRANTY

Sensormatic warrants that the recording medium on which the Software is recorded, and the documentation 
provided with it, will be free of defects in materials and workmanship under normal use for a period of ninety 
(90) days from the date of delivery to the first user. Sensormatic further warrants that for the same period, 
the software provided on the recording medium under this license will substantially perform as described in 
the user documentation provided with the product when used with the specified hardware. 

CUSTOMER REMEDIES

Sensormatic's entire liability and your exclusive remedy under this warranty will be, at Sensormatic's option, 
to a). attempt to correct software errors with efforts we believe suitable to the problem, b). replace at no cost 
the recording medium, software or documentation with functional equivalents as applicable, or c). refund 
the license fee and terminate this agreement. Any replacement item will be warranted for the remainder of 
the original warranty period. No remedy is provided for failure of the diskette or Software if such failure is the 
result of accident, abuse, alteration or misapplication. Warranty service or assistance is provided at the 
original point of purchase.

NO OTHER WARRANTIES

The above warranty is in lieu of all other warranties, express or implied, including, but not limited to the 
implied warranties of merchantability and fitness for a particular purpose. No oral or written information or 
advice given by Sensormatic, its representatives, distributors or dealers shall create any other warranty, 
and you may not rely on such information or advice.

NO LIABILITY FOR CONSEQUENTIAL DAMAGES

In no event will Sensormatic be liable to you for damages, including any loss of profits, loss of data or other 
incidental or consequential damages arising out of your use of, or inability to use, the Software or its 
documentation. This limitation will apply even if Sensormatic or an authorized representative has been 
advised of the possibility of such damages. Further, Sensormatic does not warrant that the operation of the 
Software will be uninterrupted or error free.

This limited warranty gives you specific legal rights. You may have other rights that vary from state to state. 
Some states do not allow the exclusion of incidental or consequential damages, or the limitation on how 
long an implied warranty lasts, so some of the above limitations may not apply to you. Under no 
circumstances shall Sensormatic's liability for any claim by Customer exceed the purchase price paid by 
Customer. 

GENERAL

If any provision of the agreement is found to be unlawful, void, or for any reason unenforceable, then that 
provision shall be severed from this agreement and shall not affect the validity and enforceability of the 
remaining provisions. This agreement is governed by the laws of the State of Florida.

You should retain proof of the license fee paid, including model number, serial number and date of 
payment, and present such proof of payment when service or assistance covered by this warranty is 
requested.

U.S. GOVERNMENT RESTRICTED RIGHTS

The software and documentation are provided with RESTRICTED RIGHTS. Use, duplication, or disclosure 
by the Government is subject to restrictions as set forth in subparagraph (c)(1)(ii) of the Rights in Technical 
Data and Computer Software clause at DFARS 252.227-7013 or subparagraph (c)(1) and (2) of the 
Commercial Computer Software—Restricted Rights at 48 CFR 52.227-19, as applicable. Manufacturer is 
Sensormatic Corporation, 6600 Congress Avenue, Boca Raton, FL, 33487.

Summary of Contents for DigiMux DG4004

Page 1: ...Digital Video Recorder and Multiplexer Quick Setup Guide English Models DG4004 DG4009 DG4016 Part Number 8200 0391 9900 A0 ...

Page 2: ...le Computer Inc Trademarked names are used throughout this manual Rather than place a symbol at each occurrence trademarked names are designated with initial capitalization Inclusion or exclusion is not a judgment on the validity or legal status of the term For your Records Complete the following product purchase information The factory requests this information when contacted for technical suppor...

Page 3: ...oper consideration for the weight of this product Consult with the manufacturer of your rack regarding the proper hardware and procedure of mounting this product in a safe and usable fashion Avoid uneven loading or mechanical instability when rack mounting units Make sure that units are installed to get enough air flow for safe operation The maximum temperature for rack mounted units is 40 C Avoid...

Page 4: ...uits radioélectriques dépassant les limites applicables de la Classe A prescrites dans le Réglement ICES 003 sur le brouillage radioélectrique édicté par le Ministère des Communications du Canada Important Information Before proceeding please read and observe all instructions and warnings contained in this manual Retain this manual with the original bill of sale for future reference and if necessa...

Page 5: ...herwise use the Software except as stated in this agreement The hardware software key where applicable is your proof of license to exercise the rights granted herein and must be retained by you If the Software is provided as part of a System the Software may only be used with the System You may not sub license rent or lease the Software but you may permanently transfer the Software to another part...

Page 6: ...h information or advice NO LIABILITY FOR CONSEQUENTIAL DAMAGES In no event will Sensormatic be liable to you for damages including any loss of profits loss of data or other incidental or consequential damages arising out of your use of or inability to use the Software or its documentation This limitation will apply even if Sensormatic or an authorized representative has been advised of the possibi...

Page 7: ...igiMux Setup 9 DigiRemote 11 DigiMux Basic Playback Operations 12 Basic Playback Controls 12 Playback by Date and Time GoTo 12 Playback Alarm Events 12 DigiClient Remote Software 13 Installing DigiClient 13 DigiClient Basic Playback Operations 14 Basic Playback Controls 14 Playback by Date and Time 15 Playback Alarm Events 15 Downloading Video Files 15 Playback Downloaded Files 15 DigiAlert Event ...

Page 8: ...Quick Setup Guide viii NOTES ...

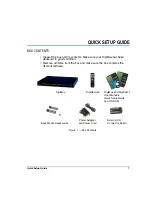
Page 9: ... has been delivered in good condition Remove all items from the box and make sure the box contains the items listed here Figure 1 Box Contents DigiMux DigiRemote DigiMux and DigiClient Quick Setup Guide User Manuals and CD ROM Rack Mount Accessories External I O Power Adapter and Power Cord Connector Board ...

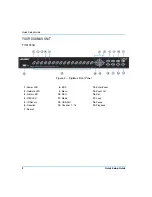
Page 10: ...UX UNIT Front Panel Figure 2 DigiMux Front Panel 1 Power LED 8 ESC 14 Enter Zoom 2 Network LED 9 Menu 15 Event List 3 Alarm LED 10 SEQ 16 Set 4 REC LED 11 Mode 17 Lock 5 IR Sensor 12 USB Port 18 Pause 6 Direction 13 Channel 1 16 19 Playback 7 Search ...

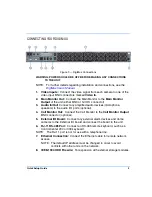
Page 11: ...speakers to the audio I O ports optional 4 Call Monitor Out Connect the Call Monitor to the Call Monitor Output BNC connector optional 5 External I O Board Connect any external alarm devices and dome cameras to the External I O board and connect the board to the unit 6 RJ 11 RS 485 Port Connect an RS 485 remote keyboard such as a ControlCenter 200 or 300 keyboard NOTE The RJ 11 port is not for use...

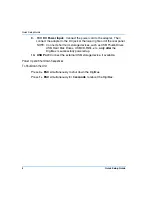
Page 12: ...TE Connect short term storage devices such as USB ThumbDrives USB Hard Disk Drives USB CD RWs etc only after the DigiMux is successfully powered up 10 USB Port Connect the external USB storage device if available Power Up and Shut Down Sequences To Shut Down the Unit Press 4 ESC simultaneously to shut down the DigiMux Press 1 ESC simultaneously for 3 seconds to reboot the DigiMux ...

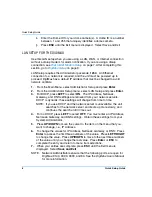
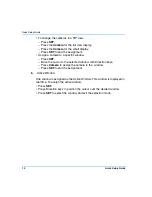
Page 13: ...gs are 4800 8 1 None 4800 Baud 8 Data Bits 1 Stop Bit No Parity a Press Menu to access the OSD Main Menu b Enter the Administrator passcode 1234 c Select Administrator Setup d Select RS 485 Port Settings Press Enter to select an option to change and LEFT RIGHT to change a value e Press ESC to leave the RS 485 Port Settings menu f Select Dome Protocol and Press Enter g Select the number of the Dome...

Page 14: ...teway and DNS settings are retrieved from your network servers DHCP is dynamic these settings will change from time to time NOTE If you use DHCP and the network server is unavailable the unit searches for the network server and boots up more slowly and continues the search until it times out 4 For no DHCP press LEFT to select OFF You must enter an IP Address Netmask Gateway and DNS settings Obtain...

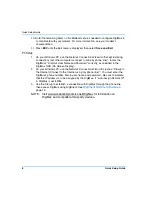
Page 15: ...P Addresses The Local IP address is used to identify the DigiMux unit over the modem The Remote IP address is used to identify the PC via modem NOTE These IP addresses and settings need not change unless you specifically want to use the remote PCs IP address If you want to assign the IP address for the PC yourself then set Auto assign Remote IP to OFF and enter the PC s IP address 6 To change the ...

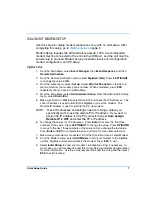
Page 16: ...assword correctly as specified in the DigiMux OSD On Screen Display 2 On your Windows PC use the Network Connection Wizard to create a Dial up to the Internet Connect to the Internet using my phone line You must enter the DigiMux s phone number Dial in user name and password Be sure to indicate that the IP address is to be assigned by the DigiMux if Auto assign Remote IP in DigiMux is set to ON 3 ...

Page 17: ...iMux splash screen is displayed on the main monitor When power up is completed the splash screen is replaced by 4 x 4 live video display screen 3 Access the On Screen Display Main Menu and enter the passcode Press Menu to access the Main Menu Enter the default Administrative passcode 1234 using the Camera keys 4 Define Recording Settings Select Record from the Main Menu Adjust Pre Alarm Circular a...

Page 18: ...cific window Press SET Move the cursor to the selected window with Direction keys Press Camera to assign the camera to the window Press SET to end the assignment 6 Active Window One window is assigned as the Active Window This window is displayed in real time To assign the active window Press SET Press Direction keys to position the cursor over the desired window Press SET to select the window and...

Page 19: ...e Remote Control Go Preset Set Preset Camera or Channel Keys 1 16 Pause Focus Far Lock Iris Close Playback Zoom Out Set Run Pattern Esc Menu Iris Open Enter Auto Focus Seq Focus Near Mode Zoom In Note Press Set key to toggle between dome control and Live Playback operation of the unit Direction Pan Tilt Dome Control Hint Screen Toggle Two AA Batteries are included ...

Page 20: ... available video is displayed 3 Use Up Down to select the Date on the screen Use Right Left to edit the values 4 Use Up Down to select the Time on the screen Use Right Left to edit the values 5 Press Enter to start playback Playback Alarm Events 1 Press Playback 2 Press Down for an Event alarm List search The list of events from the alarm history log is displayed 3 Use Up Down to scroll through th...

Page 21: ...can proceed to Step 3 of this procedure If you choose to decline then you can click Cancel to exit DigiClient Installation In this case DigiClient is not installed The necessary DigiClient plug ins are downloaded and installed on your PC If you have previously loaded DigiClient software a confirmation box allows you to confirm a version upgrade The DigiClient plugins are downloaded and installed i...

Page 22: ... User s Manual DIGICLIENT BASIC PLAYBACK OPERATIONS Basic Playback Controls Figure 6 DigiClient Main Window Figure 7 Basic DigiClient Playback Controls Toolbar Camera Window Display Mode Icons DigiClient Main Window View Logo and Information Connection Live Video Setup Alarm Exit Status Selection ...

Page 23: ...or download format 4 Enter File Name and click Save 5 Enter Start Date Start Time End Date and End Time Click side arrow for Calendar if desired for Start and End Date 6 Click OK to start download Playback Downloaded Files Play AVI Files with WindowsTM Media Player If WindowsTM Media Player is the default double click the file name in Windows Explorer Otherwise select the file right click select O...

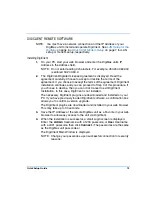
Page 24: ...wnload DigiAlert The DigiAlert installer is then displayed 4 Click Next for each screen and then click Install DigiAlert is installed during the next few minutes 5 When the installation is successful the Installer displays a final screen Click Finish to complete the installation DigiAlert Setup on DigiMux 1 Setup on the DigiMux depends on whether you have a LAN Internet connection or a Dial In Out...

Reviews: