RM4200 Series User Guide
RM4210 & RM4211 Installation
14
Installing the RM4210
I
MPORTANT
:
Electrostatic Discharge (ESD) can damage electronic components. Provide ESD protection by
wearing an anti-static wrist strap attached to any unpainted metal surface before accessing the unit or handling
electronic parts. If an anti-static wrist strap is unavailable, discharge static electricity from yourself and your
clothing by touching a nearby metal surface before accessing the unit or handling electronic components.
The following section explains how to install the RM4210 onto the top of a coupon test station. For alternative
mounting options, please contact Technical Services or refer to Appendix B,
N
OTE
:
American Innovations recommends using AI part number 211061-000 (Belden 5308UE), or equivalent,
for wiring inputs. To ensure a clean stable reading, keep field wiring as short as possible and use shielded twisted
pair wire such as Alpha 2463C.
Complete the following steps to install the RM4210 on a coupon test station.
N
OTE
:
For the RM4210, you can attach
either
a PCR
or
a selectable current transducer attached to a PCR. Refer
Installing the Selectable Current Transducer
complete current transducer installation instructions
before
beginning the unit installation.
1
Remove the protective cover over the test station head.
2
Connect wiring harness individual wires to the respective test points on the test station.
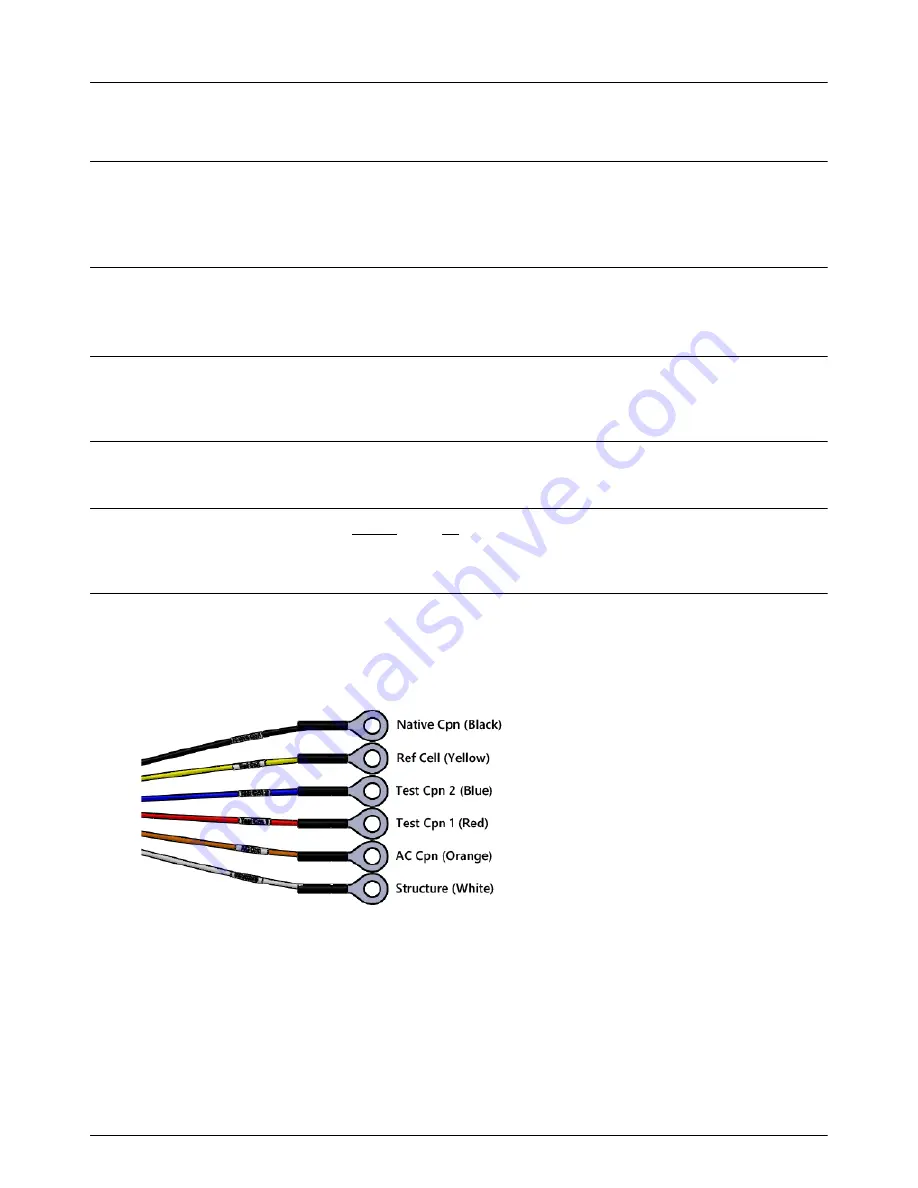
Figure 2-6. Wiring Harness Leads with Ring Terminals
The wires are color-coded and labeled for use with a Triton
®
coupon test station.
If connecting to
another type of test station
, note the following:
Do not connect the orange
AC Cpn
wire unless using a separate AC coupon.
The blue and red
Test Cpn
leads
must be on the same connection
.


