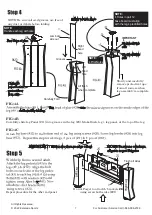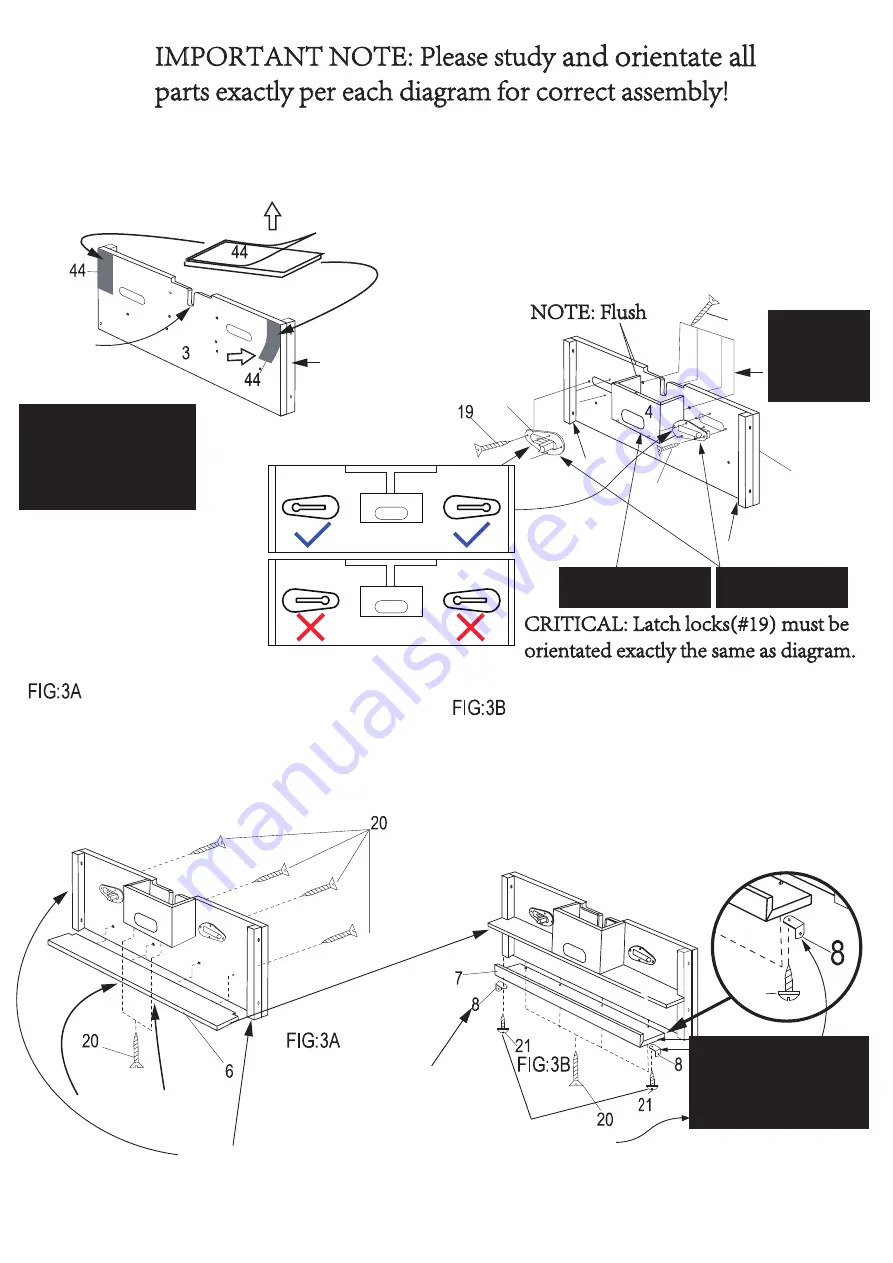
Remove backing and stick the end panel inner
cushions (#44) to the each of the end panels (#3).
Attach 2 Latch/locks (#5) into the Leg Top End
Panel (#3) pre-cut holes with Screws(#19).
Carefully fold and attach the puck catcher box (#4)
with Screws (#20) using the predrilled holes.
Add a small amount of wood glue into miter grooves
before folding
.
Tighten, but do not strip screws (#20 & #19).
Repeat this step for the other end panel.
Screw the Steel Brackets (#8) onto the bottom of the Ball
Storage Board (#7) using the pilot holes and Screws (#21).
Now attach the Ball Storage Board (#7) to the leg pedestal
using the predrilled holes and Screws (#20).
Tighten, but do not strip screws (#20) and (#21).
Repeat these steps for the other end panel (#3).
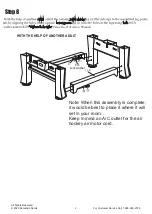
Step 3
Screw the end panel support board (#6) to the leg top
end panel (#3) using screws (#20) into predrilled holes.
Tighten,
Countersinks
lower side
but do not strip screws (#20).
3
FIG:2A
FIG:2A
FIG:2B
Note: Edge of the Steel
L-Brackets (#8) must be
fl
ush with edge of the
Ball Storage Board (#7).
NOTE TO CUSTOMER:
The purpose of the (#44)
end panel inner cushions
is to offer a more stable
playfield during play
Right
Wrong
Brace this side
3
19
5
20
NOTE:
CORRECT
ORIENTATION
NOTE:
Oval opening
is on lower side.
Brace this side
Install 2 pcs (#8)
L-brackets as
per diagram
Use pilot
holes to Install
Will be here
Peel and Stick
FIG:2A
Cut Out
Top Side
NOTE:
Inner brace
this back side
NOTE:
BE SURE
TO USE THE
CORRECT
LOWER TWO
HOLES
©
202 2 Escalad e Sports
Fo r Custome r Servic e Cal l 1-888-996-2729
6
All Rights Reserved.
Step 2
21


