(4) 12-Gallon, 500 PSI Carpet Extractor
12-Gallon, 500 PSI Carpet Extractor (13)
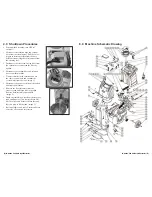
9.0 Machine Parts List Continued
Item No.
Item Description
Qty. Drawing No.
10-0807
Wheels
for
Extractor 2 48
10-0834
Pump Flat Washer
18
49
10-0835-N
Nut for Pump Bolt on Extractor
8
50
10-0808
Caster
for
Extractor
2 51
10-0816
Caster Bolt 1/4-20 x 1/2 Hex Bolt
12
52
10-0843-COM
1/2” x 54” Clear Hose for Extractor Pump
Includes Fittings and Filter
1
53
80-0040-C
46” of Blue 3000 psi Hose for Extractor
Complete with Fittings and Clamps
1
54
80-0044-S
30” Black Hose with Fittings and Clamps 1
55
10-0835-N
Nut for Pump Bolt on Extractor
4
56
Hose
Fitting
Part
of
80-0044-S
57
Hose
Fitting
Part
of
80-0040-C
58
80-0015
500 psi Pump Mount Plate
1
59
10-0833
Motor Manifold Bolts for Extractor
4
60
80-0044-L
67” Black Hose with Fittings and Clamps
1
61
Hose
Fitting
Part
of
80-0044-L
62
Hose
Fitting
Part
of
80-0044-S
63
10-0881
1/4” MNPT x 3/8” JIC 90 Degree -
Part
of
80-0044-S
1 64
80-0016
500
psi
Pump
1 65
10-0835-B
Pump Bolt for Extractor
4
66
80-0036
Locking
Plate
1 67
10-0832
S/R
Strap
Bolts
4 68
10-0040
3000 psi Blue Hose - Part of 80-0040-C
6
69
80-0026
3/8” Barb x 1.4” MPT 90 Degree -
Part
of
80-0040-C
1 70
80-0017
Bulk Head fitting for Extractor
3
71
10-0379
8-32
x
3/8
Screw
8 72
10-0868
1/4” Female QD for Extractor
1
74
10-0831
S/R
Bracket
for
Extractor
2 75
80-0035
Bracket
1 Not Pictured
80-0037
RFI Filter
1 Not Pictured
80-0005-C
10 amp Circuit Breaker
1 Not Pictured
2.0 Set-Up / Prepare Unit for Use
DO NOT USE ON WET SURFACES. DO NOT EXPOSE TO RAIN. STORE
INDOORS.
•
All carpet extractors, no matter what the time of year, are shipped with antifreeze in
the solution lines. Prior to first use, fill the solution tank with one quart of warm water.
Attach the hose and using a hand tool or wand, flush out the system by spraying the
one quart of water through the pump.
•
Attach the vacuum hose and the brass quick disconnect.
•
Fill the solution tank with warm water (less than 100 degrees Fahrenheit). Fill to
approximately 4 inches from the top. Pre-spray and agitate the surface with detergent
made for floor cleaning or upholstery. Use only warm water to extract the pre-spray
from the surface.
• Be sure to replace any filters back into the machine prior to use.
•
Do not use citric acid, butyl glycol or harsh degreasers inside the machine.
2.1 Electrical
Plug cord(s) into 10 AMP grounded wall outlet(s). 10 AMP circuits are normally found in
kitchens and bathrooms. Never remove ground prong from the plug. If a circuit breaker
trips during operation, turn machine off, reset the breaker and move the electrical cord to
a different outlet and resume operation.
2.2 Vacuum System
Automatic Vacuum Shut-Off:
The float assembly shut-off, located in the recovery
tank on the vacuum stand pipe, prevents the waste tank from overflowing into the stand
pipe and damaging the vacuum motor(s). The float assembly will cut-off vacuum to the
waste tank. The motor(s) will also reach a fast, high-pitched sound alerting you when the
recovery tank is about to over flow. When this happens, immediately turn off the vacuum
motor(s) and empty the waste tank. If the operator continues to use machine after the tank
is full, it will void the Warranty.
The float assembly has a filter to prevent lint and debris from entering the stand pipe.
Refer to the “Maintenance” section for removal and proper cleaning.
Recovery Tank:
the vacuum system requires the use of an external filter. The clear
view in-line filter is included with the machine and must be used on every job.
It is also necessary to use a defoamer to eliminate foam build-up in the recovery
tank which could lead to foam/moisture entering the vacuums and contributing to
early failure of the vacuum motors
.
If moisture does enter the vacuum motors, contact an authorized service center. To
prevent moisture from damaging the vacuum motors during storage, empty the recovery
tank and store with the lid open.


