18-CD24D1-2
7
Installer’s Guide
HORIZONTAL INSTALLATION
The coil and furnace must be fully supported when used
in the horizontal position.
INSTALLATION INSTRUCTIONS
▲
CAUTION
!
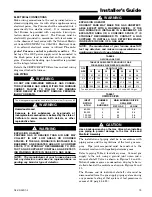
Bottom panel for furnace to remain in place until unit
reaches final installation location. If bottom panel is re-
moved before installation the collection cell and field
charger must also be removed to protect installation
personnel.
▲
CAUTION
!
Remove the COLLECTION CELL and remove and dis-
card the cardboard over the cell.
NOTE: No sheetmetal screws may be used from 0-4"
from the bottom of the unit. Screws will interfere with
the Air Cleaner. See Figure 4.
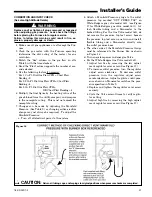
REMOVING THE BOTTOM PLATE
a.
Once the furnace is in place, remove the two screws
located at the front bottom corners of the Furnace.
b.
Lean the furnace back slightly and remove the bot-
tom panel.
c.
Replace the two screws removed in step a.
REMOVING THE COLLECTION CELL AND FIELD
CHARGER
When COLLECTION CELLS and FIELD CHARGER
must be removed, follow the steps below.
a.
Remove the lower furnace door.
b.
Remove the four screws holding the inner blower
panel and remove panel. Set aside in a safe place
until the unit is set in place and ready to start up.
c.
Remove the COLLECTION CELL by sliding for-
ward. Remove the cardboard from the COLLEC-
TION CELL and discard. Set aside in a safe place
until the unit is set in place and ready to start up.
d.
Disconnect the Green return wire and the Red high
voltage wire. Twist and pull the connector on the
Red wire to release.
e.
Remove the two hold down screws on the bottom of
the FIELD CHARGER and retain.
f.
Remove the Field Charger. Set aside in a safe
place until the unit is set in place and ready to start
up.
g.
Set furnace in place. Repeat step a-g in reverse or-
der. Do Not put cardboard back in Furnace. Inner
blower door MUST be put back into place.
UP
FL
OW
FU
RN
AC
E
CASED
COIL
SCREWS
(BOTH SIDES)
STANDOFFS
(BOTH SIDES)
STANDOFFS (4)
DRILL SCREWS (4)
FOR VERTICAL
Figure 2
UPFLOW INSTALLATION
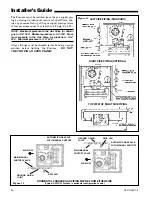
Standoffs and screws (See Figure 2) are included with
the cased coils for attachment to the Furnace. There
are clearance alignment holes near the bottom of the
coil wrapper. Drill screws are used to engage the Fur-
nace top flanges. The standoff is inserted into the cabi-
net alignment hole. The drill screws are inserted
through the standoffs then screwed into the Furnace
flange. The coil is always placed downstream of the Fur-
nace airflow. The above instructions apply only if the
coil is on top of an upflow Furnace.
The cased coil is secured to the Furnace and both the
Furnace and the cased coil must be properly supported.
The brackets mount using the rear screws on the coil
case and use the screws provided to secure the bracket
to the Furnace. The remaining bracket is placed as
close to center as possible (horizontally) between the
coil case front and the upflow Furnace, converted to
horizontal, aligns and attaches to the TXC coil. How-
ever, the coil requires additional support.
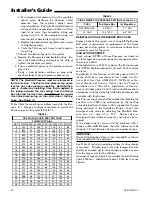
The horizontal Furnace installation in an attic should
be on a service platform large enough to allow for
proper clearances on all sides and service access to the
front of the Furnace (See Figure 3 & Clearance Table
1). Line contact is only permissible between lines
formed by intersections of the top and two sides of the
furnace casing and building joists, studs, or framing.
IMPORTANT:
The 2/4TXC cased coil must be placed downstream of the
furnace. In horizontal installations, the apex of the coil
may point either toward or away from the furnace. See
the 2/4TXC coil Installer's Guide for more details.


