LAKELAND™ UNDERCABINET STORAGE RACK
8193.140
Installation
Instructions
7 9 1 4 0 7 - 1 0 0
BEFORE YOU BEGIN:
IMPORTANT: DIMENSION OF FIXTURES ARE NOMINAL AND MAY VARY WITHIN PERMITTED MANUFACTURING TOLERANCES.
© A M E R I C A N S T A N D A R D I N C . 2 0 0 5
™
• Carefully unpack your accessory, check the contents, and inspect carefully for damage.
RECOMMENDED TOOLS & MATERIALS:
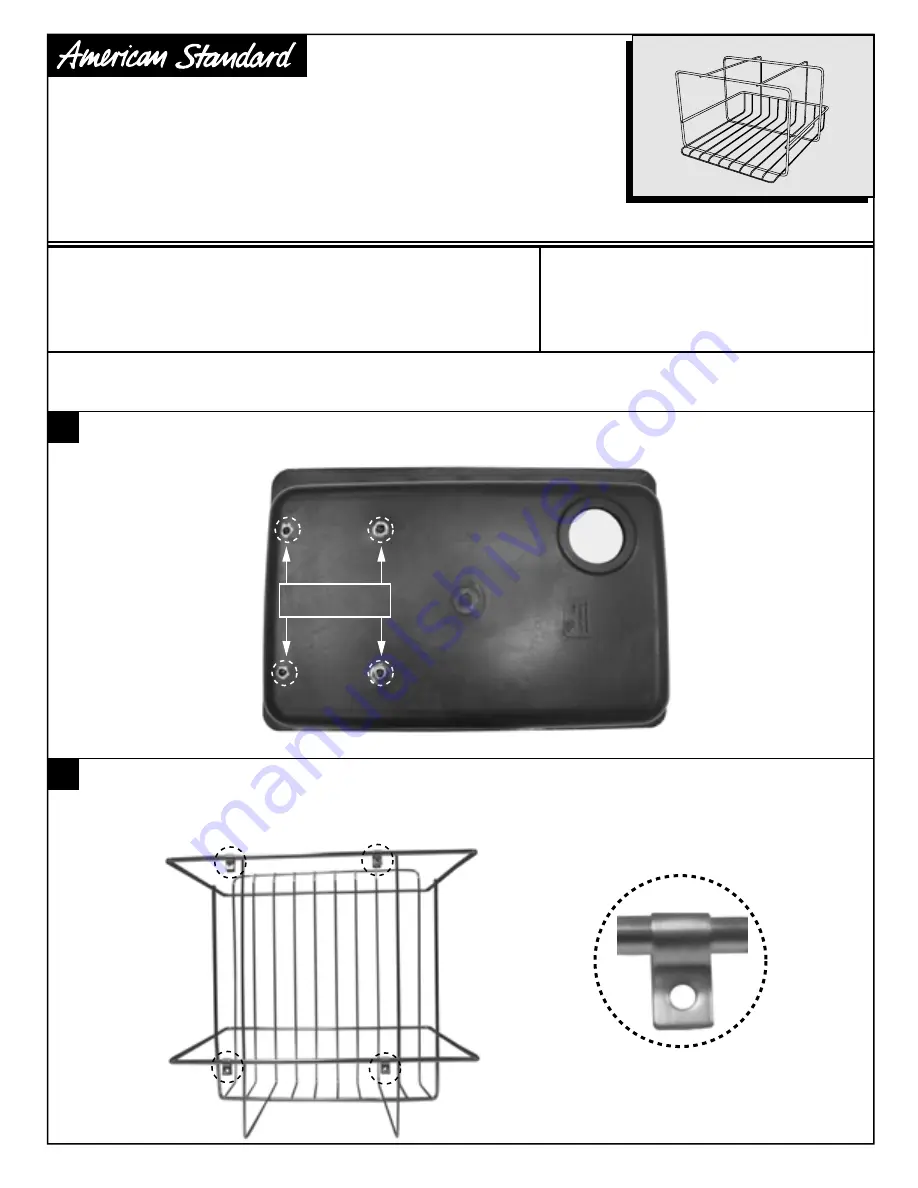
• Locate the fixing screw holes on the underside of the sink.
• Make sure the threads are clear and mark around them. Fig 1.
• Regular Screwdriver (Small)
• Phillips Screwdriver
• Flash Light
• Pliers
• Tape Measure
• Masking Tape or Yellow Crayon
• Mounting Kit Consists Of:
• Put two clips on each of the top thick wires.
• Gently squeeze them closed.
• The exact location of the clips may vary depending on whether you want to position your storage rack
to the left or right. Fig 2 & 3.
Note: The top of the rack is manufactured with a slope. When it is correctly installed under the sink the bottom
of the rack will be parallel with the rim of the sink.
Thank you for selecting American-Standard...the benchmark of fine quality
for over 100 years. To ensure that your installation proceeds smoothly--
please read these instructions carefully before you begin.
• 4 Clips
• 2 Long and 2 Short Metric Machine Screws
• 10 Flat and 4 Anti-shake (star) washers. Fig 4.
2
1
Fig.1
Fixing Screw
Hole Locations
Fig.2
Fig.3


