background image

26                                              080306A-1              

5. 

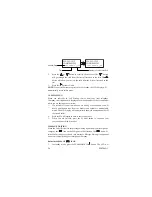
Press the MENU/OK button twice. 

6. Press 

the   or 

  button to scroll the call record you wish to delete. 

7. 

Press the MENU/OK button. 

8. Press 

the   or 

  button to select “DELETE”.   

9.  Press the MENU/OK button to confirm. The LCD will show 

“CONFIRM?”. 

10.  Press the MENU/OK button to confirm. 

11. Press 

the 

  button to return to Idle Mode. 


DELETING ALL RECORDS IN THE CALLER LIST 

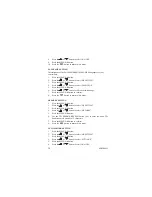
1. 

Press the MENU/OK button 

2. Press 

the   or 

  button to select “CALL LOG”. 

3. 

Press the MENU/OK button 

4. Press 

the   or 

  button to select “RECEIVED”. 

5. 

Press the MENU/OK button twice. 

6. 

Press the MENU/OK button. 

7. Press 

the   or 

  button to select “DELETE ALL”. 

8.  Press the MENU/OK button to confirm. The LCD will show 

“CONFIRM?”. 

9. 

Press the MENU/OK button to confirm. 

10. Press 

the 

  button to return to Idle Mode. 


PHONEBOOK SETTING 

SAVING IN THE PHONEBOOK 

1. 

Press the MENU/OK button. 

2. Press 

the   or 

  button to select “ PHONE BOOK” 

3. 

Press the MENU/OK button. 

4. Press 

the   or 

  button to select “ADD ITEM”. 

5. 

Press the MENU/OK button. The LCD will show “NAME?”. 

6. 

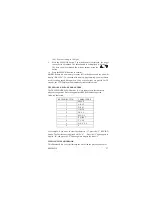
Use the TELEPHONE KEYPAD button (0-9) to enter the name; (see the 

“TELEPHONE KEYPAD CHARACTERS SETTING” section) you can 

store up to 12 characters.   

7. 

Press the MENU/OK button. The LCD will show “NUMBER?” 

8. 

Enter the telephone number using the TELEPHONE KEYPAD button 

Summary of Contents for UA23324H

Page 1: ...ct to rain or any type of excess moisture If it is accidentally dropped into water the AC adapter should immediately be unplugged from the wall along with the telephone line cord THIS SYMBOL IS INTEND...

Page 2: ...an unstable cart stand or table The product may fall causing serious damage to the product 6 Slots and openings in the cabinet and the back or bottom are provided for ventilation to protect it from ov...

Page 3: ...ater D If the product does not operate normally by following the operating instructions Adjust only those controls that are covered by the operating instructions Improper adjustments of other controls...

Page 4: ...xercise care in handling the battery in order not to short the battery with conducting material such as rings bracelets and keys The battery or conductor may overheat and cause burns 5 Recharge only t...

Page 5: ...be certain of the number of devices you may connect to your line as determined by the REN you should call your local telephone company to determine the maximum REN for your calling area 4 If your tel...

Page 6: ...NOTE This equipment has been tested and found to comply with the limits for a Class B digital device pursuant to Part 15 of the FCC Rules These limits are designed to provide reasonable protection aga...

Page 7: ...duct Use of other accessories may not ensure compliance with FCC RF exposure guidelines SAR STATEMENTS 1 The equipment complies with FCC RF radiation exposure limits set forth for an uncontrolled envi...

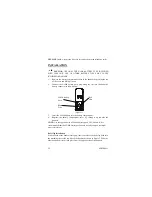
Page 8: ...OK MENU EXIT UA23324H CONTROLS DIAGRAM LCD Display CID Button Redial Pause Button Menu OK Power Button Exit End Call Button CONF Move Right Lock Keypad Button Flash Delete Button Intercom Button Opti...

Page 9: ...080306A 1 9 PAGE IN USE CHARGE 6VDC 250mA CHARGE UA23324H CONTROLS DIAGRAM LINE Jack DC 6V Jack DC 6V Jack CHARGE LED Indicator PAGE Button IN USE CHARGE LED Indicator...

Page 10: ...unit to the idle mode Press to end a call Button Press to switch the speakerphone on or off Press to make or answer a call INT Intercom Button Use this to set up a conference call with an external lin...

Page 11: ...items Press to return to the previous menu In standby mode to delete the MSG icon Microphone Used for speaking with callers LDS Button Press to use the Pay N Talk Long Distance Service BASE UNIT CONT...

Page 12: ...as shown below 3 Insert the Ni Mh battery into the battery compartment 4 Replace the battery compartment cover by sliding it up towards the handset NOTE Use the type and size of Ni Mh battery pack 2 4...

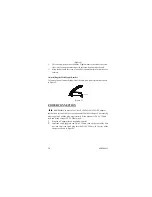
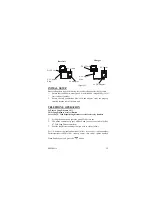
Page 13: ...end of the telephone line cord to the modular wall jack 4 Align the wall mounting slots with studs located on the modular wall plate and slide base down to lock in place Wall Mounting No Standard Wall...

Page 14: ...ull it forward as shown in Figure 5 POWER CONNECTION CAUTION You must use a Class II 120 Volt AC 6 Volt DC adaptor that delivers at least 250mA for base unit and 250mA for charger The center tip must...

Page 15: ...ce Button Access Pay N Talk Prepaid long distance service from every handset 1 Pick up the handset and press the green LDS access key 2 The phone automatically goes off hook and you are connected to t...

Page 16: ...code screen will be displayed pin number should be entered The factory preset pin number is 0000 The tone will be sounded and the Base assigns a number to the Handset NOTE When you want to add a new e...

Page 17: ...at you want to call 2 The external call is put on hold and the internal called handset rings 3 After the internal called handset has answered you can press the CONF button to activate 3 way conference...

Page 18: ...ou enter the number 4 When finished with your call press the button The base IN USE LED indicator will light up steadily C ANSWER A CALL 1 When the phone rings the LCD Display will show CALL press the...

Page 19: ...RE PA button This will automatically redial the last telephone number you called up to 32 digits 4 When finished with your call press the button or place the handset on the base unit The base IN USE...

Page 20: ...PAGING FUNCTION If you have misplaced the handset or need to alert a person near the handset press the PAGE button on the base unit Each press of this button will activate the handset to beep for 60 s...

Page 21: ...ASE 2 BASE 3 BASE 4 AUTO REG BASE 1 2 3 4 REG BASE REG BASE REG BASE DEL ITEM MODIFY PIN ALARM PB STATUS LIST NAME SELECT ENTRY CONFIRM PIN PIN PIN ALARM ON INT RING ALARM OFF EXT RING KEY TONE BATTER...

Page 22: ...mber programmable memory Phonebook Hearing aid compatibility Unlike regular telephones your cordless telephone does not work during power failures We do not recommend that you use a cordless telephone...

Page 23: ...this service Before using this unit please read instruction manual carefully RECEIVING A NEW CALL When you receive a new call the call information is stored in the CALLER ID List The NEW NUMBER segme...

Page 24: ...while you are having a conversation 1 If a second call comes in while you are having a conversation you will hear a notification tone from the handset and volume is momentarily muted The LCD Display...

Page 25: ...NAME AND NUMBER FROM THE CALLER LIST INTO PHONE BOOK 1 Press the MENU OK button 2 Press the or button to select CALL LOG 3 Press the MENU OK button 4 Press the or button to select RECEIVED 5 Press the...

Page 26: ...OK button twice 6 Press the MENU OK button 7 Press the or button to select DELETE ALL 8 Press the MENU OK button to confirm The LCD will show CONFIRM 9 Press the MENU OK button to confirm 10 Press the...

Page 27: ...ay PB FULL To continue with memory programming you must delete or edit existing speed dial numbers If no active buttons are pressed for 20 seconds the LCD Display will automatically return to idle mod...

Page 28: ...UMBER IN THE PHONEBOOK 1 Press the MENU OK button 2 Press the or button to select PHONE BOOK 3 Press the MENU OK button 4 Press the or button to select CHANGE ITEM 5 Press the MENU OK button 6 Press t...

Page 29: ...e contact you want to call 3 Press the button to dial out the telephone number 4 Start your conversation 5 To end your conversation press the button NOTE Be sure to check that the line is not in use b...

Page 30: ...n to return to Idle Mode BS SETTING TERMINATE BS SETTING This function allows the user to delete a handset registration from the base 1 Press the MENU OK button 2 Press the or button to select BS SETT...

Page 31: ...to idle mode MODIFY PIN SETTING This function allows the user to change the pin number of the currently active Base 1 Press the MENU OK button 2 Press the or button to select BS SETTING 3 Press the ME...

Page 32: ...he alarm simply press any key on the handset 1 Press the MENU OK button 2 Press the or button to select HS SETTING 3 Press the MENU OK button 4 Press the or button to select ALARM 5 Press the MENU OK...

Page 33: ...U OK button 6 Press the or button to select INT RING or EXT RING 7 Press the MENU OK button 8 Press the or button to select MELODY or VOLUME 9 Press the MENU OK button 10 Press the or button to select...

Page 34: ...button to confirm 8 Press the button to return to idle mode HS LABEL SETTING 1 Press the MENU OK button 2 Press the or button to select HS SETTING 3 Press the MENU OK button 4 Press the or button to...

Page 35: ...e or button to select ON or OFF 9 Press the MENU OK button to confirm 10 Press the button to return to idle mode DATE TIME SETTING 1 Press the MENU OK button 2 Press the or button to select HS SETTING...

Page 36: ...S 5 Press the MENU OK button 6 Press the or button to select BASE 1 2 3 4 or AUTO 7 Press the MENU OK button to confirm AREA CODE SETTING This function allows user to set a different area code for CID...

Page 37: ...ase unit has a unique security code 5 Generation of the security code is by employing a sequential fixed approach During manufacing the code will be generated and programmed into the EEPROM of the uni...

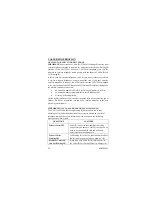
Page 38: ...educed useable charge time When you notice the usable charge duration decreasing fully discharge the Ni Mh battery and recharge as described DISCHARGING 1 Unplug the telephone line cord from the UA233...

Page 39: ...s fluorescent bulbs motors and fans also generate noise pulses Because radio frequencies are susceptible to these noise pulses you may occasionally hear them in your handset Generally they are minor a...

Page 40: ...irmly until they click If you had a power failure or unplugged the base unit replace the handset on the base unit for two to five seconds to reset the system Does not ring Check the RINGER mode on the...

Page 41: ...the battery compartment on the handset Make sure the charging contacts on both the base unit and the handset are in contact during charging The charging contacts and terminals may need cleaning with...

Page 42: ...ID does not show the caller s name and or phone number The Caller ID unit will not function until you have Caller ID service provided by your local phone company Call your local phone company to have...

Page 43: ...rare occasions the Caller ID information sent by the telephone company may have an error in the transmission This is not the fault of your Caller ID unit It can only capture and store the data that w...

Page 44: ...lies to the use of this device with a communications service for which it is designed This device alone does not provide the customer with any communications service and requires a separate subscripti...

Page 45: ...facturing defect and without limiting the generality of the foregoing does not apply to any defect caused by damage in transit retailer handling or customer handling This warranty also does not cover...

Page 46: ...n provided with the device we make no warranties of any kind This warranty is the complete and exclusive agreement between you and American Telecom Services Inc It supersedes all other written or oral...

Page 47: ...gives you specific legal rights and you may also have other rights which vary from state to state or province to province More Service Information For service information in and out of warranty call A...

Page 48: ...48 080306A 1 UA23324H 080306A 1...

Reviews: