Americana Outdoors, Inc.
12
Navajo Installation Guide
OPTIONAL
-
WOOD SUB
-
ROOF INSTALLATION
WITH
18”
STANDING SEAM PANELS
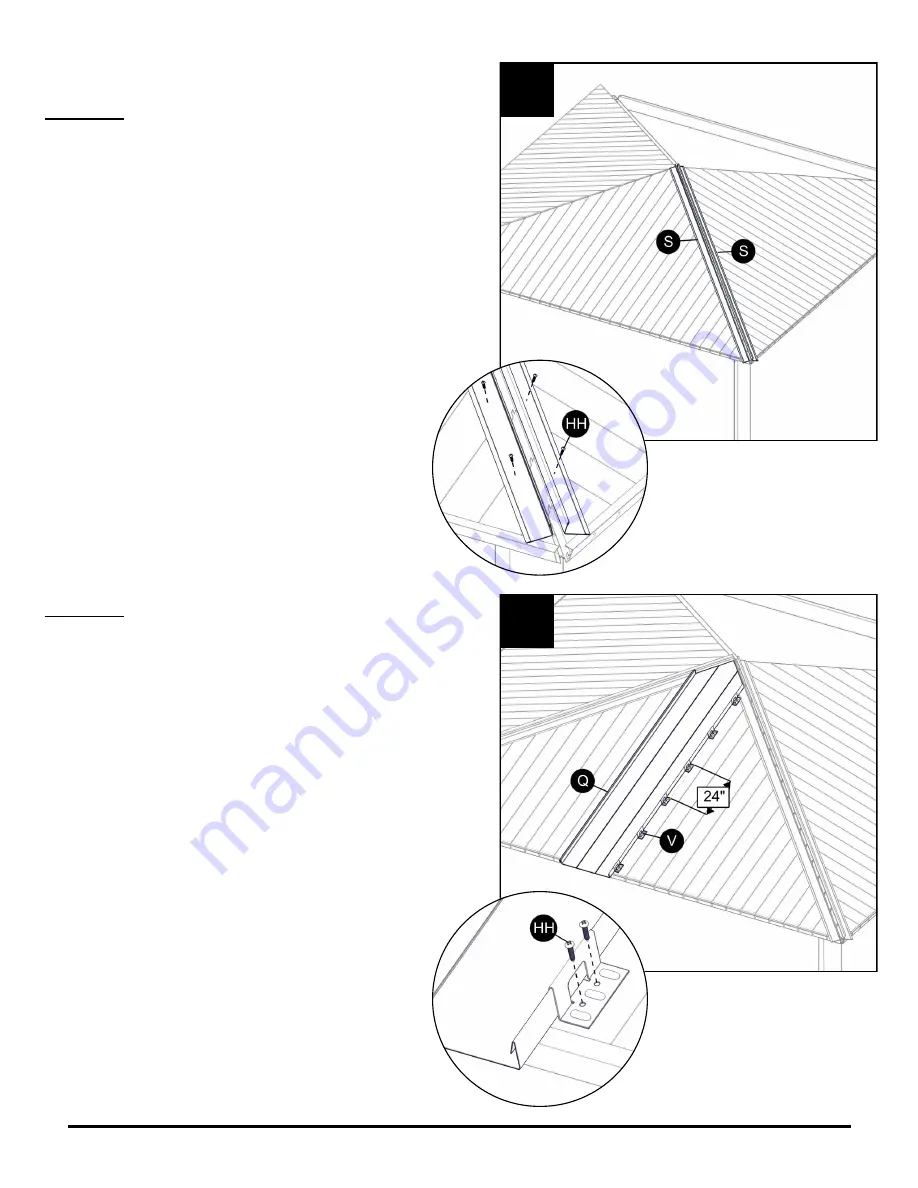
STEP W3
Once the wood sub
-
roof is completely installed in at
least two adjacent roof sections, position L flashing
(S)
back
-
to
-
back along each ridge, over the center
of rafter
(B)
. Attach to the wood sub
-
roof using #10
x
1”
screw
(HH)
at
12”
on center.
Continue to install standing seam panel (Q) or
go to Step 6 on page 15 to install
‘
W
’
Style Roof
Panel (G).
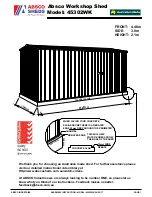
STEP W4
Begin roof panel
(Q)
installation with the longest
panel. Set the panel on the shelter and line up the
center of the panel lock at the pointed end with the
center of tie block
(D)
and the center of purlin
(C)
(see Step 6 for detail). Recommended minimum
overhang is
1”.
With the roof panel
(Q)
held in the correct position,
fit mounting clip
(V)
over the small lock of the panel
and attach to the wood sub
-
roof using (2) #10 x
1”
screws
(HH)
. Attach additional mounting clips
(V)
up
the length of the panel at
24”
on center.
W3
W4


