background image

Installation Instructions 


This bath has been designed for floor or wall mounted taps. 


The floor which the bath sits on must be as level as possible due to the 

bath sitting on it’s flat base. 


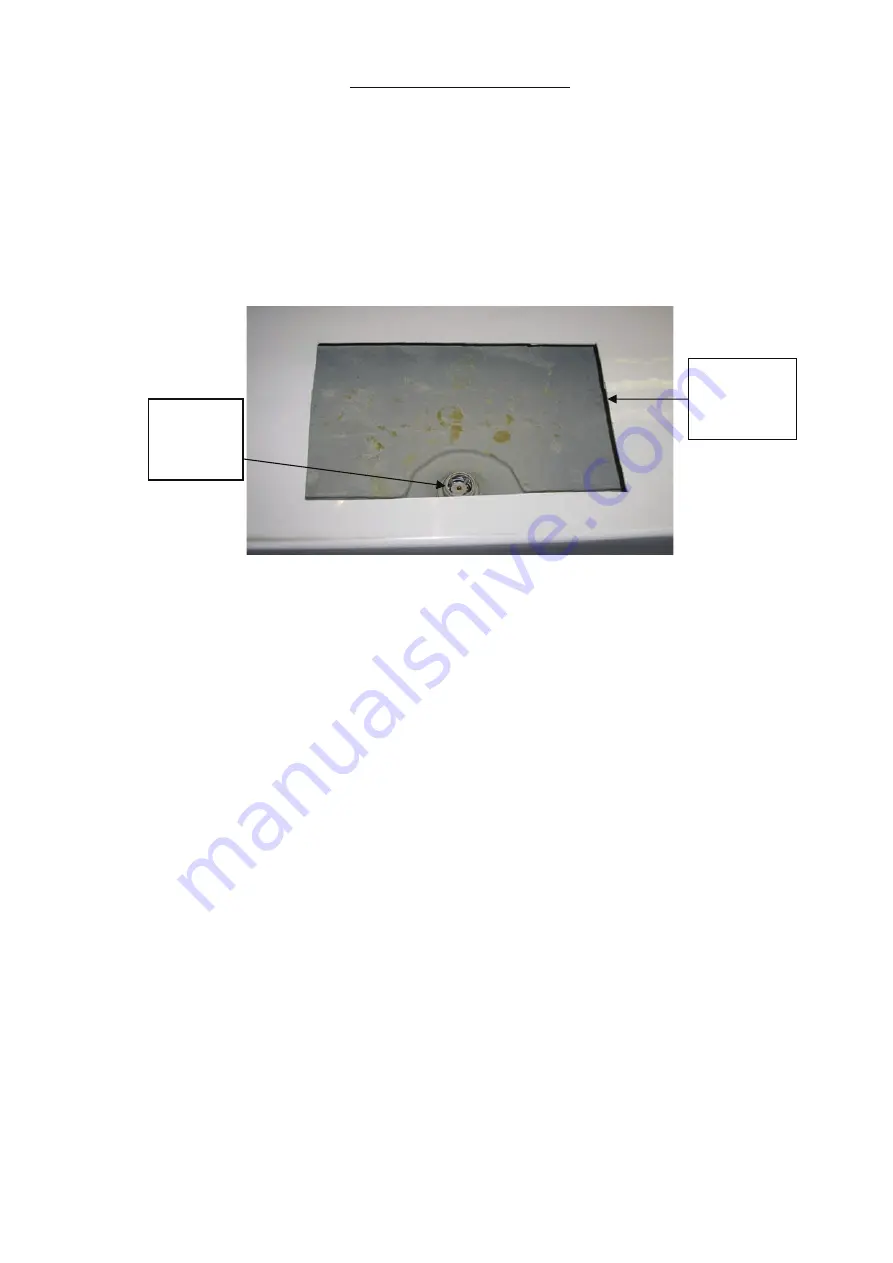
As the skirted baths have no panel to remove for access to the waste, an 

access hole in the base of the outer skin has been cut so connection can 
be made from the waste. Picture (A) shows the access hole below 


Access 
hole in 
outer skin 

 Fitted 
waste in 
bath 

Picture (A) 


The access hole can be enlarged if required, be careful not to cut into the 
structural supports in the bath. The cut should not extend beyond the 

base up the side walls. 


Summary of Contents for Nouveau FT

Page 1: ...Installation and User Guide Nouveau FT RT ...

Page 2: ...damaged must be reported within 24hrs of receipt of the product No such claims will be recognised after installation as this is classed as acceptance of the product Please do not remove the old fixture before you unpack and inspect the new unit Upon receipt check for shortages immediately Store the bath in a safe place until you begin installation to avoid damage Any installation should be carried...

Page 3: ...shown in the picture below Some Americh International baths are made form double skin acrylic technology Both skins are bonded together as one there is no panel around the bath Due to the way the Nouveau Flat top bath is designed the pop up waste is factory fitted The baths are water tested for any leaks wrapped and despatched ...

Page 4: ...s have no panel to remove for access to the waste an access hole in the base of the outer skin has been cut so connection can be made from the waste Picture A shows the access hole below Access hole in outer skin Fitted waste in bath Picture A The access hole can be enlarged if required be careful not to cut into the structural supports in the bath The cut should not extend beyond the base up the ...

Page 5: ...th the bath this is shown below Screw the 1 adaptor onto the end of the waste thread ensuring a tight fit Make sure the rubber seal is in the adaptor shown below 1 Adaptor screwed onto waste underneath the bath Rubber seal inside adaptor The position of the bath should have been finalised and the outlet pipe work should be on place Once the adaptor has been fitted with the use of a compression fit...

Page 6: ...Then fill the bath half way full empty and check for leaks again Securing the bath It is very important that you secure your bath to the floor to stop it moving from its final position When the installation is complete it is recommended that you apply silicone sealant around the bottom of the bath to secure it to the floor Should maintenance access be needed the silicone can be released by cutting...

Page 7: ...mage the finish Safety This product is intended for indoor use only Use the bathtub only for its intended purpose as described in this manual and do not use attachments or accessories which are not recommended by the manufacturer Caution should always be exercised when entering or exiting the bathtubs Pregnant women should be careful of the temperature of the water when bathing To reduce the risk ...

Reviews: