A m e r i s t e p ® I n c . 9 0 1 T a c o m a C t . • P . O . B o x 1 8 9 • C l i o , M I 4 8 4 2 0 ( 8 1 0 ) 6 8 6 - 4 0 3 5 w w w . a m e r i s t e p . c o m
Page 2
©2009 (rev 12/08)
SET UP INSTRUCTIONS
A m e r i s t e p ® I n c . 9 0 1 T a c o m a C t . • P . O . B o x 1 8 9 • C l i o , M I 4 8 4 2 0 ( 8 1 0 ) 6 8 6 - 4 0 3 5 w w w . a m e r i s t e p . c o m
T H E
Bone Collector
G R O U N D B L I N D
Models #3297
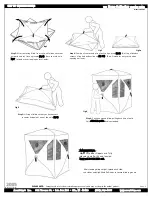
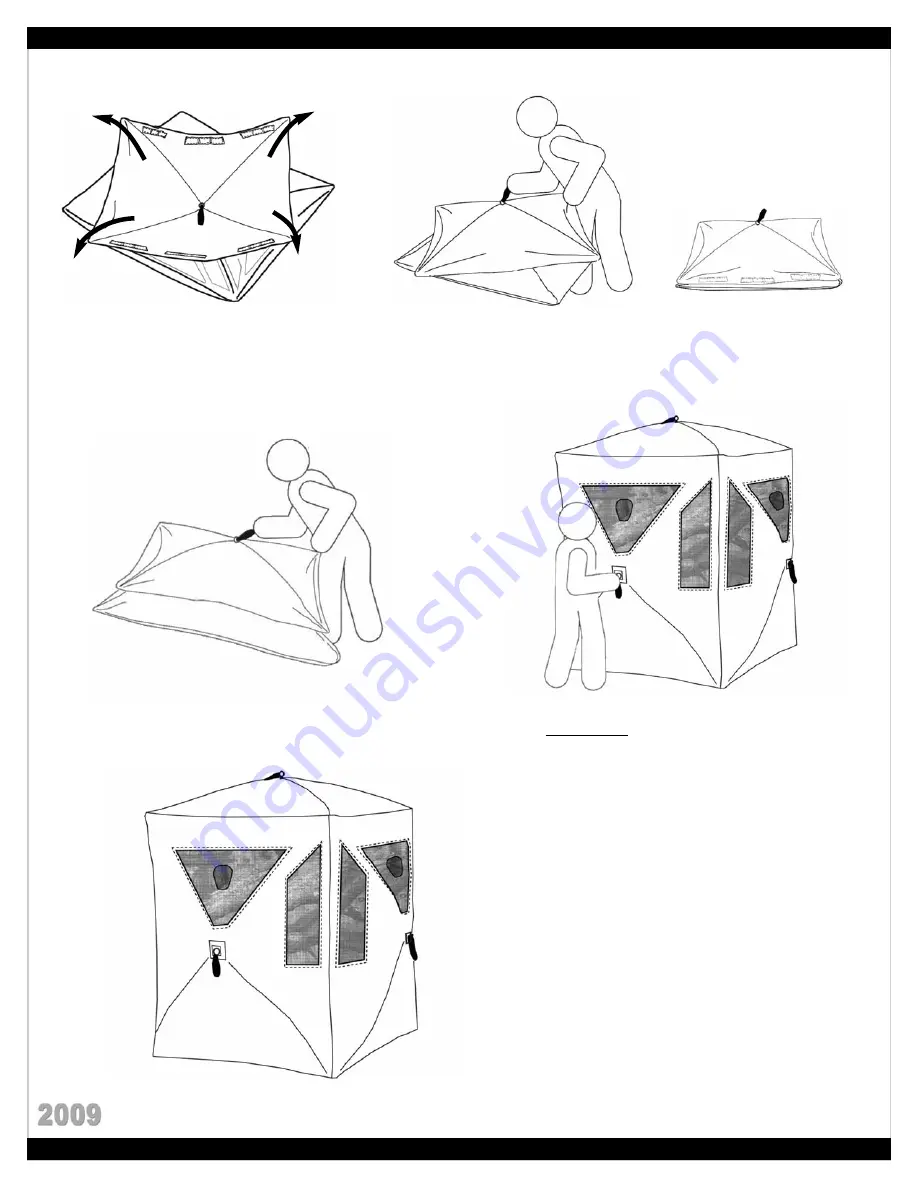
Step 2:
Firmly pull center hub of roof pull so it pops up (fig 2). Twist top of blind so
corners of top and bottom line up (fig 2a). This will make for easy set up when
opening wall hubs.
Step 1:
After removing Blind from case, unfold each corner
outward and lay flat on ground (fig 1). Be sure material is
NOT twisted or overlapping ends of poles.
fig 1
fig 2
fig 2a
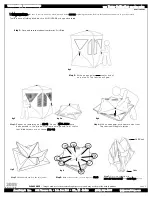
fig 3
Step 3:
Lift top of blind so that you have access
to center hub pole of one of the walls (fig 3).
Step 4:
C ontinue around blind, pulling each hub of walls.
Until all but door side hub is extended.
After standing blind upright, spread each side.
Use stakes and High-Wind Tie-Downs to secure blind to ground.
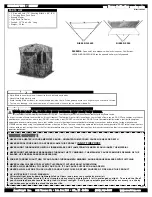
PLEASE NOTE:
Images used are for demonstration purposes only and may not depict the actual product.
IMPORTANT:
Make sure door zippers are fully
closed so wall will keep tension.
Now pull DOOR HUB out.
fig 4


