S
SE
ET
T U
UP
P IIN
NS
ST
TR
RU
UC
CT
TIIO
ON
NS
S
PLEASE NOTE:
Images used are for demonstration purposes only and may not depict the actual product.
S
Stte
ep
p 3
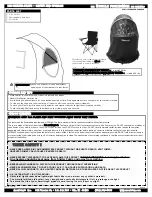
3:: Grab steel bands from behind chair and pull forward until blind is fully covering chair ((ffiig
g 3
3 a
an
nd
d 3
3a
a))
S
Stte
ep
p 5
5::
Position Ice Shelter over hole in ice with back of
shelter toward prevailing wind. This will keep shelter from
folding back unexpectedly when entering or exiting.
A
A m
m e
e rr ii s
s tt e
e p
p ®
® II n
n c
c .. 9
9 0
0 1
1 T
T a
a c
c o
o m
m a
a C
C tt .. •
• P
P .. O
O .. B
B o
o xx 1
1 8
8 9
9 •
• C
C ll ii o
o ,, M
M II 4
4 8
8 4
4 2
2 0
0 (( 8
8 1
1 0
0 )) 6
6 8
8 6
6 -- 4
4 0
0 3
3 5
5 w
w w
w w
w .. a
a m
m e
e rr ii s
s tt e
e p
p .. c
c o
o m
m
©2008 (rev 8/08)
fig 2
fig 2a
fig 2b
Step 2:
Unbuckle Quick-Connect ((ffiig
g 2
2)) and open chair ((ffiig
g 2
2a
a a
an
nd
d 2
2b
b)).
T
T H
H E
E
M
M O
O B
B II L
L E
E F
F II S
S H
H E
E R
R M
M A
A N
N
II C
C E
E S
S H
H E
E L
L T
T E
E R
R S
S
Models #20003A & #20004A
Step 1:
Remove Ice Shelter from Back Pack.
S
Stte
ep
p 4
4:: From inside shelter, insert fiber pole into
pocket located at bottom center below window.
Insert other end of fiber pole into top pocket and
snap shut.
fig 3
fig 3a
Fiber Pole
Top Pocket
Bottom Pocket
S
Stte
ep
p 6
6::
To secure shelter in windy conditions, stake shelter
to ice using ice stakes provided. Screw in four ice stakes
through grommet holes in rear skirting and into ice.
S
Stte
ep
p 7
7::
Once inside, secure front of shelter with one ice stake to detachable
grommet hole located at bottom. Once this is secure, you can enter and exit
shanty by unclipping grommet buckle to lift open or shut front of shelter ((ffiig
g 7
7a
a)).
fig 4
fig 5/6
fig 7
fig 7a
Page 2


