A
A m
m e
e rr ii s
s tt e
e p
p ®
® II n
n c
c .. 9
9 0
0 1
1 T
T a
a c
c o
o m
m a
a C
C tt .. •
• P
P .. O
O .. B
B o
o xx 1
1 8
8 9
9 •
• C
C ll ii o
o ,, M
M II 4
4 8
8 4
4 2
2 0
0 (( 8
8 1
1 0
0 )) 6
6 8
8 6
6 -- 4
4 0
0 3
3 5
5 w
w w
w w
w .. a
a m
m e
e rr ii s
s tt e
e p
p .. c
c o
o m
m
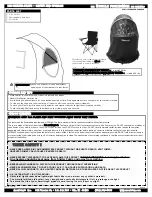
Step 3:
Close chair by pulling up on
seat and bring legs together
((ffiig
g 3
3)).
Step 5:
Place Ice Shelter into backpack.
PLEASE NOTE:
Images used are for demonstration purposes only and may not depict the actual product.
T
TA
AK
KE
E--D
DO
OW
WN
N IIN
NS
ST
TR
RU
UC
CT
TIIO
ON
NS
S
©2008 (rev 8/08)
T
T H
H E
E
M
M O
O B
B II L
L E
E F
F II S
S H
H E
E R
R M
M A
A N
N
II C
C E
E S
S H
H E
E L
L T
T E
E R
R S
S
Models #20003A & #20004A
!!
!!
IIM
MP
PO
OR
RT
TA
AN
NT
T::
IIM
MP
PO
OR
RT
TA
AN
NT
T::
Be sure to remove all ice or accumulated snow before beginning take down.
Step 1:
Remove Ice Stake from Interior Grommet and fiber pole from front of Shelter
then Ice Stakes from Exterior Grommet.
Step 2:
Lift front of Shelter up and over back of chair so that shelter falls behind chair
((ffiig
g 1
1 a
an
nd
d 2
2))
.
Step 4:
Place cinch strap around shelter
and snap together to keep Shelter closed ((ffiig
g 4
4)).
fig 1a
fig 1
fig 2
fig 2a
fig 3
fig 4
Page 3


