background image

5

B345518012PCOM

1

10 /24 

?? www.ameriwood.com ??

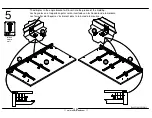
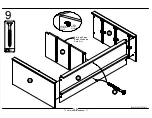
The dimples in the angle bracket will insert into the groove of the molding. 

Los hoyuelos en el soporte angular serán insertados en las honduras de la moldura.

Les fossettes de l'équerre s'insèreront dans la rainure de la moulure. 

8

6

x

A

B

H

H

8

8

black

negra

noir

Summary of Contents for 5518012PCOM

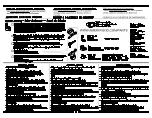
Page 1: ... gardent pas de pièces If a part is missing or damaged please visit our website or call our toll free customer service line We will gladly ship your replacement parts FREE of charge Si las partes están perdidas o dañadas Por favor visite nuestra página de Internet o llame a nuestra línea de teléfono gratis de Servicio al Cliente Nosotros le enviaremos sus repuestos sin cargo adicional serán totalm...

Page 2: ......

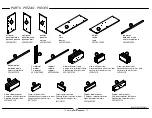
Page 3: ...jo ceinture inférieure 35518012070 support soporte support 35518000090 2 moldings 2 moldes 2 moulures 35518012080 4 lower left drawer sides 4 izquierdo cajones inferior a los lados 4 gauche côtés de inférieur tiroir 35518302110 4 lower right drawer sides 4 derecho cajones inferior a los lados 4 droit côtés de inférieur tiroir 35518302120 2 upper left drawer sides 2 izquierdo cajones superior a los...

Page 4: ...2 12 A54000 spacer bracket soporte de espacios support de cale x 3 6 A52890 handle el tirón poignée x 4 10 A22500 cam lock cerradura de leva serrure de came x 5 10 cam bolt A22510 perno de leva boulon de came x 6 12 A11070 euro screw tornillo euro vis euro x 7 18 A53600 angle bracket support de l angle anaquel del ángulo x 8 36 A12210 1 2 pan head black cabeza redondo 1 2 negra tête ronde noir x 9...

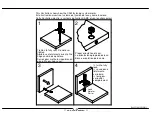
Page 5: ... No haga encima de apriétese Serrez pour mettre le siège bien en place Ne pas trop serrer Proper orientation of cam La orientación apropiada de leva Bonne orientation de la came 1 This illustration shows how the CAM fastening system works Esta ilustración muestra el sistema de fijación de leva y como funciona Cette illustration montre le système de fixation CAME et son fonctionnement Lock Apretar ...

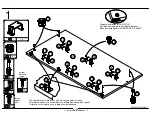
Page 6: ...anel El soporte angular será encontrado con el bordo de enfrente del panel L équerre sera à égalité avec le bord avant du panneau Proper orientation of CAM LOCK Posición correcta de la cerradura de leva Bonne orientation de la SERRURE DE CAME 2 2 2 2 2 2 18 18 18 18 18 18 18 18 18 18 18 A 7 8 x 18 12 yellow amarillo jaune black negra noir ...

Page 7: ...5518012PCOM1 7 24 www ameriwood com 1a x 3 x 6 6 A 1a 1a 1a 1a 6 6 6 6 6 6 6 Start with the 2nd hole behind the roller Comience con 2 orificio detrás del rodillo Commencez avec 2ème trou derrière le rouleau ...

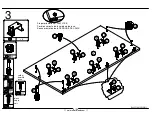
Page 8: ...2 6 x 4 2 x 5 2 7 3 x 8 3 x 4 5 18 Proper orientation of CAM LOCK Posición correcta de la cerradura de leva Bonne orientation de la SERRURE DE CAME B 2 2 2 2 2 2 18 18 18 18 18 18 18 18 18 18 18 7 8 black negra noir x 18 12 yellow amarillo jaune ...

Page 9: ...5518012PCOM1 9 24 www ameriwood com x 6 6 1b x 3 6 B 6 6 6 6 6 1b 1b 1b 1b 6 Start with the 2nd hole behind the roller Comience con 2 orificio detrás del rodillo Commencez avec 2ème trou derrière le rouleau ...

Page 10: ...es in the angle bracket will insert into the groove of the molding Los hoyuelos en el soporte angular serán insertados en las honduras de la moldura Les fossettes de l équerre s insèreront dans la rainure de la moulure 8 6 x A B H H 8 8 black negra noir ...

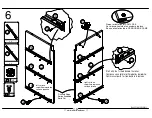
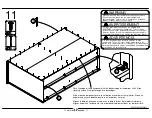
Page 11: ... orientation de la SERRURE DE CAME Start with the 1st hole behind the roller Comience con el primer orificio detrás del rodillo Commencer par le 1er trou derrière le rouleau 1a 1a 1a Finished Edge Borde Acabado Bord Fini 1a 1b 1b 1b 1b 4 12 12 12 12 C C left surface superficie izquierda surface gauche right surface superficie derecha surface droite ...

Page 12: ...7 B345518012PCOM1 12 24 www ameriwood com x 5 6 7 4 x 8 8 x x 17 1 17a 17b 5 5 7 8 8 Finished Edge Borde Acabado Bord Fini D F 17a 17b black negra noir ...

Page 13: ...ww ameriwood com 4 4 x 4 4 7 8 x 8 14 x Proper orientation of CAM LOCK Posición correcta de la cerradura de leva Bonne orientation de la SERRURE DE CAME 7 7 7 8 8 8 8 Finished Edge Borde Acabado Bord Fini G E I black negra noir ...

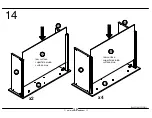
Page 14: ...9 B345518012PCOM1 14 24 www ameriwood com 13 x2 UNLOCK LOCK APRETAR DESAPRETAR OUVRIR SERRER A B C E Finished Edge Borde Acabado Bord Fini 13 ...

Page 15: ...10 B345518012PCOM1 15 24 www ameriwood com UNLOCK LOCK APRETAR DESAPRETAR OUVRIR SERRER A C B D ...

Page 16: ...venir instable s effondrer subitement et ou causer des blessures graves tightened firmly Failure to do so could cause instability All nails must be driven into the parts straight and Please make sure that the Backs are attached securely ADVERTENCIA AVERTISSEMENT WARNING 16 x 42 15 Flush the edge of the back panel with the bottom edge of the bottom shelf Align squarely and nail straight through int...

Page 17: ...2PCOM1 17 24 www ameriwood com 1c x 6 1d x 6 x 9 24 x 10 24 x 12 x24 12 12 12 12 x2 x4 1c 1c 1d 1d 9 9 9 9 9 9 9 10 10 10 10 10 10 Finished Edge Borde Acabado Bord Fini Finished Edge Borde Acabado Bord Fini K L N O ...

Page 18: ...13 B345518012PCOM1 18 24 www ameriwood com x 10 24 15 18 x x2 x4 N O K L 10 10 J Q 15 15 ...

Page 19: ...14 B345518012PCOM1 19 24 www ameriwood com O N Q J L K R R raw surface superficie cruda surface crue raw surface superficie cruda surface crue x2 x4 ...

Page 20: ...15 B345518012PCOM1 20 24 www ameriwood com x2 x4 x 11 24 11 11 11 11 O Q N L K J M P ...

Page 21: ...ancrage mural 17d dans le trou jusqu à ce qu il soit à égalité avec le mur Fixez le support mural 17a à l ancrage mural 17d avec la vis 17c Option 1 Securely screw 17c into solid area of the wall as shown Opción 1 Firmemente el tornillo 17c en el área sólida de la pared como mostrado L option 1 Solidement vis 17c dans région solide du mur comme montré Please Note The top of the unit is not shown f...

Page 22: ...u tiroir rouleau x 3 6 x 14 12 3 14 J J J J Q Q Notice Install the drawers by starting with the bottom drawers and working up to the upper drawers AVISO Instale a los cajones empezando por los cajones de la parte inferior y trabajar hasta a los cajones superiores Avis Installez les tiroirs en commençant par les tiroirs du bas et en travaillant aux tiroirs de la partie supérieures ...

Page 23: ...se and or serious injury Esta unidad ha sido diseñada para soportar la carga máxima anotada El exceder estos límites puede causar inestabilidad colapsarse y o causar serias lesiones Ce meuble a été conçu pour supporter les charges maximales indiquées En excédant ces limites de charge le meuble pourrait devenir instable s effondrer et ou causer des blessures graves 50 lbs 22 7 kg 25 lbs 11 3 kg 25 ...

Page 24: ...his instruction manual 2 This certificate applies to compliance of this product with the CPSC Ban on Lead Containing Paint 16 CFR 1303 3 This product is distributed by Ameriwood Industries Inc 410 East First Street South Wright City MO 63390 636 745 3351 4 Site of Manufacture Tiffin OH 5 See front page of instruction manual for date of manufacture ...

Reviews: