15
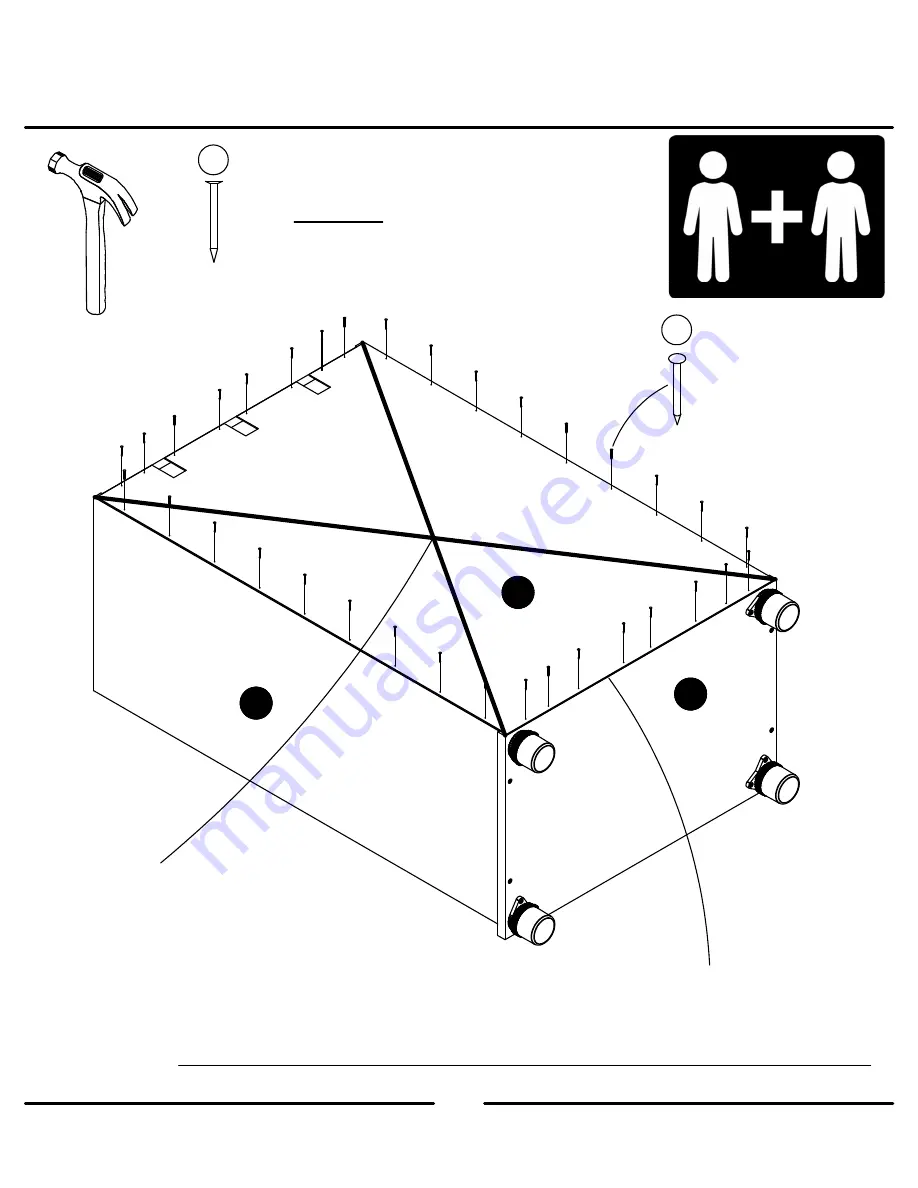
STEP 7
Carefully place unit on its front side.
raw surface
Assure that the unit is square.
Distance from corner to corner must be
equal as shown.
Flush
the
edge
of
the
back
panel
with
the
bottom
edge
of
the
bottom
shelf.
Align
squarely
and
nail
straight
through
into
back
edges.
IMPORTANT!
THE BACK PANEL IS A STRUCTURAL PART OF THIS UNIT AND MUST BE INSTALLED PROPERLY.
CAUTION:
When turning unit over to attach back
panel, the slides will slide out.
7
(x34)
#A21110
B
D
Q
7
Summary of Contents for 6421403COM
Page 4: ...4...
Page 13: ...13 STEP5 A B C D UNLOCK LOCK 1st 2nd x4 A23030 finished edges will face up 8 8 8 8 8...
Page 16: ...16 STEP8 x6 A12120 3 Inner slide removed from step 2 3 3 3 3 3 F G 3...
Page 17: ...17 STEP9 x4 A22620 Proper orientation of CAM LOCK Tip Assembly Quick 1 1 1 1 1 F G...
Page 18: ...18 STEP10 2 6 x2 A21520 x4 A22610 Approx 7 16 6 2 2 2 2 6 6 E M...
Page 19: ...19 STEP11 UNLOCK LOCK F G M E...
Page 21: ...21 STEP13 11 11 x2 A17400 x1 A50395 10 10...
Page 22: ...22 STEP14 10 11 x4 A17400 x2 A50395 x4 A65700 15 11 10 10 15 15 P x2...


