background image

B

WARNING

ameriwoodhome.com

Follow Ameriwood Home


Keep this Assembly Manual for future reference

- Anchor unit to stud in wall

- Do Not allow children to climb on unit

- Put heavy items on lower shelves or drawers

- Two people required for assembly

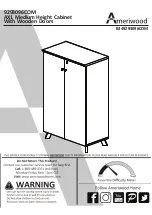
9293096COM

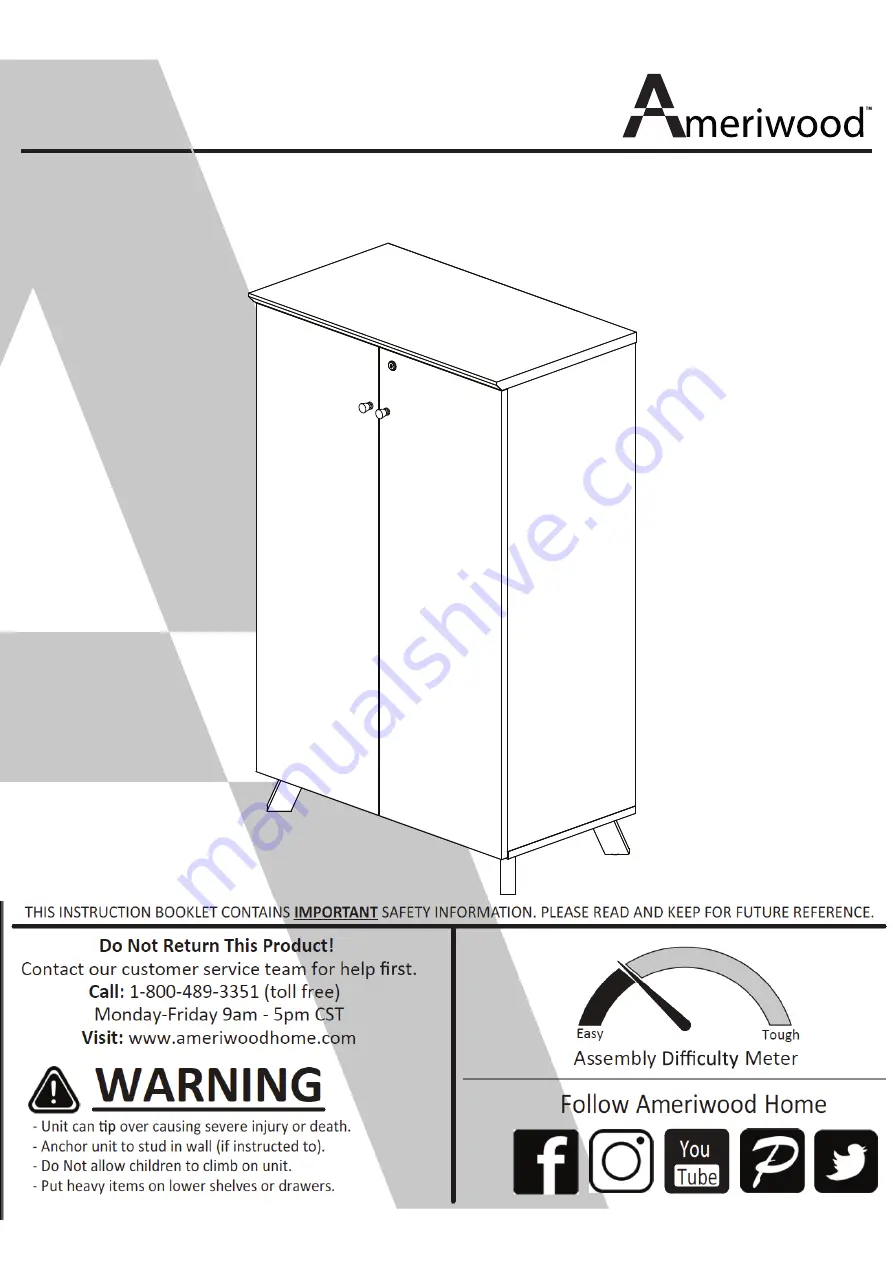
AX1 Medium Height Cabinet

With Wooden Doors

B

B349293096COM

Summary of Contents for AX1 9293096COM

Page 1: ...his Assembly Manual for future reference Anchor unit to stud in wall Do Not allow children to climb on unit Put heavy items on lower shelves or drawers Two people required for assembly 9293096COM AX1...

Page 2: ...attempting assembly Compression dowels are lightly tapped in with a hammer Slides are labeled with a R right and L left for proper placement Make sure to always face the point on the top of the Cam Lo...

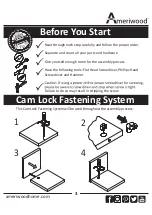
Page 3: ...parts and hardware Give yourself enough room for the assembly process Have the following tools Flat Head Screwdriver Phillips Head Screwdriver and Hammer Failure to do so may result in stripping the...

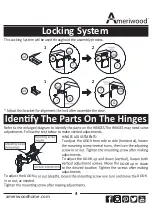
Page 4: ...will be used throughout the assembly process 1 adjustments Follow the text below to make needed adjustments HINGES ADJUSTMENTS To adjust the DOOR from side to side horizontal loosen adjustments To ad...

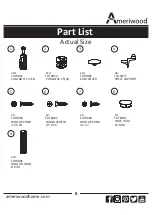
Page 5: ...ANEL B x1 T9293096020 BOTTOM PANEL C x2 T9293096030 ADJUSTABLE SHELF D x1 T9293096040 LEFT SIDE PANEL E x1 T9293096050 RIGHT SIDE PANEL F x1 T9293096060 BACK PANEL G x1 T9293096070 LEFT SIDE DOOR H x1...

Page 6: ...1 CAM COVER 4 x8 TAT0071 SHELF SUPPORT 1 x14 TAT0051 CAM BOLT 15 18 2 x14 TAT0052 CAM LOCK 15 18 7 8 5 x2 TAT0001 WOOD SCREW 6 3 5 X 16 9 x4 TAT0003 WOOD SCREW 3 5 X 18 x12 TAT0091 WOOD DOWEL 8 X 30 x...

Page 7: ...AT0037 HINGES WITH SCREW 13 x1 TAT0033 CABINET LOCK 10 x4 TAT0044 ADJUSTABLE GLIDE M6 X 25MM X 22MM 11 x4 TAT0101 BOLT M6 M6 X 35MM 16 14 x1 TAT0034 CATCH KIT TAT0121 L KEY M4 x1 15 x2 TAT0111 KNOB HA...

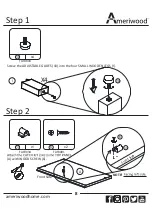
Page 8: ...ameriwoodhome com Screw the ADJUSTABLE GLIDES 10 into the four SMALL WOODEN LEGS I I X4 A Step 1 10 TAT0044 x4 Step 2 6 TAT0001 x2 14 TAT0034 x1 10 Front Side NOTE A with WOOD SCREW 6 6 14 Front Side...

Page 9: ...odhome com Fasten the SMALL WOODEN LEGS I to the BOTTOM PANEL B IMPORTANT Align holes of SMALL WOODEN LEGS I with proper holes of BOTTOM PANEL B I B I I Step 3 11 TAT0101 x4 8 TAT0081 x4 16 TAT0121 x1...

Page 10: ...10 ameriwoodhome com D E F Insert WOOD DOWELS 9 into PANELS D E F Step 4 9 TAT0091 x12 9...

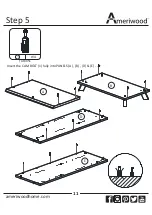
Page 11: ...11 ameriwoodhome com A B D E Step 5 1 TAT0051 x14 Insert the CAM BOLT 1 fully into PANELS A B D E...

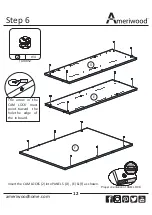
Page 12: ...oodhome com Proper orientation of CAM LOCK Tip Quick D E F Step 6 2 TAT0052 x14 2 Insert the CAM LOCKS 2 into PANELS D E F as shown The arrow in the CAM LOCK must point toward the hole the edge of the...

Page 13: ...13 ameriwoodhome com Step 7 D F E 3 TAT0061 x6 3 Assemble Panels D F to E Turn the CAM LOCKS 2 clockwise to secure the parts Insert CAM COVERS 3 into the CAM LOCKS 2...

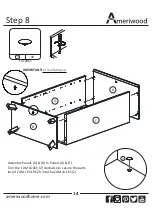
Page 14: ...4 ameriwoodhome com Step 8 3 TAT0061 x8 3 A B Assemble Panels A B to Panels D F Turn the CAM LOCKS 2 clockwise to secure the parts Insert CAM COVERS 3 into the CAM LOCKS 2 F D IMPORTANT Arrow facing u...

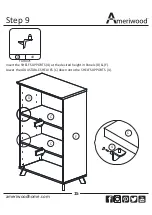
Page 15: ...15 ameriwoodhome com Step 9 C C C 4 4 TAT0071 x8 Insert the SHELF SUPPORTS 4 at the desired height in Panels D F Lower the ADJUSTABLE SHELVES C down onto the SHELF SUPPORTS 4 F D...

Page 16: ...16 ameriwoodhome com Step 10 12 TAT0037 x6 G H 12 Install the HINGES WITH SCREW 12 onto the DOORS G H...

Page 17: ...17 ameriwoodhome com Step 11 G D 12...

Page 18: ...oodhome com Step 12 IMPORTANT Align holes of HARDWARE 13 14 with proper marking holes of LEFT SIDE DOOR G 14 TAT0034 x1 13 TAT0033 x1 7 13 14 G 7 TAT0004 x4 BRACKET 14 to the LEFT SIDE DOOR G with WOO...

Page 19: ...19 ameriwoodhome com Step 13 H E 12...

Page 20: ...e com Step 14 5 TAT0003 x4 13 TAT0033 x1 H 13 14 7 5 7 TAT0004 x2 14 TAT0034 x1 DOOR H with WOOD SCREW 5 DOOR H with WOOD SCREW 7 IMPORTANT Align holes of HARDWARE 13 14 with proper marking holes of L...

Page 21: ...21 ameriwoodhome com Step 15 15 TAT0111 x2 15 to the DOORS G H...

Page 22: ...G Serious or fatal crushing injuries Install tipover restraint provided Place heaviest items in the lowest cabinet accomodate do not set TVs or other heavy objects on the top of this product only redu...

Page 23: ...of this product with the CPSC Ban on Lead Containing Paint 16 CFR 1303 3 This product is distributed by Dorel Home Furnishings Inc 410 East First Street South Wright City MO 63390 636 745 3351 4 Site...

Page 24: ...ve deals and discount codes Quick and easy replacement part service To register your product visit Ameriwoodhome com Visit your local retailer s website rate your purchased product and leave us some f...

Page 25: ...rrecta Aseg rese de que siempre este el punto locaizado en la parte superior de bloqueador de leva este volteadohacia borde exterior todos los clavos para el panel de atras y distribuirlos por igual E...

Page 26: ...o Encuestas alec su voz entre su comunidad C digos de ofertas y descuentos exclusivos F cil y r pido servicio de partes de remplace Para registrar su producto visite ameriwoodhome com Clasi casi n de...

Page 27: ...u es d un R droit et d un L gauche pour un bon placement Assurez vous toujours de faire face la pointe situ sur le haut de la Serrure de Came vers le bordext rieur U er tous les clous fournis pour le...

Page 28: ...sur les nouveaut s Sondages avoir une voix au sein de notre communaut O res exclusives et codes promo Service de pi ces de rechange rapide et facile Pour enregistrer votre produit visitez ameriwoodho...

Reviews: