www.amico.com 17
Section 3: Installation to Monitor and Accessory
Monitor Mounting: VESA 75/100
WARNING:
ENSURE THAT THE AHM ARM IS IN THE HIGHEST VERTICAL POSITION AND LOCKED BEFORE
MOUNTING OR REMOVING DEVICES FROM THE FALCON WORKSTATION.
NOTE:
See page 29 for instructions on locking and unlocking the AHM Arm.
NOTE:
4x M4 screws are provided for mounting the display to the VESA Head, different screws may be needed if
the provided screws are not the right size, standoffs may be needed depending on the hole pattern on the
display.
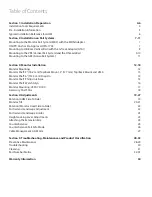
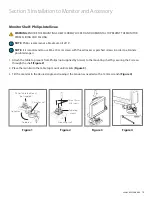
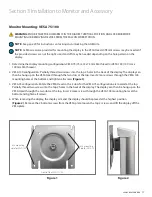
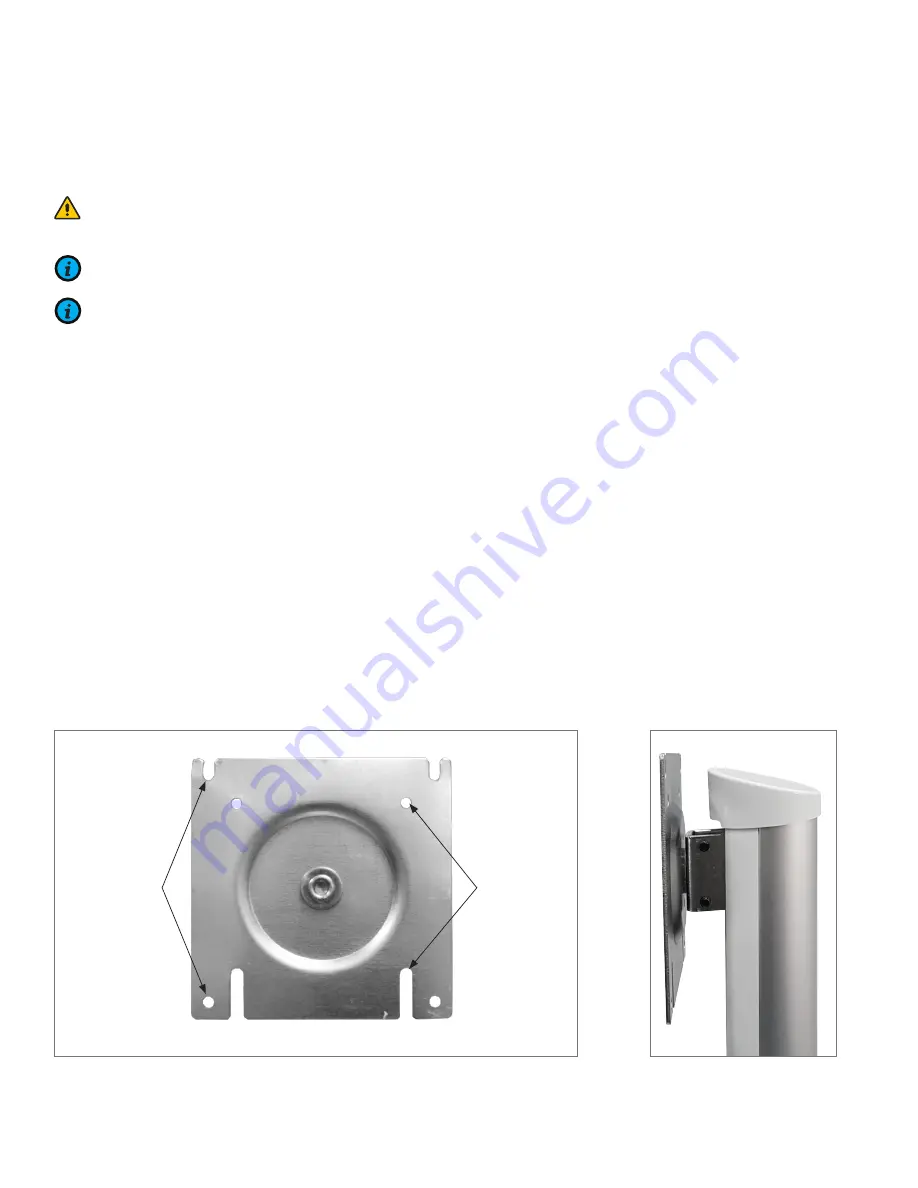
1. Determine the display mounting configuration. VESA 75 (75 mm x 75 mm M4 thread) or VESA 100 (100 mm x
100 mm M4 threads).
2. VESA 100 configuration: Partially thread two screws into the top 2 holes in the back of the display. The display can
then be hung up on the VESA Head through the two slots at the top. Insert 2 more screws through the VESA 100
mounting holes at the bottom and tighten all screws
(Figure 1)
.
3. VESA 75 configuration: Rotate the VESA Head so the 2 slots for the VESA 75 configuration are located at the top.
Partially thread two screws into the top 2 holes in the back of the display. The display can then be hung up on the
VESA Head through the two slots at the top. Insert 2 more screws through the VESA 100 mounting holes at the
bottom and tighten all screws.
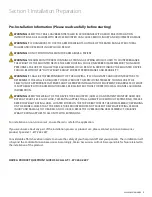
4. When removing the display, the display arm and the display should be placed at the highest position
(Figure 2)
. Remove the 2 bottom screws from the VESA plate, loosen the top 2 screws, and lift the display off the
VESA plate.
Front of the VESA 75/100
M4 mounting
hole for VESA 75
M4 mounting
hole for VESA 100
Figure 1
Figure 2

