1
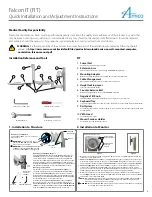
Falcon IT (FIT)
Quick Installation and Adjustment Instructions
Medical Facility Responsibility
Preventive maintenance checks must be performed regularly to maintain the quality and performance of this product. Any parts that
may be broken, missing, worn, distorted, or contaminated in any way should not be used and all affected parts should be replaced
immediately. Should the necessity of any repair be suspected; please contact your local Amico distributor.
!
WARNING:
It is the responsibility of the end user to ensure all aspects of the installation are covered by following the full
manual at:
https://www.amico.com/sites/default/files/product/downloads/amico-aa-wall-mounted-computer-
workstation-falcon-manual.pdf
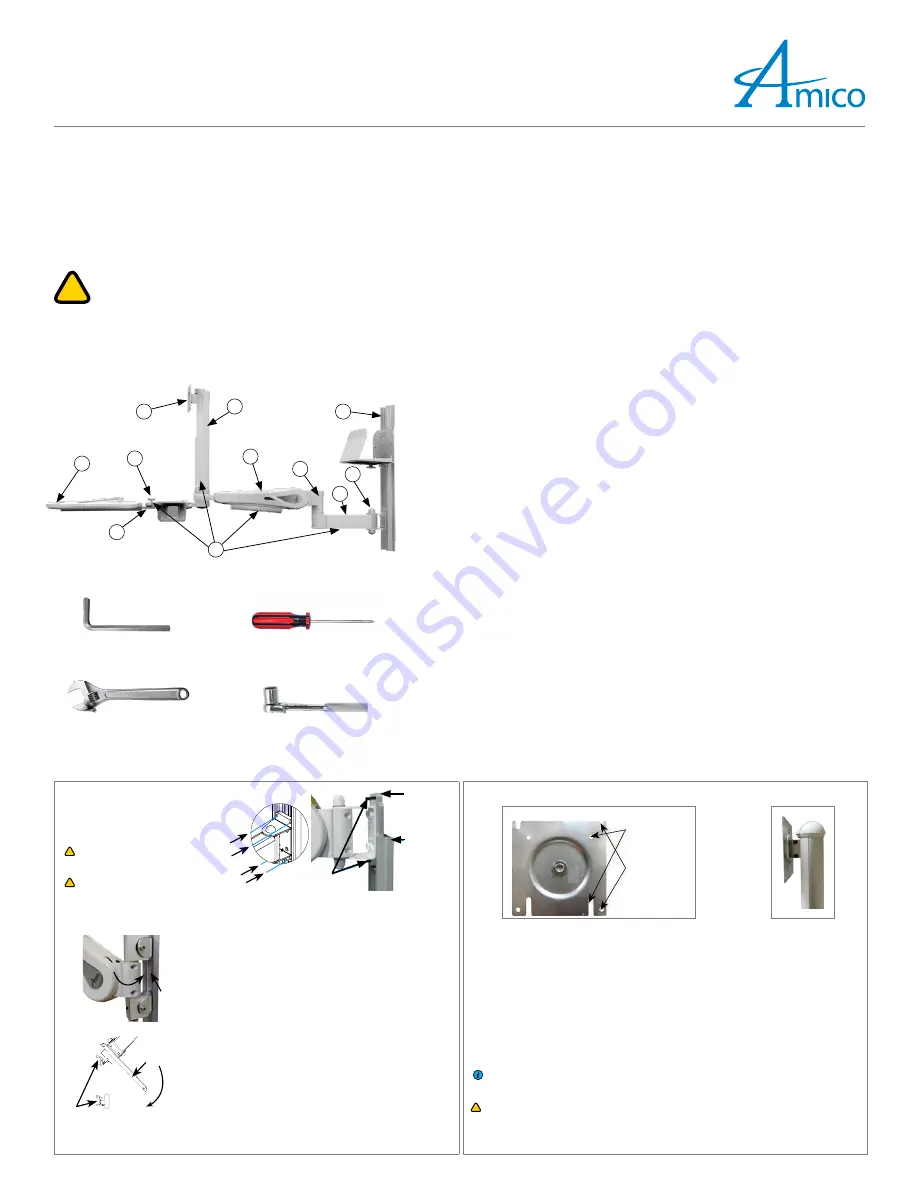
Installation Reference and Tools
Hex Key (1/8", 3/16", M3, M4)
#2 Phillips Head Screwdriver
Adjustable Wrench
Socket Wrench (12 mm, 1/2")
FIT
1.
Swivel Post
For mounting and positioning of monitor.
2.
Extension Arm
Extension arm to increase movement range of AHM ARM (if applicable).
3.
Mounting Adapter
Different mounting adapters will be provided based on the rail system used.
4.
Cable Management
Manage cables for the FIT station for a clutter-free environment.
5.
Height-locking Lever
Locks arm at the desired height.
6.
Counter-balance Bolt
Balance the weight of the monitor on the AHM ARM of the FIT.
7.
Negative Tilt Knob
Tilts the keyboard tray’s back downwards for proper ergonomics in certain cases.
8.
Keyboard Tray
Location for keyboard & mouse. (2x mouse pads, 12x dual lock coins provided; wrist rest if purchased).
9.
Rail System
For mounting the FIT station, varies depending on user’s selection. Rail is packed separately and must
be installed first.
10.
VESA Head
For mounting the monitor.
11.
Mouse/Scanner Holder
For storing mouse and hand-held scanners.
1
5
3
7
10
2
6
9
4
8
11
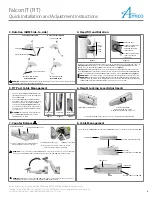
1. Installation to Structure
2. Installation to Monitor
Mounting on an MRS Rail
4x
1/4-20 SET SCREWS
. Use 1/8" (3 mm) Hex
Key to tighten.
!
WARNING:
Never attempt to mount or
remove the
AHM ARM
from the
MRS RAIL
when a monitor is installed.
!
WARNING:
Support
AHM ARM
until the
SET
SCREWS
are tightened,
AHM ARM
can slide
down when
SET SCREWS
are not tightened.
VRS
RAIL
STANDARD
MON-ADAPTER
MRS RAIL
SET SCREWS
3 mm
ARS RAILS
MOUNTING
ADAPTER
CHANNEL
ARS
ADAPTER INSTALLED
Mounting on a VRS/Ohmeda Rail
Angle the
AHM ARM
from the left of the
CHANNEL
and guide the
ADAPTERS
into the groove of the
CHANNEL
. Tighten
SCREW
with
a 3/16" Hex Key when
V-ADAPTER
is at the desired height. When
tightened, the
SCREW
will protrude from the other side. Fasten the
NUT
to the
SCREW
to secure the
V-ADAPTER
. If the
NUT
cannot be
installed, the
ADAPTER
is not properly engaged. Check that all
NUTS
and
SCREWS
are tightened to ensure the
V-ADAPTER
is locked.
Mounting on a Headwall
Pop out the cover from the
MOUNTING ADAPTER CHANNEL
to
access the
SCREWS
. Remove the 2x
SCREWS
and
LOCK WASHERS
to
free bottom
MOUNTING ADAPTER
. Install it into the bottom
RAIL
by angling the upper lip into the inside lip of the
ARS RAIL
, pull the
lever back against the
MOUNTING ADAPTER
and push the
ADAPTER
into the
ARS
RAIL
. Once secure, release the lever.
Install the remaining
MOUNTING ADAPTER
into the top
ARS
RAIL
the same way as step 1, ensuring the 2x
HOLES
on the bottom
MOUNTING ADAPTER
can be seen through the
MOUNTING ADAPTER
CHANNEL
. Secure the
CHANNEL
to the bottom
MOUNTING ADAPTER
using the
SCREWS
and
LOCK WASHERS
you removed in step 1.
1. Determine the monitor mounting configuration.
VESA 75
(75 mm x 75 mm M4 thread) or
VESA 100
(100 mm x 100 mm M4 threads).
2.
VESA 100 Configuration:
2x
SCREWS
are partially threaded into the top 2x
HOLES
in the back of the
monitor. The monitor can then be hung up on the
VESA HEAD
through the 2x slots at the top. Insert
2x more
SCREWS
through the
VESA 100
MOUNTING HOLES
at bottom, tighten all
SCREWS.
(Figure 1)
3.
VESA 75 Configuration:
Rotate the
VESA HEAD
so the 2x slots for the
VESA 75
configuration are
located at the top. Partially thread 2x
SCREWS
into the top 2x
HOLES
in the back of the monitor.
The monitor can then be hung up on the
VESA HEAD
through the 2x slots at the top. Insert 2x more
SCREWS
through the
VESA 100
mounting holes at the bottom and tighten all
SCREWS
.
4. When removing the monitor, the monitor
ARM
and the monitor should be placed at the highest
position
(Figure 2)
. Remove the 2x bottom
SCREWS
from the
VESA PLATE
, loosen the top 2x
SCREWS
,
and lift the monitor off the
VESA PLATE
.
NOTE:
4x
M4 SCREWS
are provided for mounting the monitor to the
VESA HEAD
, different
SCREWS
may be needed if the provided
SCREWS
are not the right size, standoffs may be needed
depending on the hole pattern on the monitor.
!
WARNING:
Ensure that the
AHM ARM
is in the highest vertical position and locked before mounting
or removing devices from the FIT station.
FRONT OF THE VESA 75/100
M4 MOUNTING
HOLE FOR VESA 75
M4 MOUNTING
HOLE FOR
VESA 100
Figure 1
Figure 2


