1
Quick Installation and Maintenance Instructions
Worktop Light for Powered Hummingbird
(LCD & Laptop Models)
HMA-WT-LEDMNT
LCD Model Installation
INSTRUCTIONS:
1. Unlock the work surface using the provided key (lock is located on right side of work surface). Open
work surface by lifting surface from rear.
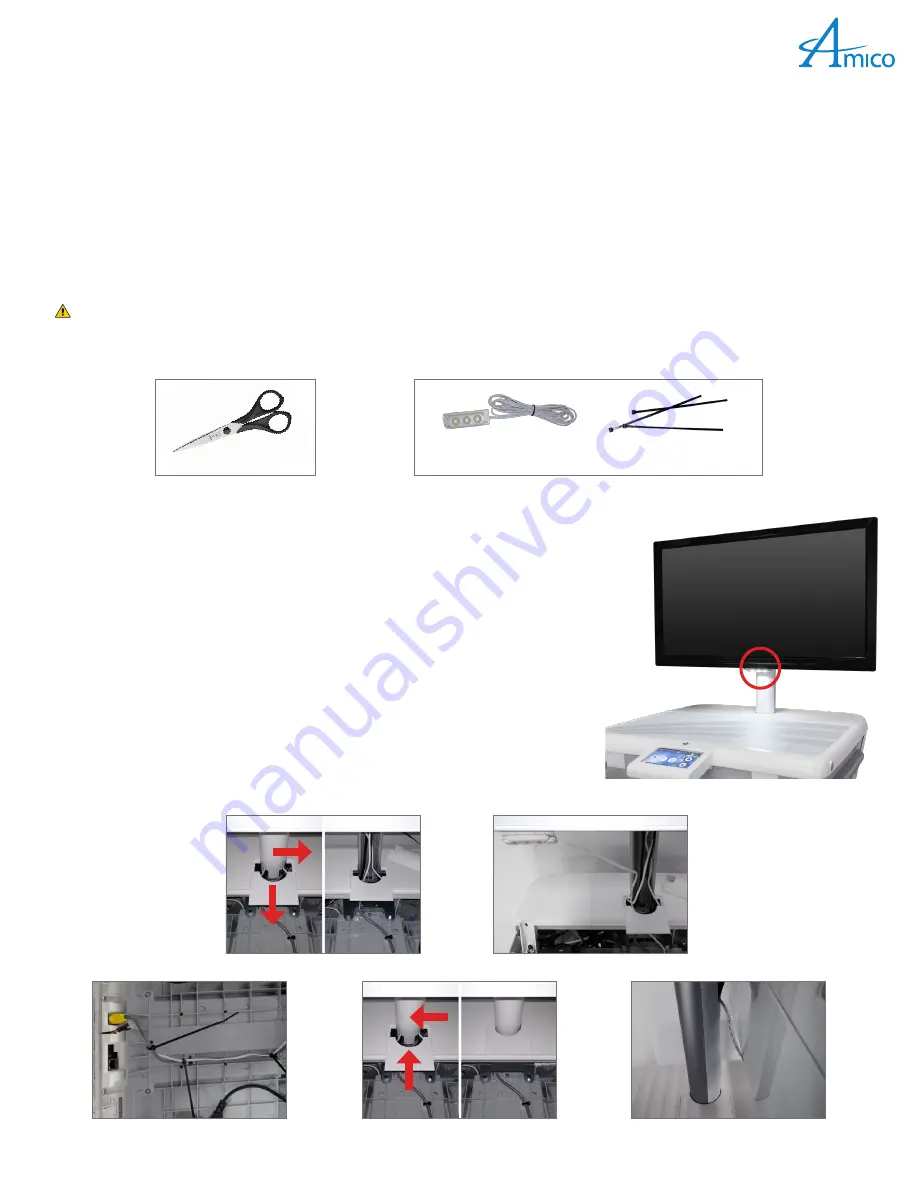
2. Open cord access door and remove cable management cover
(Figure 1)
.
3. Raise display to its MAXIMUM height on the display post.
4. Clean desired mounting location on bottom of display.
5. Remove tape backing from LED accessory and mount to desired location on display. For ideal bonding
results, apply moderate pressure to adhesive section (unfold/open LED) for 15 seconds.
6. Run LED Accessory cable through cord access door
(Figure 2)
.
7. Plug in connector and tie the LED cable to CAT5 cable using provided cable ties
(Figure 3)
.
8. Replace cord management cover, close the cord access door
(Figure 4)
.
9. Close and lock work surface.
10. Refer to
Enable LED
below.
WARNING:
It is the responsibility of the end user to ensure all aspects of installation are covered by following the full manual and reviewing warnings/notes
found at:
http://www.amico.com/products/workstations-wheels
Preventive maintenance checks must be performed regularly to maintain the quality and performance of this product. Any parts that may be broken, missing,
worn, distorted, or contaminated in any way should not be used and all affected parts should be replaced immediately. Should the necessity of any repair be
suspected; please contact your local distributor.
Figure 3
Figure 5
Figure 4
Medical Facility Responsibility
Figure 2
Installation Tools
Installation Reference
Scissors
Cable Tie x 3
Accessory LED with
mounting adhesive
Figure 1


