background image


For Suspended Ceiling 

Installations 

 
Remove the ceiling tile from the selected speaker location that is to be cut 
from the ceiling, and an adjacent ceiling tile for access.  
 
Installation 

1. Make sure that all the power is removed. 
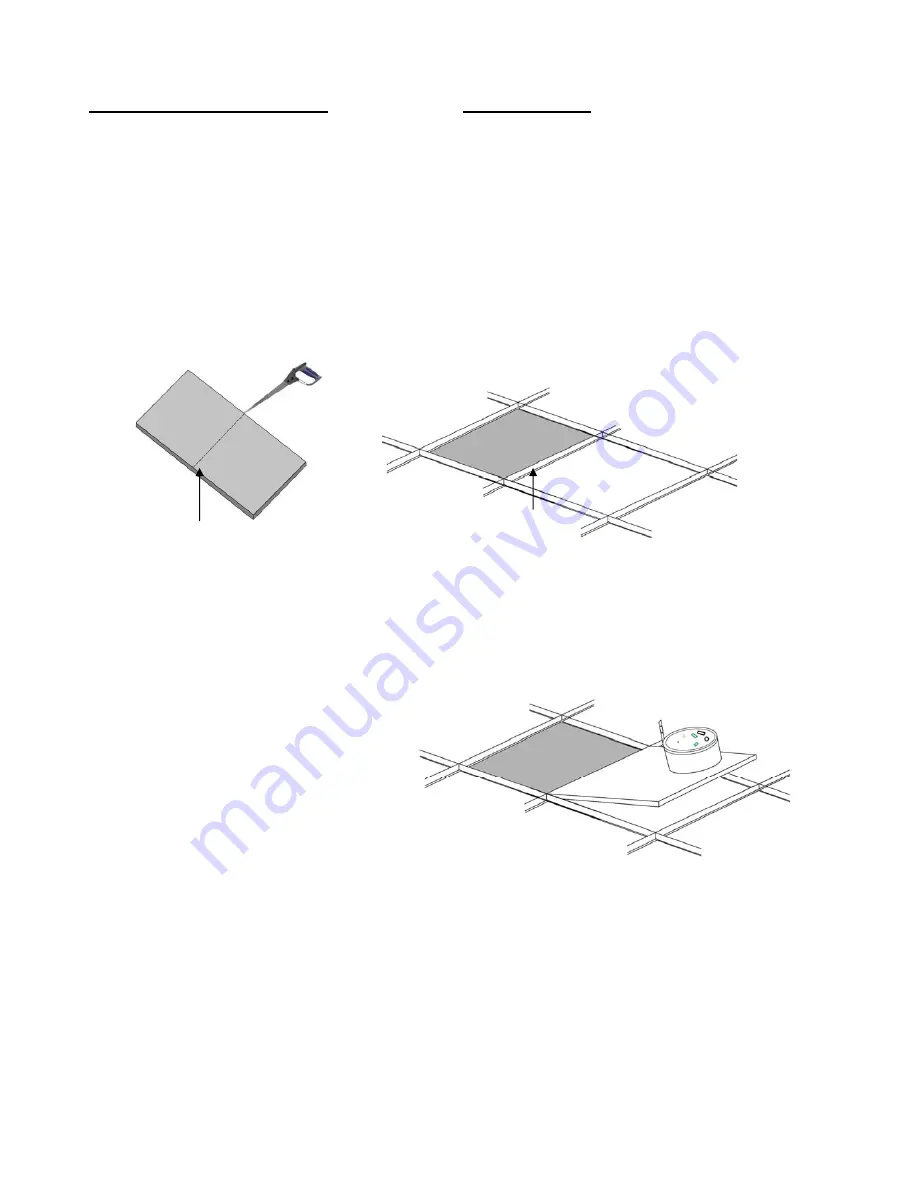
2. Remove and cut ceiling tile as sown below.  If the tile is 2’ x 4’, then 

you will need to cut the tile into half.  Install the T-rail crosspiece into 
the ceiling opening up against the cut tile, as shown below. 


Carefully measure 
and draw the line at 
the halfway point. 

Ceiling Tile

T-rail 
Crosspiece 
needs to be 
installed.

3.  Install the T-rail in a 
rectangular tile 

 When the 

ceiling uses rectangular tiles, 
install the T-rail crosspiece into 
the ceiling opening up against 
he cut tile. 
 
4.  Connect appropriate cables 
and plugs.  Connect the right 
plugs for the audio and power 
into the jacks on the top of the 
enclosure.  Different types of 
connections are shown on next 
page. 


Lay in the speaker appropriately as it 
is shown above.


Summary of Contents for DT64-B

Page 1: ...s speakers near water 6 Clean only with dry cloth 7 Do not block any ventilation openings Install in accordance with manufacturer s instructions 8 Do not install these speakers near any heat sources such as radiators heat registers stoves or other apparatus including amplifiers that produce heat 9 Use only attachments accessories specified by manufacturer 10 If the speakers have not been used for ...

Page 2: ...o the ceiling opening up against the cut tile as shown below Carefully measure and draw the line at the halfway point Ceiling Tile T rail Crosspiece needs to be installed 3 Install the T rail in a rectangular tile When the ceiling uses rectangular tiles install the T rail crosspiece into the ceiling opening up against he cut tile 4 Connect appropriate cables and plugs Connect the right plugs for t...

Page 3: ...e Ethernet signal wires through conduit terminate with RJ45 connector punch the one of the knock out where RJ45 jack is located than plug it into the speaker After the connection is made make sure to close the handy box with the cover provided The connection on the top as shown is to be connected to same zone speaker Channel 1 as the main active PoE speaker CONNECTOR MARKED IN PINK COLOR WILL BE T...

Page 4: ...close the handy box with the cover provided There is a single 2 position phoenix connection inside of the handy box THE PASSIVE SPEAKER THAT WILL BE THE SAME CHANNEL SPEAKER AS THE ACTIVE SPEAKER HAS PINK MARK ON THE PHOENIX CONNECTOR Warranty The speakers should be not open altered tampered without the consulting with AMK otherwise you will lose the warranty on the speaker If the speaker is a nee...

Reviews: