background image

- 8 -


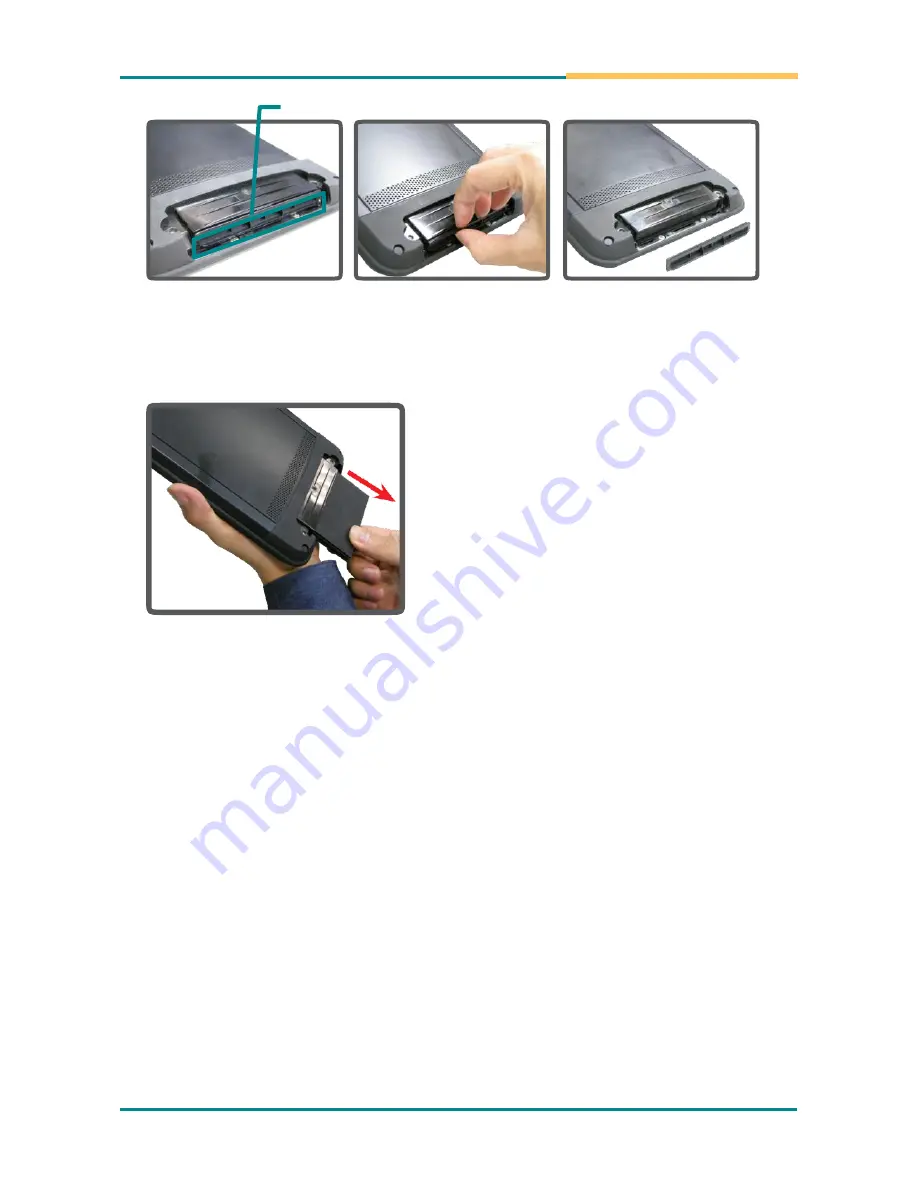
Protective lid


3. 

The battery is in a compartment inside. Its opening is 

covered by a protective lid. Insert the tip of your finger 
onto the top of the cover and remove it.


4. 

Then you can remove the battery 

from the chamber.


Summary of Contents for GT78-V

Page 1: ...GT78 V 7 85 Rugged Android Handheld Device Quick Start Guide Version 1 0 2018 08...

Page 2: ...rcumstances will the manufacturer be liable for any direct indirect special incidental or consequential damages arising from the use or inability to use the product or documentation even if advised of...

Page 3: ...oth 3 Be cautious of the tiny removable components when you use a vacuum cleaner to absorb the dirt on the floor 4 Never drop the components inside the device or get circuit board damp or wet 5 Be cau...

Page 4: ...the contents If any of the items is missing or appears damaged contact your local dealer or distributor The package should contain the following items 7 85 Rugged Android Handheld Device Rechargeable...

Page 5: ...an key 2 Barcode scanner 10 Speaker 3 Pogo pin 11 Battery 4 USB connector 12 Camera Flashlight 5 Front Camera 13 Rear Camera 6 Light sensor 14 NFC 7 Touch panel 15 Volume key 8 Microphone 16 SD card s...

Page 6: ...Follow the direction of red arrow to open the lid of mSD slot 3 Open the lid and insert the mSD card into the slot 4 Close the lid and follow the direction to lock 5 Follow the direction of red arrow...

Page 7: ...an electricaloutlet Warning Use only the power adapter that comes with your device Using a different power adapter may damage your device and may result in poor performance It may also invalidate warr...

Page 8: ...ve lid 3 The battery is in a compartment inside Its opening is covered by a protective lid Insert the tip of your finger onto the top of the cover and remove it 4 Then you can remove the battery from...

Page 9: ...the battery into the battery chamber Contact pins 3 To restore the protective lid make sure the lid is oriented as shown in the photo to the right 4 Align the top edge of the lid with the top of the o...

Page 10: ...i 5 Select the desired network 6 For the desired network touch CONNECT For the secure network enter the password and then touch CONNECT Enabling Bluetooth and Connecting to a Bluetooth To enable Bluet...

Reviews: