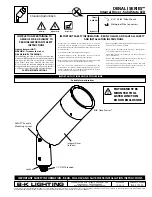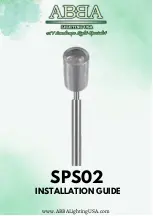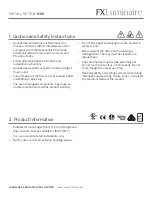
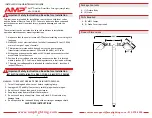


Install Shield and Glare Guard
4
Glare Guard
Shield
Set Screw
Fixture Body
Place the shield over the lamp and
thread onto the fixture. Attach the
glare guard back onto the shield
and secure with the set screw.
Tighten until snug.
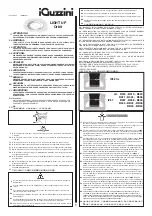
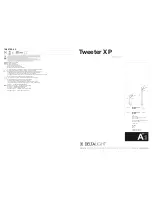
Install Lamp
3
MR11 Lamp
Socket
Insert the lamp with the correct
wattage and type marked on the
fixture label.
CAUTION: Do not exceed maximum
wattage marked on luminaire
label.
NOTE: DO NOT touch lamp with
bare hands. Use soft cloth to
handle lamp.
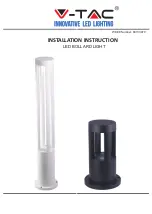
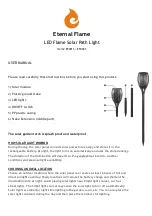
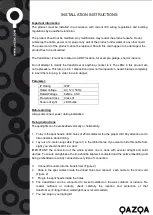
Install Stake
1
Board
Stake
Soil
Ground
Determine the desired location for
mounting the fixture. Hammer the stake
into the ground until flange of stake is
flush to grade. To avoid damage to the
stake, place a board on top of the stake
while hammering.
NOTE: If the ground is hard and the
stake is difficult to install, make a
crosscut in the ground using a flat
shovel.
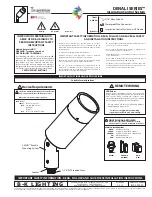
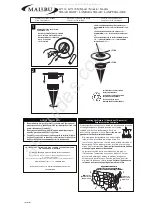
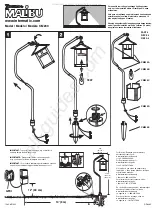
Remove Shield and Glare Guard
2
Glare Guard
Shield
Set Screw
Fixture Body
Loosen the set screw and remove
the glare guard from the shield.
Remove the shield from the
fixture.
- 5 -
- 4 -
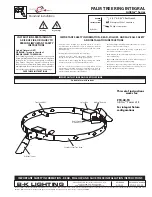
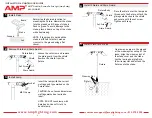
Install Fixture to Stake
5
Pigtail
Fixture
Wireway Slot
Clear away an area in the ground
at the wireway slot on top of the
stake. Align the wireway slot of
the stake cover and the stake.
Lay the luminaire pigtail into
the wireway slot and attach the
fixture onto the stake.
AMP
®
Dual Mini PinnaclePro Path Light (Lamp Ready)
APL-3015-B-BZ
INSTALLATION & MAINTENANCE GUIDE
w w w. a m p l i g h t i n g . c o m
customersupport@amplighting.com • 813.978.3900