Date: 02 Feb 2011
Ampair ® 300 (Mk1, “Pacific”) Wind Turbine Manual
CD 2300
Issue: 1.2
Page 23 of 34
- 23 -
© Ampair, April 2007
WARNING:
Do not service regulators with the wind turbine running. First stop the wind turbine, then
remove wires (or fuses), then service the regulator.
4.7.7 Batteries
We recommend large battery banks. A minimum 300 AmpHour battery bank is advisable, and 400 or 500
AmpHours would be sensible.
4.8 Final assembly
Assemble the blades onto the generator before putting the tailfin on and then putting the entire unit on the
mounting system.
CAUTION:
This is the reverse of the sequence that was advised in the previous manual. The tailfin
must
be put on the generator before putting the entire unit on the mounting system.
CAUTION:
The blades are very sharp. Safety gloves
must
be worn when handling blades.
The outline process is:
1.
Item checking
2.
Blade mounting
3.
Further steps
4.8.1 Item checking
The following items will be used during the assembly process. Check all are present before starting:
1
pcs
Generator / Hub
3
pcs
Rotor blade
1
pcs
Blade mounting bolt kit
The blade mounting bolt kit includes:
6
pcs
Blade mounting bolt
M6×30 SS socket button headed capscrew
12
pcs
Blade mounting washer
M6 large plain washer
6
pcs
Blade mounting nut
M6 hex nyloc nut
1
pcs
Allan key
4.0mm allan key
4.8.2 Blade Mounting
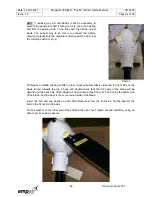
Put the generator body on a flat surface with the rear of the body down and the hub on the top. Put
the hub onto the generator and rotate the hex bolt until it is firmly engaged (see Photo 1).
Depending on whether you are being supplied with a new unit or whether you are replacing
blades/hub on an old unit this may already have been done for you.

