background image

9

Safety instructions

Ampler – Curt

There is a risk of injury from incorrect use of  

the trailer adapter!  

Incorrect assembly and improper use of the trailer adapter  

and the trailer can lead to accidents and serious injuries.


Read and follow the instructions for the trailer adapter.


Do 

not 

modify the Pedelec accessories.


Do 

not 

modify the Pedelec trailer adapter.


Only use original components for the assembly and use  

of the trailer adapter.

Corrosive cleaning agents

Injuries to eyes and skin may result from the use of corrosive 

cleaning agents!  

Cleaning agents can get into the eyes and on to the skin if  

used carelessly.


Adhere to the cleaning agent manufacturer's instructions  

for use.


Do 

not 

clean the Pedelec with corrosive cleaning agents.

Corrosive hydraulic fluid in the brake hoses

Injuries to eyes and skin may also be caused by the hydraulic 

fluid in the brake hoses!  


In case of damaged brake hoses: Avoid contact with any 

leaking hydraulic fluid.


In case of contact with spilled hydraulic fluid: Rinse  

exposed skin surfaces and eyes immediately with water.  

Get medical help.


Handle hydraulic fluid only according to the  

manufacturer's instructions.

Irritant lubricants

Injuries to eyes and skin may be caused by exposure to  

irritant lubricants. 

Aerosolized caustic lubricants can get on the skin  

and in the eyes.


Do 

not 

use aerosol based lubricants.


In case of contact with aerosolized lubricants: Rinse eyes 

immediately with water, rinse affected skin areas with water. 

Get medical help.

Tools with sharp edges and cutting edges

Cut and puncture injuries can result from sharp edges,  

spikes and cutting blades of tools!  

Improper and unprotected use of tools with sharp edges, 

spikes and cutting blades can injure hands and other parts  

of the body.


Use personal protective equipment if necessary.


Use tools with care.

Damaged rechargeable battery

Danger of fire and explosion! 

A damaged battery can self-ignite and explode.

If the electronic safety system fails, the residual voltage in the 

battery can trigger a short circuit.


Do 

not 

open the Pedelec battery casing.


Do 

not 

remove the battery yourself.


Do 

not 

disassemble or attempt to repair the battery yourself.


After a Pedelec has been dropped or subjected to an impact, 

deactivate the Pedelec for at least 24 hours (do 

not 

switch 

on the Pedelec, do 

not 

use it) and monitor the battery.


In the event of visible damage to the frame in the down tube 

area of the installed battery: 


y

Switch off the Pedelec immediately.


y

Do 

not 

switch the Pedelec on again.


y

Do 

not 

use the Pedelec.


If damage to the battery is suspected, store the Pedelec in a 

dry area and protect it from heat. 


y

Do 

not 

store the Pedelec near flammable materials.


Dispose of a Pedelec with a damaged battery appropriately.

The battery is installed within the frame, but water ingress might 

cause a short circuit. The battery may self-ignite and explode.


Never immerse the frame of the Pedelec, even partially,  

in water.


If there is a suspect of water ingress into the frame: 


y

Switch off the Pedelec immediately.


y

Do 

not 

switch the Pedelec on again.


y

Do 

not 

use the Pedelec.

High outdoor temperatures can cause fluids to leak from the 

battery and damage the housing. The battery may self-ignite 

and explode.


Shield a Pedelec with a built-in battery from high temperatures, 

long and/or strong sunlight and heat exposure.


Avoid severe and sudden temperature changes around the 

frame of the Pedelec in the area of the built-in battery.


Do 

not 

store the Pedelec outdoors in high temperatures. 


Keep the Pedelec in the shade during the summer.

Unsuitable battery chargers (e.g. ones with too high a voltage) 

will damage the battery. The battery may self-ignite and explode.


Only use the original Ampler charger supplied with  

the Pedelec.  


If necessary, label the charger so that it can

not 

be confused 

with chargers for other batteries or other Pedelecs.

Summary of Contents for Curt

Page 1: ...Original Operating Instructions Model year 2022 Ampler Manual Curt...

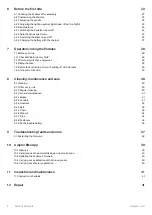
Page 2: ...3 2 1 Transporting the Pedelec in the shipping carton 11 3 3 Unpacking the Pedelec 12 3 4 Transporting the Pedelec 12 4 Ampler Pedelec 13 4 1 Bicycle structure and components 13 4 1 1 Frame number 14...

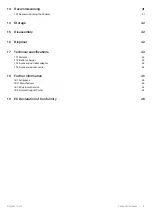
Page 3: ...e 29 7 3 Before the first rides perform bedding in of the brakes 29 7 4 At the end of the ride 29 8 Cleaning maintenance and care 30 8 1 Cleaning 30 8 1 1 After every ride 30 8 1 2 Regular cleaning 30...

Page 4: ...42 16 Disposal 42 17 Technical specifications 43 17 1 Pedelec 43 17 2 Battery charger 44 17 3 Accessories trailer adapter 44 17 4 Accessories rear carrier 44 18 Further information 45 18 1 Addresses...

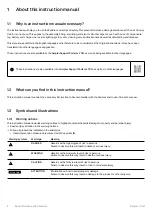
Page 5: ...PDFs as well as in other languages 1 2 What can you find in this instruction manual This instruction manual contains the necessary information to become familiar with the Pedelec and to use it in a s...

Page 6: ...nformation tip or recommendation 1 3 3 Validity This instruction manual applies to the following Pedelecs Model Model Year Curt belt 2022 Curt gears 2022 1 3 4 Other relevant documents Pedelec compone...

Page 7: ...ng the seatpost beyond the minimum insertion depth y Failure to sufficiently tighten the stem clamping screws by the user y Over or undertightening the headset cap screw by the user y Failure to corre...

Page 8: ...ads to loss of riding stability and can cause serious injuries X The maximum permissible total weight of the Pedelec includes the mounted accessories any luggage and the person riding Inappropriate us...

Page 9: ...d rechargeable battery Danger of fire and explosion A damaged battery can self ignite and explode If the electronic safety system fails the residual voltage in the battery can trigger a short circuit...

Page 10: ...hot X Place the charger in a well ventilated location Electric shock A damaged charger may have defective plugs power cables and buttons X Only operate the charger if it is in good working condition a...

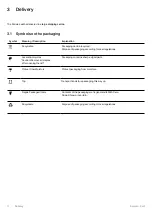
Page 11: ...ckaging according to local regulations Laceration Injuries Caution Remove all staples after opening the lid Packaging contains sharp edged parts Protect from Moisture Protect packaging from moisture T...

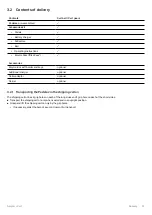
Page 12: ...r and keys optional Additional charger optional Trailer adapter optional Carrier optional 3 2 1 Transporting the Pedelec in the shipping carton The shipping carton has 2 grip holes on each of the long...

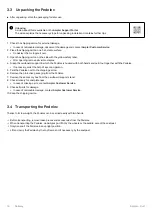
Page 13: ...and pull it out together with the Pedelec y If necessary enlist the help of a second person 5 Park the Pedelec next to the shipping carton 6 Remove the protective packaging from the Pedelec 7 Remove t...

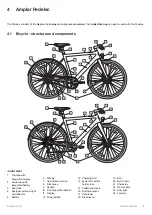
Page 14: ...ube with integrated display 2 Down tube with integrated battery 3 Seat tube 4 Seatpost with rear light and reflector 5 Battery 6 Wheels 7 Hub Electric motor 8 Disc brake 9 Saddle 10 Front light with r...

Page 15: ...ERT Seatpost Minimum insertion depth 6 V DC Front light Front light power supply 4 1 1 Frame number The frame number is on the left side dropout chainstay and in the Ampler Bike Pass The frame number...

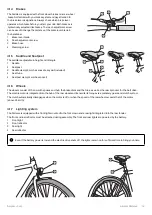
Page 16: ...post clamp 4 mm hex socket 4 1 6 Wheels The wheels consist of the rim with spokes and hub the brake discs and the tires as well as the rear sprocket for the belt drive The electric motor is integrated...

Page 17: ...own tube and bottom bracket X The motor and the hub of the rear wheel form an integrated unit The Pedelec can be used with or without motor assist 1 Rear wheel 2 Motor cable 3 Integrated motor 4 1 9 R...

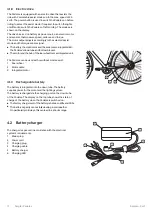
Page 18: ...ught with the bike it contains the appropriate holder which can be attached to the eyelets of the bottle cage mount These are on the seat tube for Curt 4 3 3 Trailer adapter The Ampler trailer adapter...

Page 19: ...tart up Tools required y 4 mm hex key included in delivery y 6 mm hex key included in delivery Using a torque wrench If applicable a torque wrench can be used for assembly not included available from...

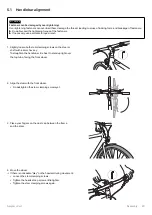
Page 20: ...ngers on the dust cap between the frame and the stem 4 Move the wheel J If there is noticeable play on the headset during movement y Loosen the stem clamping screws y Tighten the headset cap screw a l...

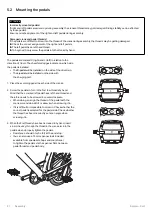
Page 21: ...the drivetrain y The L pedal will be installed on the side with the charging port 1 Place the according pedal to each side of the cranks 2 Screw the pedals in Turn in the first few threads by hand Min...

Page 22: ...washers remain as they are on the trailer adapter The finely notched structure points outwards the coarsely notched structures interlock 5 Install the axle hitch supplied by the trailer manufacturer t...

Page 23: ...coast freely J Check tire pressure e g with a suitable bicycle pump y Do the tires have the required tire pressure J Test the brakes Spin the front wheel and rear wheel separately Operate each brake l...

Page 24: ...pedal 6 Your leg should be straight with your knee joint still slightly bent 7 If necessary repeat the process and adjust the saddle height so that the leg is almost fully extended but not stretched...

Page 25: ...settings can also be set through the Ampler Bike App Switching on the Pedelec first start up When you start the Pedelec for the first time a special procedure is necessary in order to wake the bike up...

Page 26: ...f Pedelec is switched on 1 Press the power button and hold it y The display shows the power off symbol 2 Release the power button y The display switches off y The Pedelec switches off When the Pedelec...

Page 27: ...on the display operations while riding Keep the focus on the road ahead and your surroundings while riding The lights front light and rear light are powered by the battery The front and rear lights a...

Page 28: ...east above 0 C Charging the battery 1 Allow the Pedelec and charger to acclimatise to the ambient temperature if necessary 2 Lift the charging port cover and insert the magnetic charger plug into the...

Page 29: ...braking distances or influence of the handling of the Pedelec compared to a normal bicycle that you might be used to X While riding pay attention to the respective environmental conditions and adapt...

Page 30: ...soon as the pedals are engaged the motor turns on depending on the selected assist mode and starts to support the pedalling movement 7 3 Before the first rides perform bedding in of the brakes The bra...

Page 31: ...can remove lubrication that is necessary e g on headset bearings and hubs impair their function and cause serious damage to the components nuts bearings seals A jet of water at high pressure can caus...

Page 32: ...othbrush 8 2 1 Brakes After a certain amount of use disc brakes may become less efficient Dirt and oil on the brake discs and pads become noticeable through noise and reduced braking performance Switc...

Page 33: ...he 4 mm hex key 2 Slightly tighten the screw of the headset cap until the spacer no longer moves 3 Check adjustment Reapply the front brake and gently move the wheel back and forth again 4 Tighten bot...

Page 34: ...delec Check the chain wear The links of the chain may stretch a little over time Any bicycle workshop can check the chain wear and elongation The measurement can also be carried out by yourself with a...

Page 35: ...ue wrench Follow the manufacturer s instructions 8 2 7 Tires Switch off the Pedelec Check tire pressure The correct tire pressure leads to low rolling resistance and can prevent punctures It also lead...

Page 36: ...e belt on the sprocket or the chain on the cassette Pull the derailleur back by hand if necessary 8 When the belt or chain is correctly positioned on the sprocket or cassette Insert the rear wheel int...

Page 37: ...s checked out 8 2 9 Rechargeable battery ATTENTION Damage to the battery is caused by a permanently low charge level when not in use for a long time The battery cells may be damaged X Check the state...

Page 38: ...en braking y Dirt oil on the brake pads J Check and clean brake pads J Replace if necessary and perform bed in procedure Creaking noises when putting load on the pedals y Loose pedals J Tighten the pe...

Page 39: ...nnected dropped or lost J Restart the firmware 9 1 Restarting the firmware A firmware restart resets the Pedelec s settings and restarts the Pedelec s electrical system support It can be triggered thr...

Page 40: ...ec off in order for ride distance to be recorded Adjustment of the motor power and max speed The Ampler Bike App allows you to adjust the Pedelec s settings and control functions y Adjust assist modes...

Page 41: ...other This calibration is carried out using the Ampler Bike App We recommend calibrating the sensor every 3 to 6 months Ampler Bike App installed on a smartphone Ampler Bike App connects to the Pedel...

Page 42: ...e end of the season 12 Repair Repairs to the Pedelec can only be carried out by a bicycle workshop or by Ampler Bikes and our Service Partners depending on the particular case Ampler Customer Service...

Page 43: ...heck the state of charge of the battery regularly ATTENTION Damage to the battery is caused by a permanently low state of charge when not in use for a long time The battery cells may get damaged and l...

Page 44: ...neral oil hydraulically operated disc brakes Mineral oil hydraulically operated disc brakes Wheels and tires y Size 28 28 y Tires size 40 622 mm 40 622 mm y Tire pressure max 5 3 bar 75 PSI max 5 3 ba...

Page 45: ...hex key or y 15 mm spanner Pedals y 35 Nm y 6 mm hex key or y 15 mm spanner 17 2 Battery charger Parameters Battery charger external y Voltage mains supply 220 240 V AC 50 60 Hz y Plug connector Rose...

Page 46: ...vice hello amplerbikes com Telephone 49 30 5683 7159 18 2 Ampler Support Portal The Ampler Support Portal provides further information on y Notes and videos on all stages of use y Notes on how to reac...

Page 47: ...EPAC Trade name Ampler Model Curt belt 2022 Curt gears 2022 Conforms to the following directives 2014 35 EU LVD Low Voltage Directive 2014 30 EU EMC Electromagnetic Compatibility 2014 53 EU RED Radio...

Page 48: ...Ampler Bikes O Telliskivi tn 60 2Tallinn 10412 Estonia hello amplerbikes com www amplerbikes com...

Reviews: