background image

13

V2.3 03.11.20

13

Ampler hardware (the battery, controller and sensors) are inserted 
into the down tube. This keeps the bike clean, the weight down, and 
the components safe from outside elements such as the rain and cold 
temperature. 

The hardware doesn’t need any special maintenance. However, we 
recommend to keep your bike Firmware up to date and calibrate your 
bike sensors from time to time. This will help to keep your bike in a 
good shape for longer time.

Software restart clears up your bikes memory and starts it fresh. It 
helps to resolve any problems connected to the hardware, and any 
communication problems between the bike and the mobile app. 

To reset your bike
1.  Hold down the power button for 10 seconds. This will reset and 

turn off your bike.

2.  Turn on the bike again from the power button.

Ampler bikes are pedelecs and they have sensors regulating the 
motor, measuring the speed of pedalling and your own input power. 
Therefore, the bike is easy to use and the motor power is controlled 
according to your own pedaling force. This creates a safe and smooth 
riding experience.

We recommend to calibrate your bike’s torque sensor 

every 3–6 

months

, or in case the bike feels over- or underpowered. Torque 

sensor calibration is done via the Ampler app:

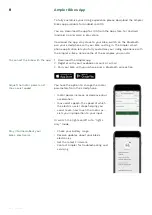
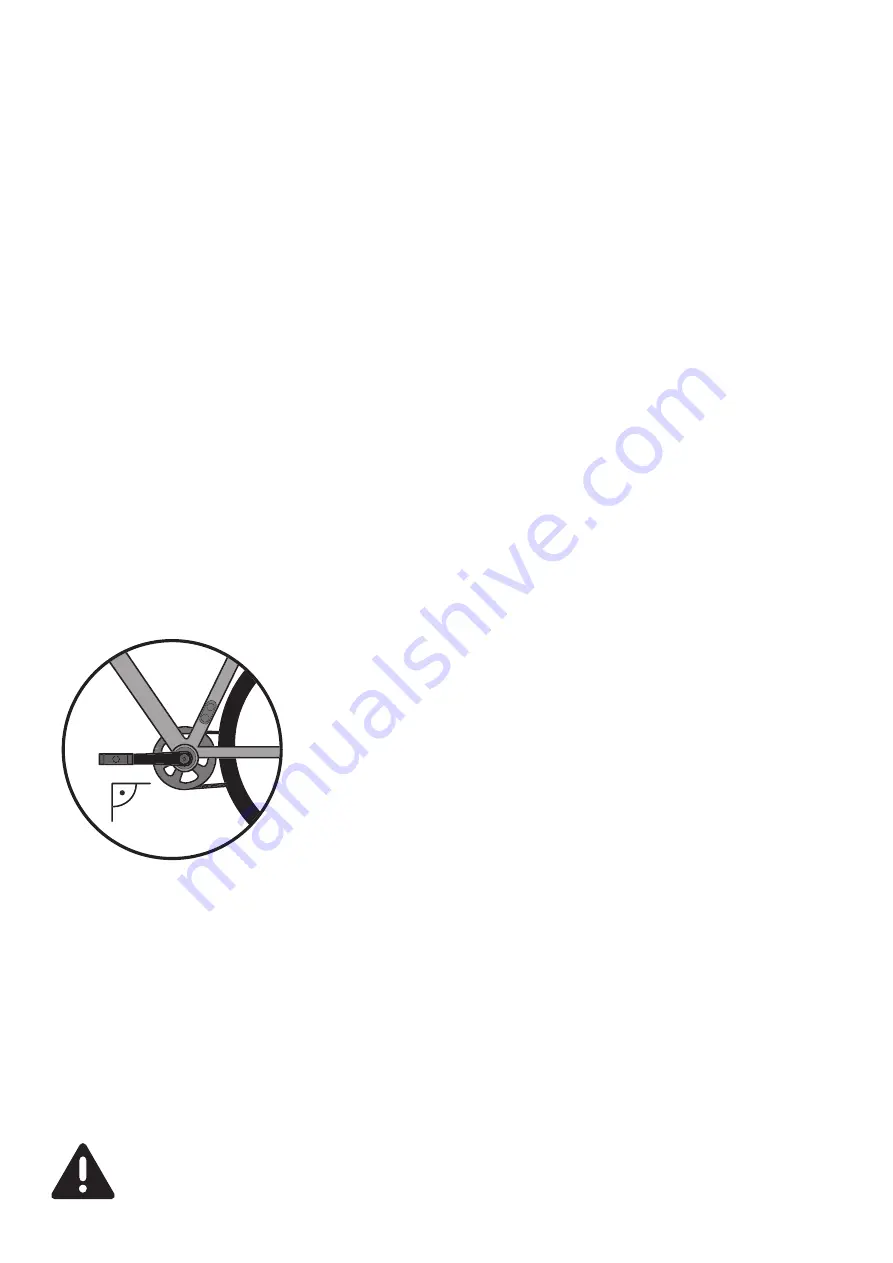
1.  Adjust the left crank forward, parallel to the ground. 
2.  Connect the Ampler app with your bike via Bluetooth
3.  Open 

‘Vehicle’

 setting from the menu

4.  Click on 

‘torque sensor calibration’

5.  The LED blinks in 

orange

6.  The LED will turn 

green

 once the calibration is successful 

Re-adjusting the sensor signal helps to improve your bike’s responsi-
veness and power to its original fi gures.

Every Ampler has a motor controller – the so-called brain of your bike 
that connects all the elctronics and makes sure everything runs 
smoothly. The motor controller is managed by Firmware (the software 
that controls the hardware). To guarantee the best riding experience, 
we recommend keeping your bike’s Firmware up to date.

Factory calibration will adjust all your bike's sensors and align the 
functionality of all electronic components. Use this calibration only if 
any of the electronic components have been replaced or only if re-
commended by Ampler support.

CAUTION! During the factory calibration, the motor starts on its own 
and thus the rear wheel will start spinning. It is necessary for you to 

Software restart

Electric system support

Torque sensor calibration

Factory calibration

Summary of Contents for Stout 2020

Page 1: ...V2 3 03 11 20 Ampler Manual Stout 2020 ...

Page 2: ...20 2 Table of Content 3 What s in the box 3 Frame number 4 Assembly 7 Using the Power Button 9 Ampler Bikes app 10 Maintenance 13 Electric system support 16 Charger safety manual 17 Trailer adapter 18 Specifications ...

Page 3: ...out Frame number The bike will arrive at your doorstep in a big cardboard box Inside this you will find Your new Ampler bike bike passport 4 mm hex key 6 mm hex key Pedals with reflectors Charger Bicycle bell Additional reflectors front and rear Optional ABUS Bordo lock with holder and keys additional charger trailer adapter ...

Page 4: ... and lightly tighten the top cap bolt on the handlebar stem This will make sure the headset will not have any play in it 90 3 Take the 4 mm hex key and carefully tighten the same stem bolts you loosened 2 steps back Turn your handlebar left and right and make sure it spins freely If it feels a bit too tight loosen the stem bolts and just slightly loosen the top cap 4 mm hex key 6 mm hex key Pedals...

Page 5: ...ly at the end of the thread if the pedal is hard to thread in from the beginning then the threads must be inspected L R left right 1 Clamp the white front reflector below the front light 2 Attach the red rear reflector to the bracket Wrap the bracket around the seat post and secure it with the screw 3 Attach one orange reflector on the front wheel one on the rear wheel Pick a spoke place the refle...

Page 6: ... drive runs freely Shift the gears on the 10 speed bike 5 Check your bike visually Does everything seem alright Remember to check your bike occasionally and view our Ampler Bikes Maintenance information Final check before your first ride Take the 4 mm hex key and adjust the perfect seat height 1 Place the bike in a way that allows you to support yourself against a wall when sitting on it 2 Put one...

Page 7: ...n fully charged It takes about 2 5 hours from empty to full Ampler charger will automatically stop charging when the battery is full There is no risk of overcharging the battery when you forget to unplug it For your protection please read carefully Charger safety manual chapter below before operating the Ampler battery charger The power button also acts as a battery charge monitor The LED colours ...

Page 8: ...n as the button turns orange After releasing the button it will blink ONCE if it changes to Normal Mode assist mode 1 or TWICE if it changes to Boost Mode assist mode 2 You can also change the support modes on the dashboard of your Ampler app You can fully customise the assist modes with the Ampler Bikes app under Vehicle settings Changing the assist modes bike is ON press hold release LED blinks ...

Page 9: ...2 Register with your Facebook account or e mail 3 Pair your bike with your phone over a Bluetooth connection Ampler Bikes App To connect the bike with the app Stay informed about your bike s electronics Adjust the motor power and max assist speed You have the option to change the motor parameters from the smartphone motor power increase or decrease your acceleration max assist speed the speed at w...

Page 10: ...e washers as the pressure driven water will get dirt sand and dust particles inside tiny compartments causing rust and problems later down the line Check tyre pressure regularly the recommended tyre pressure is given on the side wall of the tyre The tyres should always be inflated so that the pressure is within the manufacturer s recommendation for minimum and maximum tyre pressure Full will keep ...

Page 11: ... to see how they are holding up There shouldn t be any dirt or oil on the pads Often times the brakes will make a howling noise if there s oil on them Check the brake hoses for wear and tear if you can see that the house is crumbling or broken in any place get it checked immedia tely by a professional After first couple of weeks check the bolts and nuts If there is too much play in the bolts tight...

Page 12: ...t everything is working as it should After that have the bike service regularly every 3000 km If you ride often and don t count the riding distance make sure to take it to a professional bike shop for maintenance at least twice every season ideally even three times Before the start of the season Mid way through At the end of the season This way all the important aspects like brake oil levels and t...

Page 13: ...our bike s torque sensor every 3 6 months or in case the bike feels over or underpowered Torque sensor calibration is done via the Ampler app 1 Adjust the left crank forward parallel to the ground 2 Connect the Ampler app with your bike via Bluetooth 3 Open Vehicle setting from the menu 4 Click on torque sensor calibration 5 The LED blinks in orange 6 The LED will turn green once the calibration i...
Page 14: ... app If your bike is connected to the app you will get a notification in your app about the new available Firmware Please go to the Vehicle settings to update your Firmware Before starting the update make sure You have the latest Ampler app version You have internet connection on your phone Your phone s battery is not running low The battery level of the bike is more than 25 You have registered an...

Page 15: ...then back ON under settings 5 Open the Ampler app 6 Pair your bike with your smartphone 7 Check if the update is available and complete the update If a new firmware version becomes available in the future you will be notified within the app Meanwhile you can check the firmware status in the Vehicle view if the firmware is up to date you ll see the infor mation in the lower part of the screen in th...

Page 16: ...ore the charger in a cool and dry place Always check that the magnetic charging plug and connector are clean and dry Any electrically conducting particles at the connection can damage the charger or the electrical system of the e bike During charging the charger can become moderately hot Always place the charger in a well ventilated place and keep it away from combus tible materials Children shoul...

Page 17: ...opout located next to the motor Do not remove the motor torque washer from the dropout keep it attached to the axle 2 Attach the Ampler motor axle adapter to the frame Use a 19 mm wrench and make sure the axle adapter is securely fastened 3 Finally insert the two security washers Thule trailer mount and fasten them by using a 13 mm wrench to tighten the outside bolt 2 ...

Page 18: ...ymmetrical 18 mm rims w sealed bearing hubs 36H Tyres Continental Top Contact II 42 622 mm Wheels 28 Weight 17 2 kg Electronics Assist speed 25 km h Range 45 100 km depending on terrain and assist mode Battery 48 V 336 Wh LG Li ion battery Motor 48 V 250 W rear hub motor Control mode Precise pedal torque sensing motor control system Connectivity Smartphone connectivity with option to change motor ...

Reviews: