background image

44

5

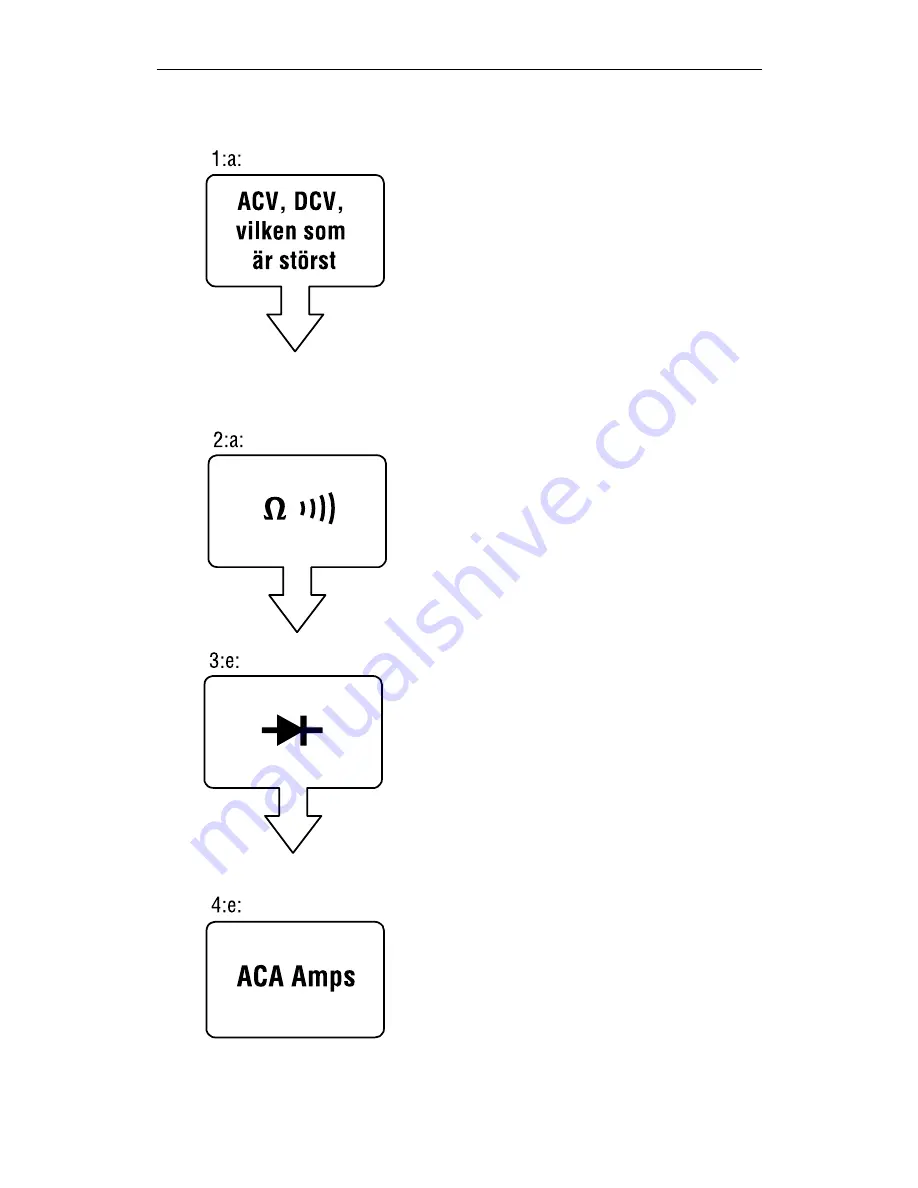
Funktionernas prioritet

Följande avsnitt visar en lista över funktionernas prioritet:

LCD-fönstret visar 
spänningsläget när 
ingångsterminalen uppfylls av 
följande villkor:
Växelströmsvolt  
 

,3 v till 999,9 V


< ,0 v 

 + ton

Likströms- 
volt  
 

, V till 999,9 V


-0,7 V till -999,9 V

LCD-fönstret visar 

-läget 

när ingångsterminalen 
uppfylls av följande villkor:
0 till 


Växelströmsvolt 0 v till 0,9 V
Likströmsvolt    -0,4 till -0, V
Likströmsvolt    ,0 v till ,0 V

LCD-fönstret visar diodläget 
när ingångsterminalen 
uppfylls av följande villkor:
Likströmsvolt 0,4 till 0,8 V

LCD-fönstret visar 
spänningsläget 
för växelström när 
strömingångskäften uppfylls 
av följande villkor:
ACA    0,9 a till 600,0 a

Summary of Contents for AC71B

Page 1: ...User Manual Mode d emploi Bedienungshandbuch Manual d Uso Manual de uso Användarhandbok AC71B Clamp on Multimeter ...

Page 2: ...clude the test leads with the meter Non warranty repair or replacement charges should be remitted in the form of a check a money order credit card with expiration date or a purchase order made payable to Amprobe Test Tools In Warranty Repairs and Replacement All Countries Please read the warranty statement and check your battery before requesting repair During the warranty period any defective tes...

Page 3: ...Symbols Used in this Manual 3 Introduction 3 AutotectTM 3 Making Measurements 6 Additional Features 6 Product Maintenance 7 Maintenance 7 Cleaning 7 Troubleshooting 7 Battery Replacement 7 Specifications 8 General Specifications 8 Electrical Specifications 9 ...

Page 4: ...ds before you use the meter If this product is used in a manner not specified by the manufacturer the protection provided by the equipment may be impaired Do not use the meter if it operates abnormally Protection may be impaired When in doubt have the meter serviced Do not operate the meter around explosive gas vapor or dust Before use verify the meter s operation by measuring a known voltage Use ...

Page 5: ...tic backlight has a sensor that recognizes when the ambient light becomes dim and turns itself on A bright blue backlight is then available to easily read the measurement value on the digital display The AC71B is a complete multimeter measuring AC and DC volts resistance continuity in addition to the AC current A useful tool for the electrician plant maintenance HVAC or field service technician Au...

Page 6: ...ting Do not make measurements during the start up and self test sequence This will cause the self test to fail Disable Auto Power Off APO Press and hold the ON OFF button for more than 3 seconds Enable ACA Auto Hold and disable Auto Power Off APO Press and hold the ON OFF button for more than 5 seconds The AC71B will automatically turn OFF in 20 min Power Off Press ON OFF button for 3 seconds The ...

Page 7: ... The LCD display shows Ω mode when the Input Terminal is satisfied by the following conditions 0 to Ω ACV 0 V to 0 9 V DCV 0 4 to 0 2 V DCV 1 0 V to 2 0 V The LCD display shows diode mode when the Input Terminal is satisfied by the following conditions DCV 0 4 to 0 8 V The LCD display shows AC current mode when the Current Input Jaw is satisfied by the following conditions ACA 0 9 A to 600 0 A ACV...

Page 8: ...onments The backlight activates automatically in low ambient light conditions Data Hold See Figure 9 The Data Hold function allows the meter to capture and display a measurement reading When the reading has stabilized press the HOLD button and the reading will be locked on the display The data hold function is not available if OL kΩ or no input signal is displayed WARNING Hazardous voltages presen...

Page 9: ...ing instructions to ensure the meter is being used properly 2 Make sure the battery is in good condition The low battery symbol appears when the battery falls below the level where accuracy is guaranteed Replace a low battery immediately Battery Replacement To replace the battery See Figure 10 1 Turn the meter off and remove attached test leads 2 Loosen the screw and remove the battery door 3 Repl...

Page 10: ...ize 32 mm diameter 1 3 in Max Operation Time Delay Time 30s for input 30 V Shock Vibration Sinusoidal vibration per MIL PRF 28800F 5 to 55 Hz 3 g maximum Agency Approvals Safety Conforms to EN61010 1 2001 CAT II 1000 V CAT III 600 V Pollution degree 2 Class 2 EMC Conforms to EN61326 1 This product complies with requirements of the following European Community Directives 89 336 EEC Electromagnetic ...

Page 11: ...tion Time DT 30s for 30 V Input Impedance 4 kΩ for input voltage up to 30 V Impedance increases with input voltage to approximately 375 kΩ at 750 VAC Resistance and Continuity Diode Function Range Accuracy Ω 0 Ω to 9999 Ω 2 2 dgts 0 4 V to 0 8 V 1 3 dgts Maximum Open Circuit Voltage 2 0 V Overload Protection 1000 VDC 750 VAC Continuity Check Internal sound activates if the resistance of the circui...

Page 12: ...0 10 AC Current Function Range Accuracy A 0 9 A 600 0 A 1 9 5 dgts 50 Hz 60 Hz Overload Protection 600 0 A 0 500 A Continuous Operation 501 A 600 A 10 minutes maximum followed by 10 minute cooling period ...

Page 13: ...11 AC71B 1 Clamp Meter ...

Page 14: ...12 12 3 sec 2 3 4 Auto Power Off Auto Backlight Off On 20 min AC71B AC71B AC71B AC71B AC71B K ...

Page 15: ...13 AC71B AC71B 5 1 3 V 750 0 V ACV 1 0 V 2 1 V 1000 0 V 0 7 V 1000 0 V 0 2 V DC 2mV ...

Page 16: ...14 14 AC71B AC71B 400 25 6 7 Continuity Resistance 9999 ...

Page 17: ...15 AC71B 8 I I OK OK OK I I 0 I I 0 9 A 600 0 A 50 Hz 60 Hz ...

Page 18: ...16 AC71B AC71B 9 10 1 2 3 Data Hold ...

Page 19: ......

Page 20: ......

Page 21: ...AC71B Clamp on Multimeter Francias ...

Page 22: ...cription du problème ou de la maintenance désirée ainsi que les lignes de mesure Les frais pour les réparations en dehors de la garantie ou pour le remplacement d instruments doivent être payés par chèque virement bancaire carte de crédit numéro de carte de crédit avec date d expiration ou une commande doit être formulée au bénéfice de Amprobe Test Tools Réparations ou remplacement sous garantie t...

Page 23: ...ymboles utilisés dans ce mode d emploi 3 Introduction 3 AutotectTM 3 Mesures 6 Autres fonctions 6 Entretien du produit 7 Entretien 7 Nettoyage 7 Dépannage 7 Remplacement de la pile 7 Caractéristiques techniques 8 Caractéristiques générales 8 Caractéristiques électriques 10 ...

Page 24: ...cordons d essai Ne pas les utiliser si l isolant est endommagé ou si des parties métalliques sont mises à nu Effectuer un essai de continuité sur les cordons Remplacer les cordons endommagés avant d utiliser le multimètre Cet appareil doit être utilisé de la manière spécifiée par le fabricant afin de ne pas entraver la protection intégrée Ne pas utiliser le multimètre s il ne fonctionne pas normal...

Page 25: ...ux bornes d un point de mesure Il n y a aucun bouton à régler Le multimètre sait quelle mesure est en cours et l affichage numérique indique la valeur mesurée avec l icône de l unité associée Le rétroéclairage automatique est muni d un capteur qui reconnaît lorsque l éclairage ambiant faiblit et il s allume dans ce cas Le rétroéclairage lumineux bleu permet ensuite de lire facilement les valeurs m...

Page 26: ...e multimètre Voir Dépannage N effectuez pas de mesures pendant la séquence de démarrage ou l autodiagnostic afin de ne pas faire échouer l autodiagnostic Désactivez la mise en veille automatique APO Maintenez le bouton marche arrêt ON OFF enfoncé pendant plus de 3 secondes Activez le maintien d affichage automatique d intensité en courant alternatif ACA et désactivez la mise en veille automatique ...

Page 27: ... lorsque la borne d entrée répond aux conditions suivantes 0 à Ω Volts c a 0 V à 0 9 V Volts c c 0 4 à 0 2 V Volts c c 1 0 V à 2 0 V L écran LCD affiche le mode de diode lorsque la borne d entrée répond aux conditions suivantes Volts c c 0 4 à 0 8 V L écran LCD affiche le mode de mesure du courant alternatif lorsque la mâchoire d entrée du courant répond aux conditions suivantes Intensité c a 0 9 ...

Page 28: ... à faible éclairage ambiant Maintien de l affichage Voir Figure 9 Le bouton de maintien d affichage permet au multimètre de capturer et d afficher en continu la valeur mesurée Lorsque la lecture s est stabilisée appuyez sur le bouton HOLD le résultat est alors verrouillé à l écran La fonction de maintien des données n est pas disponible si OL kΩ ou si aucun signal d entrée n est affiché AVERTISSEM...

Page 29: ...ilisation pour confirmer que le multimètre est utilisé correctement 2 Assurez vous que la pile est en bon état Le symbole de pile faible apparaît lorsque la tension de la pile tombe en dessous du niveau garantissant la précision Remplacez immédiatement une pile faible Remplacement de la pile Pour remplacer la pile Voir Figure 10 1 Mettez le multimètre hors tension et retirez tous les cordons de me...

Page 30: ...6562 pieds Calibre de conducteur 32 mm de diamètre 1 3 po Durée de fonctionnement max Temps de retard 30 s pour une entrée 30 V Vibrations chocs Vibration sinusoïdale selon MIL PRF 28800F 5 à 55 Hz 3 g maximum Approbations des agences Sécurité Conforme à to EN61010 1 2001 CAT II 1000 V CAT III 600 V degré de pollution 2 classe 2 CEM Conforme à EN61326 1 Ce produit est conforme aux exigences des di...

Page 31: ...nt max DT 30 s pour 30 V Impédance d entrée 4 kΩ pour une tension d entrée jusqu à 30 V L impédance augmente avec la tension d entrée jusqu à environ 375 kΩ à 750 V c a Résistance continuité et diode Fonction Gamme Précision Ω 0 Ω à 9999 Ω 2 2 chiffres 0 4 V à 0 8 V 1 3 chiffres Tension maximum en circuit ouvert 2 0 V Protection contre les surcharges 1000 V c c 750 V c a Contrôle de continuité L a...

Page 32: ...n Gamme Précision A 0 9 A à 600 0 A 1 9 5 chiffres 50 Hz à 60 Hz Protection contre les surcharges 600 0 A 0 à 500 A Fonctionnement continu 501 A à 600 A 10 minutes maximum suivi d une période de refroidissement de 10 minutes ...

Page 33: ......

Page 34: ......

Page 35: ...AC71B Clamp on Multimeter Deutsch ...

Page 36: ...owie die Messleitungen dem Messgerät beilegen Die Gebühren für Reparaturen außerhalb der Garantie oder für den Ersatz von Instrumenten müssen als Scheck Geldanweisung Kreditkarte Kreditkartennummer mit Ablaufdatum beglichen werden oder es muss ein Auftrag an Amprobe Test Tools formuliert werden Garantiereparaturen oder austausch alle Länder Bitte die nachfolgende Garantieerklärung lesen und die Ba...

Page 37: ...mationen 2 Symbole in diesem Handbuch 3 Einführung 3 AutotectTM 3 Messungen durchführen 6 Zusätzliche Funktionsmerkmale 6 Produktwartung 7 Wartung 7 Reinigung 7 Fehlerbehebung 7 Ersetzen der Batterie 7 Spezifikationen 8 Allgemeine Spezifikationen 8 Elektrische Spezifikationen 9 ...

Page 38: ...eschädigter Isolierung und exponiertem Metall untersuchen Kontinuität der Messleitungen prüfen Vor Gebrauch des Messgeräts beschädigte Messleitungen ersetzen Wenn dieses Produkt in einer hier nicht beschriebenen Art verwendet wird wird der durch das Gerät gebotene Schutz unter Umständen beeinträchtigt Das Messgerät nicht verwenden wenn es Funktionsstörungen aufweist Unter Umständen sind die Sicher...

Page 39: ...sind AutoTectTM und automatische Hintergrundbeleuchtung Die AutoTectTM Funktion erkennt automatisch welcher Typ von Messung durchgeführt wird wenn die Messleitungen über einem Messpunkt angelegt werden Es gibt keinen Knopf der gedreht werden muss Das Messgerät erkennt was gemessen wird und die digitale Anzeige zeigt den gemessenen Wert zusammen mit der entsprechenden Einheit an Die automatische Hi...

Page 40: ...dus und prüft die Batteriekapazität Die Batterie ersetzen wenn die Anzeige 0 anzeigt Wenn FAIL angezeigt wird das Messgerät nicht verwenden Siehe Fehlerbehebung Während der Einschaltsequenz und Selbsttestsequenz keine Messungen durchführen Der Selbsttest wird dadurch abgebrochen Auto Power Off APO automatische Ausschaltung deaktivieren Die Taste ON OFF drücken und mindestens 3 Sekunden gedrückt ha...

Page 41: ...9 V 0 7 V bis 999 9 V Die LCD Anzeige zeigt den Ω Modus an wenn der Eingangsanschluss die folgenden Bedingungen aufweist 0 bis Ω ACV 0 V bis 0 9 V DCV 0 4 bis 0 2 V DCV 1 0 V bis 2 0 V Die LCD Anzeige zeigt den Diodenmodus an wenn der Eingangsanschluss die folgenden Bedingungen aufweist DCV 0 4 bis 0 8 V Die LCD Anzeige zeigt den Wechselstrommodus an wenn die Strombacken die folgenden Bedingungen ...

Page 42: ...unklen Arbeitsumgebungen Unter Bedingungen mit schwachem Umlicht wird die Hintergrundbeleuchtung automatisch aktiviert Daten halten Siehe Abbildung 9 Mit der Datenhaltefunktion kann das Messgerät eine Messung erfassen und anzeigen Wenn sich der Messwert stabilisiert hat die HOLD Taste drücken worauf der Messwert auf der Anzeige verriegelt wird Die Datenhaltefunktion ist nicht verfügbar wenn OL kΩ ...

Page 43: ...s Messgerät ordnungsgemäß verwendet wird 2 Sicherstellen dass die Batterie in einwandfreiem Zustand ist Das Batterieladesymbol wird eingeblendet wenn die Spannung der Batterie unter den Wert abfällt der die Messgenauigkeit gewährleistet Eine schwache Batterie unverzüglich ersetzen Ersetzen der Batterie Ersetzen der Batterie Siehe Abbildung 10 1 Das Messgerät ausschalten und angeschlossene Messleit...

Page 44: ...gkeit Batterie entfernt Höhenlage 2000 m Leiterdurchmesser 32 mm Max Betriebszeit Verzögerungszeit 30 s für Eingang 30 V Stoßfestigkeit Sinusschwingung gemäß MIL PRF 28800F 5 bis 55 Hz 3 g max Zulassungen Sicherheit Übereinstimmung mit EN61010 1 2001 CAT II 1000 V CAT III 600 V Verschmutzungsgrad 2 Klasse 2 EMV Stimmt überein mit EN61326 1 Dieses Produkt erfüllt die Anforderungen der folgenden EU ...

Page 45: ...iebszeit DT 30 s für 30 V Eingangsimpedanz 4 kΩ für Eingangsspannung bis 30 V Impedanz erhöht sich mit Eingangsspannung bis ungefähr 375 kΩ bei 750 VAC Widerstand und Kontinuität und Diode Funktion Bereich Genauigkeit Ω 0 Ω bis 9999 Ω 2 2 Stellen 0 4 V bis 0 8 V 1 3 Stellen Max Leerlaufspannung 2 0 V Überlast schutz 1000 VDC 750 VAC Kontinuitätsprüfung Interner Piepton wird aktiviert wenn der Wide...

Page 46: ...10 Wechselstrom Funktion Bereich Genauigkeit A 0 9 A 600 0 A 1 9 5 Stellen 50 Hz 60 Hz Überlast schutz 600 0 A 0 500 A Dauerbetrieb 501 A 600 A Max 10 Minuten gefolgt von 10 Minuten Abkühldauer ...

Page 47: ......

Page 48: ......

Page 49: ...Italiano AC71B Clamp on Multimeter ...

Page 50: ...lità potrebbe non applicarsi all acquirente Riparazione Per tutti gli apparecchi che vengono spediti per la riparazione o la calibrazione durante la validità della garanzia o al di fuori della garanzia è necessario allegare quanto segue nome del cliente nome dell impresa indirizzo numero di telefono e ricevuta d acquisto Si prega inoltre di allegare una breve descrizione del problema verificatosi ...

Page 51: ...el 877 AMPROBE 267 7623 Tel 905 890 7600 Riparazioni e sostituzione al di fuori della garanzia Europa Gli apparecchi potranno essere sostituiti al di fuori della garanzia da parte del distributore competente della Amprobe Test Tools su pagamento del rispettivo importo Un elenco dei distributori competenti è contenuto al paragrafo Where to Buy centri di vendita sul sito Internet www amprobe com Ind...

Page 52: ...16 ...

Page 53: ...oli adoperati nel presente manuale 3 Introduzione 3 Autotecttm 3 Esecuzione delle misure 6 Ulteriori funzioni 6 Manutenzione del prodotto 7 Manutenzione 7 Pulizia 7 Soluzione dei problemi 7 Sostituzione della pila 7 Dati tecnici 8 Dati tecnici generali 8 Dati elettrici 9 ...

Page 54: ...nto isolante dei connettori Controllare che i cavi di misura non presentino danni al rivestimento isolante o al metallo esposto Controllarne la continuità Se sono danneggiati sostituirli prima di usare il multimetro Usare il multimetro solo secondo queste istruzioni o si rischia di comprometterne la protezione interna Non usare il multimetro se funziona in modo anomalo I dispositivi interni di pro...

Page 55: ...a AutoTectTM rileva automaticamente il tipo di misura eseguito quando i cavi di misura vengono collegati a un punto di misura non c è alcuna manopola da girare Il multimetro rileva il tipo di grandezza da misurare e il display digitale mostra il valore misurato insieme all icona della relativa unità di misura Il circuito di retroilluminazione automatica è dotato di un sensore che rileva l attenuaz...

Page 56: ...Sostituire la pila se il display mostra 0 Se si visualizza FAIL non usare il multimetro Vedere la sezione Soluzione dei problemi Non eseguire misure durante l avvio e la sequenza di autotest altrimenti l autotest non può essere completato Disattivazione della funzione di spegnimento automatico APO Premere il pulsante ON OFF e mantenerlo premuto per almeno tre secondi Attivazione della funzione ACA...

Page 57: ...di mostra la modalità di misure di resistenza Ω quando i terminali d ingresso soddisfano le seguenti condizioni da 0 a Ω Tensione in c a da 0 V a 0 9 V Tensione in c c da 0 4 a 0 2 V Tensione in c c da 1 0 V a 2 0 V Il display a cristalli liquidi mostra la modalità di prova di diodi quando i terminali d ingresso soddisfano le seguenti condizioni Tensione in c c da 0 4 a 0 8 V Il display a cristall...

Page 58: ... Tenuta Hold dei dati Vedi Figura 9 La funzione Hold consente al multimetro di acquisire e visualizzare continuamente una misura Non appena la lettura si è stabilizzata premere il pulsante HOLD per fermarne la visualizzazione La funzione Hold non è disponibile se sul display compare OL kΩ oppure non si visualizza nessun segnale d ingresso AVVERTENZA In modalità HOLD eventuali alte tensioni present...

Page 59: ...ccertarsi che il multimetro sia adoperato correttamente 2 Verificare che la pila sia in buone condizioni Quando la carica della pila è inferiore al livello che assicura la precisione si visualizza il simbolo Sostituire immediatamente una pila quasi scarica Sostituzione della pila Procedere come segue Vedi Figura 10 1 Spegnere il multimetro e scollegare i cavi di misura 2 Togliere il coperchio dell...

Page 60: ...metro Altitudine 2000 metri Dimensioni dei conduttori 32 mm di diametro Durata massima di funzionamento tempo di ritardo 30 s per un ingresso 30 V Vibrazioni da urti vibrazioni sinusoidali a norma MIL PRF 28800F da 5 a 55 Hz 3 g max Omologazioni Sicurezza a norma EN61010 1 2001 CAT II 1000 V CAT III 600 V grado di inquinamento 2 Classe 2 Compatibilità elettromagnetica a norma EN61326 1 Questo prod...

Page 61: ...to tempo di ritardo 30 s per un ingresso 30 V Impedenza d ingresso 4 kΩ per tensioni d ingresso fino a 30 V L impedenza aumenta con la tensione d ingresso sino a circa 375 kΩ a 750 V c a Misure di resistenza e prova di continuità diodi Funzione Portata Precisione Ω Da 0 Ω a 9999 Ω 2 2 cifre Da 0 4 V a 0 8 V 1 3 cifre Tensione massima di circuito aperto 2 0 V Protezione dai sovraccarichi 1000 V c c...

Page 62: ...nata Funzione Portata Precisione A 0 9 A 600 0 A 1 9 5 cifre 50 Hz 60 Hz Protezione dai sovraccarichi 600 0 A 0 500 A funzionamento continuo 501 A 600 A 10 minuti al massimo seguiti da un intervallo di raffreddamento di 10 minuti ...

Page 63: ......

Page 64: ......

Page 65: ...Español AC71B Clamp on Multimeter ...

Page 66: ... a que ciertos estados o países no permiten la exclusión o limitación de una garantía implícita o de los daños contingentes o resultantes esta limitación de responsabilidad puede no regir para usted Reparación Todas las herramientas de comprobación devueltas para su calibración o reparación cubiertas o no por la garantía deberán estar acompañadas por lo siguiente su nombre el nombre de la empresa ...

Page 67: ...eemplazo En Estados Unidos En Canadá Amprobe Test Tools Amprobe Test Tools Everett WA 98203 Mississauga ON L4Z 1X9 Tel 877 AMPROBE 267 7623 Tel 905 890 7600 Reparaciones y reemplazos no cubiertos por la garantía Europa El distribuidor de Amprobe Test Tools puede reemplazar aplicando un cargo nominal las unidades vendidas en Europa no cubiertas por la garantía Consulte la sección Dónde comprar del ...

Page 68: ...16 16 ...

Page 69: ... en este manual 3 Introducción 3 AutoTectTM 3 Uso del multímetro 6 Características adicionales 6 Mantenimiento del instrumento 7 Mantenimiento 7 Limpieza 7 Solución de fallos 7 Reemplazo de pilas 7 Reparación 8 Especificaciones 8 Especificaciones generales 9 Especificaciones eléctricas 9 ...

Page 70: ... de los conectores Revise las puntas de prueba en busca de daños en el aislamiento o partes metálicas expuestas Verifique la continuidad de las puntas de prueba Antes de utilizar el multímetro reemplace las puntas de prueba dañadas Si este producto se utilizara de una manera no especificada por el fabricante podría verse afectada la protección provista por el equipo No utilice el multímetro si no ...

Page 71: ...mple con las normas australianas relevantes Introducción El AC71B es un multímetro digital de pinzas con numerosas características singulares Dos de ellas son la función AutoTectTM y la luz de fondo automática La función AutoTectTM detecta automáticamente el tipo de medición que se está haciendo cuando se colocan las puntas de prueba a través de un punto de medición No es necesario girar una peril...

Page 72: ...ancia de entrada Opciones de encendido Pulse el botón de encendido y apagado ON OFF Durante la secuencia de arranque el AC71B pasará por un breve modo de autoprueba y comprobará la capacidad de la pila Reemplace la pila cuando se indique 0 en la pantalla Si aparece FAIL FALLO no utilice el multímetro Consulte Solución de problemas No tome mediciones durante la secuencia de arranque y autoprueba Es...

Page 73: ...a 999 9 V La pantalla LCD muestra el modo Ω cuando el terminal de entrada queda satisfecho con las condiciones siguientes 0 a Ω VCA 0 V a 0 9 V VCC 0 4 a 0 2 V VCC 1 0 V a 2 0 V La pantalla LCD muestra el modo de diodos cuando el terminal de entrada queda satisfecho con las condiciones siguientes VCC 0 4 a 0 8 V La pantalla LCD muestra el modo de corriente de CA cuando la mordaza de entrada de cor...

Page 74: ...iente baja Retención de datos Ver la figura 9 La función Data Hold Retención de datos permite al multímetro capturar y visualizar la lectura de una medición Cuando la lectura se haya estabilizado pulse el botón HOLD y la lectura quedará bloqueada en la pantalla La función de retención de datos no está disponible si aparece OL kΩ o si no aparece una señal de entrada ADVERTENCIA Los voltajes peligro...

Page 75: ...ndo de manera correcta 2 Compruebe que la pila se encuentre adecuadamente cargada Cuando el voltaje de la pila es menor que el nivel que garantiza la exactitud del instrumento aparece en la pantalla el símbolo de pila descargada La pilas descargadas deben ser reemplazadas inmediatamente Reemplazo de pilas Para reemplazar la pila Ver la figura 10 1 Apague el multímetro y retire las puntas de prueba...

Page 76: ...o 1 25 pulg Tiempo máximo en funcionamiento Tiempo de demora 30 s para entradas 30 V Vibración ante impactos Vibración sinusoidal de acuerdo con la norma MIL PRF 28800F máximo de 5 a 55 Hz 3 g Aprobaciones de organismos estatales Seguridad Cumple con la norma EN61010 1 2001 CAT II 1000 V CAT III 600 V grado de contaminación 2 clase 2 EMC Cumple con la norma EN61326 1 Este producto cumple con las e...

Page 77: ... 30 s para 30 V Impedancia de entrada 4 kΩ para voltajes de entrada de hasta 30 V La impedancia aumenta con el voltaje de entrada hasta aproximadamente 375 kΩ a 750 VCA Resistencia continuidad y diodo Función Rango Exactitud Ω 0 Ω a 9999 Ω 2 2 dígitos 0 4 V a 0 8 V 1 3 dígitos Voltaje máximo en circuito abierto 2 0 V Protección contra sobrecargas 1000 VCC 750 VCA Verificación de continuidad El son...

Page 78: ...Función Rango Exactitud A 0 9 A 600 0 A 1 9 5 dígitos 50 Hz 60 Hz Protección contra sobrecargas 600 0 A 0 500 A Funcionamiento continuo 501 A 600 A 10 minutos como máximo seguidos de un período de enfriamiento de 10 minutos ...

Page 79: ......

Page 80: ......

Page 81: ...Svenska AC71B Clamp on Multimeter ...

Page 82: ...LLER OM DE BASERAS PÅ KONTRAKT Vissa stater eller länder tillåter inte undantag eller begränsningar av underförstådda garantier eller tillfälliga skador eller följdskador så denna ansvarsbegränsning gäller eventuelltinte dig Reparation Till alla apparater som sänds in för reparation eller kalibrering inom ramen för garantin eller utanför garantin måste följande bifogas Kundens namn firmanamn adres...

Page 83: ...ols Everett WA 98203 Mississauga ON L4Z 1X9 Tél 877 AMPROBE 267 7623 Tél 905 890 7600 Reparationer och utbyte utanför garantin Europa Apparater utanför garantin kan ersättas av en behörig Amprobe Test Tools distributör mot avgift En förteckning över behöriga distributörer finns i avsnittet Where to Buy försäljningsställen på websiten www amprobe com Korrespondensadress för Europa Amprobe Test Tool...

Page 84: ...16 16 ...

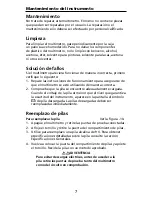
Page 85: ...boler som används i denna handbok 3 Inledning 3 AutotectTM 3 Mätningar 6 Ytterligare funktioner 6 Underhåll av produkten 7 Underhåll 7 Rengöring 7 Felsökning 7 Byte av batteri 7 Reparation 8 Specifikationer 8 Allmänna specifikationer 9 Elektriska specifikationer 9 ...

Page 86: ...llt isoleringen runt kontakterna Inspektera mätsladdarna för att se om isoleringen är skadad eller om det finns områden med frilagd metall Kontrollera mätsladdarnas kontinuitet Byt ut skadade mätsladdar innan du använder mätaren Om denna produkt används på annat sätt än det som specificeras av tillverkaren kan det skydd som tillhandahålls av utrustningen nedsättas Använd ej mätaren om den fungerar...

Page 87: ... utförs när mätsladdarna placeras över en mätpunkt Det finns ingen omkopplare som kan vridas Mätaren känner av vad som ska mätas och det digitala fönstret visar mätvärdet tillsammans med motsvarande enhetsikon Den automatiska bakgrundsbelysningen har en sensor som identifierar när det omgivande ljuset är för svagt och då tänds bakgrundsbelysningen En stark blå bakgrundsbelysning är då tillgänglig ...

Page 88: ...m FAIL FEL visas ska du inte använda mätaren Se Felsökning Utför inga mätningar under starten eller självtestsekvensen Detta medför att självtesten misslyckas Inaktivera den automatiska avstängningen Auto Power Off APO Tryck på och håll ned knappen ON OFF PÅ AV i åtminstone 3 sekunder Aktivera den automatiska hållfunktionen för ACA ACA Auto Hold och inaktivera den automatiska avstängningen Auto Po...

Page 89: ...ll 999 9 V 0 7 V till 999 9 V LCD fönstret visar Ω läget när ingångsterminalen uppfylls av följande villkor 0 till Ω Växelströmsvolt 0 v till 0 9 V Likströmsvolt 0 4 till 0 2 V Likströmsvolt 1 0 v till 2 0 V LCD fönstret visar diodläget när ingångsterminalen uppfylls av följande villkor Likströmsvolt 0 4 till 0 8 V LCD fönstret visar spänningsläget för växelström när strömingångskäften uppfylls av...

Page 90: ...lysningen aktiveras automatiskt när det omgivande ljuset är svagt Håll data Se Figur 9 Funktionen Data Hold Håll data gör att mätaren kan avläsa och visa ett mätvärde När mätvärdet har stabiliserats ska du trycka på och hålla ned knappen HOLD HÅLL för att låsa värdet i fönstret Funktionen för att hålla kvar data är inte tillgänglig om OL kΩ visas eller om ingen ingångssignal visas VARNING Farlig s...

Page 91: ...era att mätaren används på rätt sätt 2 Kontrollera att batteriet är i gott skick Ikonen för låg batteriladdning visas när laddningen understiger den nivå där noggrannhet garanteras Byt omedelbart ut ett batteri med låg laddningsnivå Byte av batteri Byta ut batteriet Se Figur 10 1 Stäng av mätaren och avlägsna alla anslutna mätsladdar 2 Lossa skruven och ta bort batteriluckan 3 Byt ut batteriet mot...

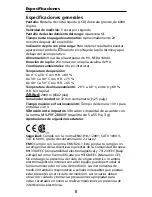
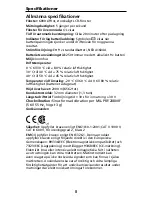
Page 92: ...snat Höjd över havet 2000 m 6562 fot Konduktorstorlek 32 mm diameter 1 3 tum Längsta driftstid Fördröjningstid 30 s för inmatning 30 V Chockvibration Sinusformad vibration per MIL PRF 28800F 5 till 55 Hz högst 3 g Godkännanden Säkerhet Uppfyller kraven enligt EN61010 1 2001 CAT II 1000 V CAT III 600 V Föroreningsgrad 2 Klass 2 EMC Uppfyller kraven enligt EN61326 1 Denna produkt uppfyller kraven en...

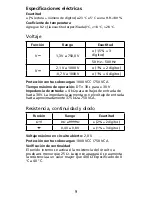
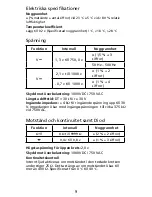
Page 93: ... VDC 750 VAC Längsta driftstid DT 30 s för 30 V Ingående impedans 4 kΩ för ingående spänning upp till 30 V Impedansen ökar med ingångsspänningen till cirka 375 kΩ vid 750 VAC Motstånd och kontinuitet samt Diod Funktion Intervall Noggrannhet Ω 0 Ω till 9999 Ω 2 2 siffror 0 4 v till 0 8 v 1 3 siffror Högsta spänning för öppen krets 2 0 v Skydd mot överbelastning 1000 VDC 750 VAC Kontinuitetskontroll...

Page 94: ...yrka Funktion Intervall Noggrannhet A 0 9 A till 600 0 A 1 9 5 siffror 50 Hz 60 Hz Skydd mot överbelastning 600 0 A 0 500 A Kontinuerlig drift 501 A till 600 A Högst 10 minuter följt av en nedkylningsperiod på 10 minuter ...

Page 95: ...11 ...

Page 96: ...12 ...

Reviews: