background image


PART FOUR


4. ERROR CODE AND SOLUTIONS 

 
When  MIB-1  is  first  turned  on,  the  machine  will  enter  in  to  self-check 

(Initialization) automatically. If LCD screen displays any of the following error codes, it 
is  because  that  there  may  be  dust  on  the  surface  of  sensors  or  sensors  blocked  by 
notes  or  other particulates or paper  clips  and  so  on.  Solutions:  Clean the  dust  with 
brush or soft cloth or remove the banknotes if in the bill path, and then restart the 
machine. Contact AMROTEC is problem continues to persist.  

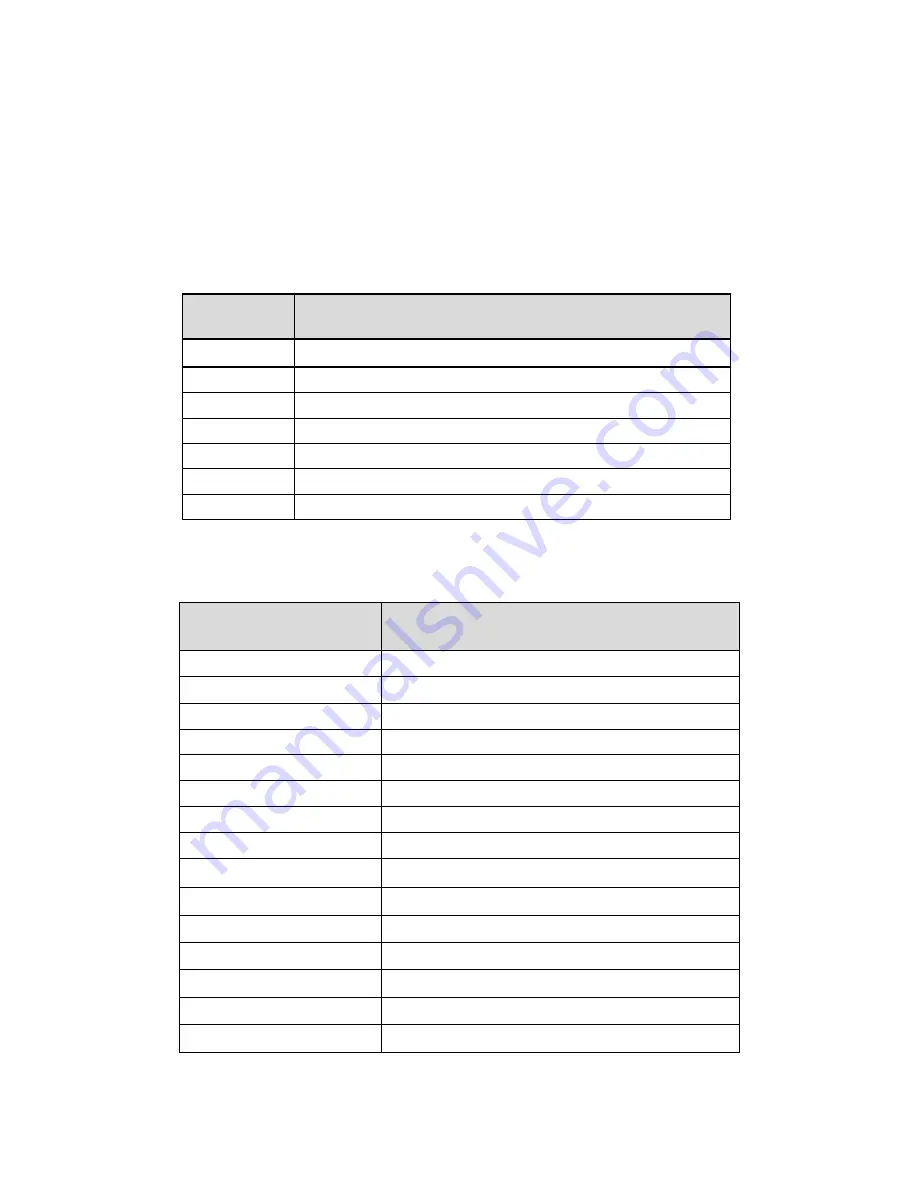
Error code  Trouble position 

EO1 

Left counting sensor 

EO2 

Right counting sensor 

EO3 

Left repeated sensor 

EO4 

Right repeated sensor 

EO5 

Note-receiving sensor 

EO6 

Note-feeding sensor 

EO7 

Breadth sensor 

 
During the counting, when LCD screen appears with any of the following Error codes 
and the machine stops, please perform:   
 

Error code 

Trouble 

Shooting 

E1 

Bill UV sensor error 

E2 

Bill double error 

E3 

Chain notes error 

E4 

Half notes error 

E10 

Bill CIS sensor signal lose 

E11 

Denomination error 

E12 

Bill denomination error 

E13 

Bill facing recognize error 

E14 

Bill size recognize error 

E15 

Bill towards recognize error 

E20 

MT error 

E21 

MG1 error 

E22 

MG2 error 

E23 

MG3 error 

E24 

MG4 error 

Summary of Contents for MiB-1

Page 1: ...Service Manual V 1 MIB 1 Series...

Page 2: ...r of this equipment Read this manual carefully before servicing the machine Refer to machine disassembly and other videos posted on AMROTEC s Dealer website Please ask for Password to login to AMROTEC...

Page 3: ...S DETECTION LEVEL ADJUSTMENT 11 1 CIS sensor Calibration 11 12 2 Dual US Software and Detection Level Adjustment 12 13 PART 6 MECHANICAL ADJUSTMENT 14 1 Position of Friction roller feed roller 14 2 Ga...

Page 4: ...e 2 Stacker sensor Emitter 3 Impeller Stacker Wheel 4 LCD Display 5 Hopper Sensor 6 Hopper Note guide 7 Handle 8 Back label Rear badge 9 Power cable Inlet 10 Power switch 11 Printer and RS232 interfac...

Page 5: ...e sensitivity of counterfeit detectors Button 8 Man Auto Switch on off Auto or Manual Start mode Button 9 MENU To Enter into Setting main Menu Password is 2552 Button 0 PRINT When MIB 1 is connected t...

Page 6: ...s MIX SORT SINGLE FACE ORIENT Size of Countable notes Minimum 110x60 mm Maximum 185x90 mm Thickness 0 08 0 12 mm Feed system Roller Friction System Hopper Capacity 400 500 notes maximum Stacker Capaci...

Page 7: ...on the banknote or glued overly creased or overly folded and so on Same applies to if any suspect banknotes not read by MIB 1 Except those highly sophisticated Super Counterfeit Dollar bill which have...

Page 8: ...the same as above described in 2 however change Counting Mode to COUNT mode for capturing data sample of suspect banknotes or genuine banknotes stopping for suspect reasons false alarm b Once machine...

Page 9: ...le sharing link such as google drive If you need assistant please contact our SERVICE TEAM 2 UPGRADE THE MIB 1 MACHINE AMROTEC periodically release upgrade software for MIB Series machine with improve...

Page 10: ...chine will automatically enter the upgrade process b MIB 1 machine display will show a progress bar indicating the process of uploading the software onto the machine After the progress bars turn to gr...

Page 11: ...is turned on and screen is back to Normal screen please follow the steps below Press MENU button Enter into 1 Service Menu by pressing 1 key Enter Password 2552 using numeric keys on the control pane...

Page 12: ...to persist Error code Trouble position EO1 Left counting sensor EO2 Right counting sensor EO3 Left repeated sensor EO4 Right repeated sensor EO5 Note receiving sensor EO6 Note feeding sensor EO7 Brea...

Page 13: ...nsmission area5 error E35 IR transmission area6 error E36 IR transmission area7 error E37 IR transmission area8 error E38 IR reflect area 1 error E39 IR reflect area 2 error E40 IR reflect area 3 erro...

Page 14: ...ng of the Bill path area until it fully blocks CIS sensor d Close the bill path and Rear door Prepare to Calibration process a Press MENU key on the control panel to enter into MENU screen Press START...

Page 15: ...default USA currency software will appear on the machine when it is first turned on Due to pre adjustment of CF and other sensor settings adjustment for USA currency Software from factory to work bes...

Page 16: ...pressing arrow down key or press 8 key on the control panel d Once in 8 Detection Level press to enter into sub menu as below If MIB 1 is set to USA currency system then CF level will appear as below...

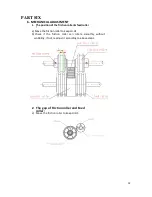
Page 17: ...ction roller feed roller a Move the friction roller to keep H H1 b Check if the friction roller can rotate smoothly without wobbling if not readjust it according to above steps 2 The gap of Friction r...

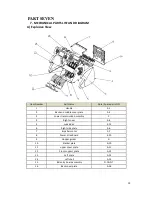
Page 18: ...er plate A 2 3 Lower transmission Assembly C 4 Right cover A 4 5 coded disc E 13 6 Right side plate A 6 7 Impeller motor A 7 8 Power drive board E 20 9 Hopper guider G 10 Stacker plate A 10 11 upper c...

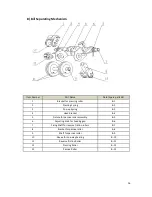
Page 19: ...p Spring B 3 4 Head bracket B 4 5 Fixture for passive roller assembly B 5 6 Adjusting knob for Feeding gap B 6 7 Fixing Shaft for reverse friction rollers B 7 8 Bracket for passive roller B 8 9 Shaft...

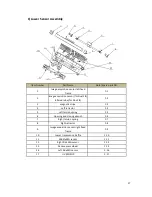
Page 20: ...ne CIS C 2 3 magnetic stripe C 3 4 Left retractor C 4 5 Left torsion spring C 5 6 Opening and closing wrench C 6 7 Right torsion spring C 7 8 Right retractor C 8 9 Image acquisition sensor right fixed...

Page 21: ...embly Item Number Part Name Note Spare parts NO 1 Bill feeding Platform D 1 2 Control Panel D 2 3 Fixture for LCD Display D 3 4 LCD Display D 4 5 Left display key D 5 6 Screen cover D 6 7 Hopper senso...

Page 22: ...block E 8 9 Image acquisition sensor right fixed frame E 9 10 40 teeth synchronizing Wheel E 10 11 20 teeth synchronizing Wheel E 11 12 153 Synchronizing Belt E 12 13 coded disc E 13 14 Code disk sens...

Page 23: ...ed hopper guide F 2 3 Right Extended hopper guide F 3 4 Fixture for extender hopper F 4 5 Left Moving Bar F 5 6 Right Moving Bar F 6 7 Gearing wheel F 7 G Hopper Assembly Item Number Part Name Note Sp...

Reviews: