52
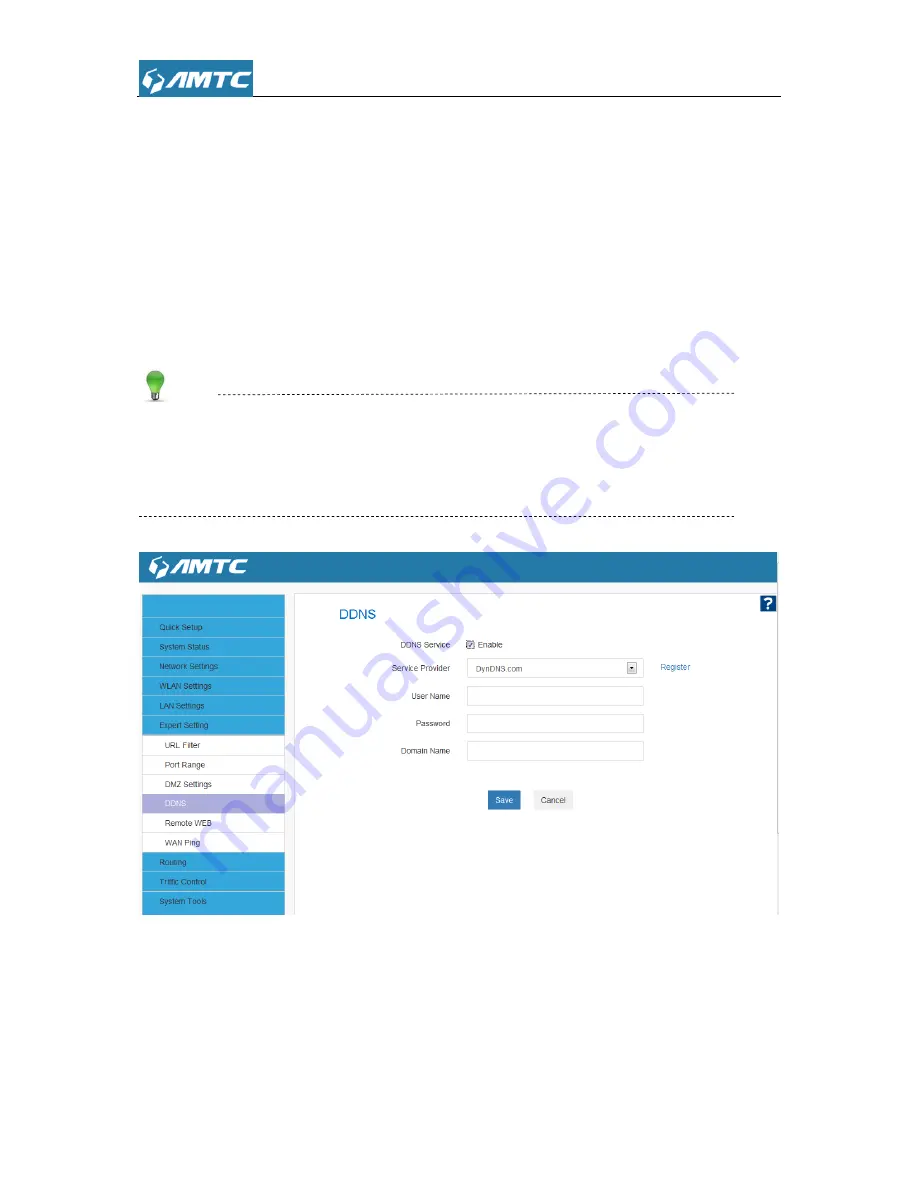
Set Steps
:
①
Click
“
Expert Settings
”
②
Select
“
DNNS
”
③
DNNS Service
Enable
④
Add
“
Serve provider
”.
⑤
Enter the
“
User name
” and “
Password
”
⑥
Enter
“
Domain Name
”
⑦
Click
“
Save
”
to confirm.
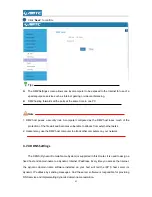
Tips
1. To use the DDNS feature, you need to have an account with one of the Service Providers in the
drop-down menu first.
2. This router supports five DDNS service providers: DynDNS.com and 88ip.cn and 3322.com
Parameters Specification:
DDNS Service:
Click the button to enable or disable the DDNS service.
Service provider:
Select one from the drop-down list and cl
ick “Sign up” for registration.
Username:
Enter the username that you use to register from the DDNS provider.
Password:
Enter the password that you use to register from the DDNS provider.
Summary of Contents for PW5002
Page 12: ...12 Click Network and Internet Click Network and Sharing Center ...
Page 13: ...13 Click Change adapter settings Click Local Area Connection and select Properties ...
Page 65: ...65 Appendix 1 Configure PC TCP IP Settings Windows 7 Click Start Control Panel ...
Page 66: ...66 Click Network and Internet Click Network and Sharing Center ...
Page 67: ...67 Click Change adapter settings Click Local Area Connection and select Properties ...
Page 68: ...68 Select Internet Protocol Version 4 TCP IPv4 and click Properties ...
Page 69: ...69 Select Obtain an IP address automatically and click OK ...
Page 70: ...70 Click OK on the Local Area Connection Properties window to save your settings ...
Page 77: ...77 Select the wireless network and click Remove network ...


