background image

Designing Touch Panel Pages

16

Color Passive-Matrix LCD Touch Panels

2.

Enter 1, 2, 3, or 4 in the keypad. The programming software uses device codes 1 - 4 to identify 

the touch panel. Refer to the 

G3 Firmware Design and Reference

 instruction manual for more 

information. 

3.

Press ENTER to save the device number, close the keypad, and return to the Button Properties 

page.

4.

Press CHAN to open the keypad and enter a channel value of 1 - 255. The source code uses the 

channel code number to identify the button and its programmed operations. The channel code 

for non-active buttons is 0.

5.

Press ENTER to save the channel number, close the keypad, and return to the Button Properties 

page.

Setting the variable text code

The variable text buttons set the device and button channel codes for the buttons.

1.

Press DEV to open the keypad and set the device number.

2.

Enter 1, 2, 3, or 4 in the keypad. The source code uses device codes 1 - 4 to identify the touch 

panel. 

3.

Press ENTER to save, close the keypad, and return to the Button Properties page.

4.

Press CHAN to open a keypad and set the channel number.

5.

Enter a channel value of 1 - 255 in the keypad. The source code uses the channel code number 

to identify the button and its operations.

6.

Press ENTER to save the channel number, close the keypad, and return to the Button Properties 

page.

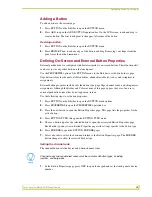
Setting the page flip

1.

Press the PAGE FLIP Type button (FIG. 15) in the Button Properties page to open the Page 

Flip Type menu.

2.

Select a Page Flip type. If you select FLIP PREVIOUS in the Page FLIP Type menu, the FLIP 

to Page button appears.

3.

Press the FLIP to Page button (FIG. 15) to open a list of all the saved touch panel pages. If the 

desired page is not present in the menu, check to verify the page has been saved.

4.

Select the target page for the page flip.

If DEVICE USED is set to 4 and Base Device Number is 128, the Controller recognizes 
bus devices 128 - 131. 
The panel will not allow you to enter a device number greater than the DEVICE USED 
without first displaying a decision box asking if you accept the new selection or not.

FIG. 15  

Page FLIP Type button

Flip to Page button

Page FLIP type 
button

Summary of Contents for 8.5" Color Passive LCD Touch Panels

Page 1: ...instruction manual Touch Panels and Accessories 8 5 Color Passive LCD Touch Panels Firmware version G3 or higher ...

Page 2: ... liability applies whether damages are sought or a claim is made under this warranty or as a tort claim including negligence and strict product liability a contract claim or any other claim This limitation of liability cannot be waived or amended by any person This limitation of liability will be effective even if AMX Corporation or an authorized representative of AMX Corporation has been advised ...

Page 3: ...ower supply 9 Using the DB 9 RS 232 connector for mouse control or data 10 Designing Touch Panel Pages 11 Buttons 11 Activating Edit Mode 12 Setting the Device Base 14 Setting the Device Used 14 Adding a Page 14 Setting the page color 14 Adding a Button 15 Resizing a button 15 Defining On Screen and External Button Properties 15 Setting the channel code 15 Setting the variable text code 16 Setting...

Page 4: ... Send_Commands 27 Color Send_Commands 31 Variable Text Send_Commands 33 Shorthand Variable Text Commands 36 Button String Commands 39 Upgrading the Firmware 41 AXT CP EPROM Replacement 41 AXM CP PB and AXD CP PB EPROM Replacement 42 Replacing the Batteries 45 AXT CP Batteries 45 AXD CP PB and AXM CP PB Batteries 46 ...

Page 5: ... AXD CP 7 50 x 11 25 x 1 77 low profile Back Box 17 48 cm x 28 58 cm x 4 5 cm 7 50 x 11 25 x 2 44 BB TP2 Back Box 17 48 cm x 28 58 cm x 6 2 cm AXT CP TiltScreen panel dimensions HW 7 10 x 9 11 18 03 cm x 23 14 cm LCD screen dimensions HW 4 80 x 6 40 12 19 cm x 16 26 cm Base dimensions WD 11 46 x 9 46 29 11 cm x 24 03 cm Adjustable display heights 3 40 8 64 cm fully lowered 8 50 21 59 cm fully rais...

Page 6: ...essories Included 12 VDC power supply 1 9 A 110 VAC installations only Low profile Back Box AXD CP and AXM CP only 4 pin female AXlink bus connector AXM CP only 4 pin AXlink data power connector AXT CP only Optional Accessories Up to 8 pushbuttons per side for the AXD CP and AXM CP 9 pin female DB 9 connector AXD CP and AXT CP only PSN2 8 Power Supply BB TP2 Back Box AXD CP Software TPDesign Windo...

Page 7: ...ully insert a flat blade screwdriver into the release slot on the touch panel s faceplate and remove the engraved overlay 3 Place the touch panel into the cutout and mark the screw insert positions as shown in FIG 1 4 Remove the touch panel and drill four 6 32 insert holes Then place a threaded insert into each hole 5 Disconnect the AXlink connector from the Central Controller Then disconnect the ...

Page 8: ...n also secure the faceplate to the bezel using the four Phillips flat head security screws 11 Insert the engraved overlay back into the bezel 12 Remove the backing from the adhesive tape strips located on the front of the touch panel press the engraved overlay onto the faceplate 13 Reconnect the AXlink wiring to the Central Controller and RS 232 wiring optional to the external RS 232 device The to...

Page 9: ...ur holes marked B in the cutout dimensions illustration 6 Disconnect the AXlink connector from the Central Controller Then disconnect the optional RS 232 wiring from the external RS 232 device connected to the touch panel 7 Remove one or more knockouts to accommodate the wiring as required 8 Thread the incoming AXlink and RS 232 wiring through the knockouts Refer to theWiring the Touch Panel secti...

Page 10: ...ly power Installing touch panels and a BB TP2 Back Box plasterboard FIG 4 shows the AXD CP PB and BB TP2 Back Box for plasterboard 1 Cut out the surface using the dimensions shown in FIG 5 2 Carefully insert a flat blade screwdriver into the release slot on the touch panel s faceplate and remove the engraved overlay 3 Lay the touch panel facedown onto a soft cloth and remove the screws from the lo...

Page 11: ...e continuing disconnect all connections until panel installation is complete 12 Fasten the touch panel to the BB TP2 with the 6 32 screws supplied with the en closure 13 Place the Decor style faceplate onto the bezel You can also secure the faceplate to the bezel using the four Phillips flat head security screws 14 Remove the backing from the adhesive tape strips Once attached to the faceplate the...

Page 12: ...shown FIG 6 The connectors are located on the top left corner of the rack mount touch panels as shown in FIG 7 Preparing captive wires You will need a wire stripper soldering iron and flat blade screwdriver to prepare and connect the captive wires 1 Strip 0 25 inch of wire insulation off all wires and apply a light coat of solder to the ends using a soldering iron 2 Insert each wire into the appro...

Page 13: ... connector on the touch panel Using AXlink for data and power Connect the Central Controller s AXlink connector to the AXlink connector on the touch panel for data and 12 VDC power as shown in FIG 8 Using the AXlink for data with a 12 VDC power supply Connect the Central Controller s AXlink connector to the AXlink connector on the touch panel and external 12 VDC power supply as shown in FIG 9 Use ...

Page 14: ...request to send and 8 clear to send together depending on the PC FIG 9 AXlink and external 12 VDC power supply wiring diagram DB 9 RS 232 Connector Pinouts Pin Signal Function 1 N A Not used 2 RXD Receive data 3 TXD Transmit data 4 DTR Data terminal ready not used 5 GND Signal ground 6 DSR Data set ready not used 7 RTS Request to send not used 8 CTS Clear to send not used 9 N A Not used FIG 10 DB ...

Page 15: ...reate or revise pages and specify panel communication parameters Button examples include selection buttons information buttons adjustment buttons and operation bars The general button categories are described in the table below General Button Categories Selection buttons Selection buttons appear on touch panel pages and set communica tion parameters Information buttons Information buttons contain ...

Page 16: ...ionality except to display information Operation bars Operation bars appear in the place of the Editor bar after selecting a button or page edit operation The operation bar indicates which edit function is currently active When an edit operation is selected it remains active until you press EXIT Touch to Continue buttons Touch to Continue buttons appear when an operation requires user acknowledgem...

Page 17: ...ious page 4 Press EDITOR to enable Edit mode The EDITOR button is highlighted in the Protected Setup page when enabled as shown in FIG 13 5 Press EXIT to close the Protected Setup page and return to the Setup page now in the Edit mode 6 Press EXIT again to return to the Main page The EDIT button appears at the top of the page indicating that Edit mode is active 7 Press EDIT to open the Edit bar Th...

Page 18: ...programmable channel codes The multiple device settings allow you to create up to four unique touch panel buttons and or pages This value is used to determine the current device being used by the panel 2 Enter the number of devices being used by the touch panel 3 Press Enter to save the value Adding a Page 1 Press PAGE on the Edit bar to open the PAGE menu 2 Press ADD to open the keyboard and ente...

Page 19: ... page flips channel codes and string macro assignments Although the Border and Color sections of this page appear they are of no use to external pushbuttons since they do not appear on screen Use the following steps to set button properties 1 Press BUTTON on the Edit bar to open the BUTTON menu options 2 Press PROPERTIES to open the PROPERTIES operation bar 3 Press the new button to open the Butto...

Page 20: ...to save close the keypad and return to the Button Properties page 4 Press CHAN to open a keypad and set the channel number 5 Enter a channel value of 1 255 in the keypad The source code uses the channel code number to identify the button and its operations 6 Press ENTER to save the channel number close the keypad and return to the Button Properties page Setting the page flip 1 Press the PAGE FLIP ...

Page 21: ...ts the On and Off properties the same 5 Press EXIT SAVE CHANGE to close the Text Image page and return to the Main page Using TPDesign3 to Download Bitmaps Icons and Fonts TPDesign3 allows you to download bitmaps icons and fonts into your touch panel from an existing touch panel program Touch Panel programs are created in the TPDesign3 software program Refer to the TPDesign3 Touch Panel Program ve...

Page 22: ...rly Adding a bargraph or joystick button Create a new button using the ADD operation bar in the BUTTON menu 1 Press BUTTON in the Edit bar to open the BUTTON menu 2 Press PROPERTIES in the BUTTON menu to open the PROPERTIES operation bar 3 Press any button to open the Button Properties page 4 Press BUTTON TYPE to open the BUTTON TYPE menus Choose a button type to open its Button Properties page Se...

Page 23: ... Panels 4 Press NUM to open a keypad and set the level number assigned to the device 5 Enter a number 1 8 Each device can have from 1 8 levels except joysticks where the range is 1 7 6 Press ENTER to save close the keypad and return to the Button Properties page ...

Page 24: ...Designing Touch Panel Pages 20 Color Passive Matrix LCD Touch Panels ...

Page 25: ...P Example SEND_COMMAND TP ADBEEP Double beeps the panel AKEYB Opens the touch panel keyboard and initializes the text string entry The keyboard string is set to null during power up and is stored until power down Syntax AKEYB text string Variables text string 0 59 characters Example SEND_COMMAND TP AKEYB TOUCH HERE Opens the touch panel keyboard with TOUCH HERE in the display AKEYP Opens the touch...

Page 26: ...SEND_COMMAND TP CONT 12 Sets to highest brightness level CALIBRATE Starts touch panel calibration Syntax CALIBRATE Example SEND_COMMAND TP CALIBRATE Starts the calibration operation on the touch panel CLOCK Sets the time and date Syntax CLOCK mm dd yy hh mm ss Variables mm 01 12 dd 01 31 yy 00 99 hh 00 23 mm 00 59 ss 00 59 Example SEND_COMMAND TP CLOCK 02 08 98 19 16 00 Sets the touch panel s date...

Page 27: ...ad of 1988 PPOF Closes a specific popup page Syntax PPOF page name Variables page name 1 50 ASCII characters Example SEND_COMMAND TP PPOF Popup Page 1 Closes Popup Page 1 PPON Opens a specific popup page Syntax PPON page name Variables page name 1 50 ASCII characters Example SEND_COMMAND TP PPON Popup Page 1 Opens Popup Page 1 QBEEP Stops all beeps Syntax QBEEP Example SEND_COMMAND TP QBEEP Stops ...

Page 28: ... WAV PK connected to the TiltScreen pan els The command is sent to the WAV PK which then sends it to the panel Syntax ST number Variables number 1 255 ASCII characters Example SEND_COMMAND TP ST 31 The number entered is based on the minute increments available within the touch panel such as 30 60 120 minutes This number will be rounded down to match an increment TPAGEOFF Deactivates page tracking ...

Page 29: ...ND TP2 PAGE TP1_BUFFER CLEAR_BUFFER TP1_BUFFER IF FIND_STRING TP1_BUFFER PPON 1 OR FIND_STRING TP1_BUFFER PPOF 1 SEND_COMMAND TP2 TP1_BUFFER CLEAR_BUFFER TP1_BUFFER IF LENGTH_STRING TP2_BUFFER IF FIND_STRING TP2_BUFFER PAGE 1 TRASH REMOVE_STRING TP2_BUFFER PAGE 1 SEND_COMMAND TP1 PAGE TP2_BUFFER CLEAR_BUFFER TP2_BUFFER IF FIND_STRING TP1_BUFFER PPON 1 OR FIND_STRING TP1_BUFFER PPOF 1 SEND_COMMAND ...

Page 30: ...83 Aqua 30 35 Dark Gray 84 86 Cyan 36 41 Black 87 Royal 42 47 Transparent 255 Blue 48 53 You must import variable text fonts into a TPDesign3 project file and download the project file containing the fonts to the touch panel The variable fonts are programming numbers assigned by the touch panel during the download process Font Styles and Programming Numbers No Font styles No Font styles 1 Extra sm...

Page 31: ...CBN variable text address color_number Variables variable text address 1 255 color number See the Colors and Programming Numbers table on page 26 Example SEND_COMMAND TP CBN 2 78 Sets the ON feedback border color to Gray for variable text button 2 CFF Sets the OFF feedback fill color to the specified color This only works if the specified background color is not the same as the current color Synta...

Page 32: ...P CPP 54 Audio Page Sets the popup page title to Audio Page and the color to Purple CTF Sets the OFF feedback text color to the speci fied color This only works if the specified background color is not the same as the current color Syntax CTF variable text address color_number Variables variable text address 1 255 color number See the Colors and Programming Numbers table on page 26 Example SEND_CO...

Page 33: ...us command would remove them all from Main Page PPF Deactivates a popup page on a touch panel page If a page name is empty the current page is used If a pop up page is part of a group the whole group is deactivated Syntax PPF popup page name page name Variables popup page name target popup page name page name target touch panel page name Example SEND_COMMAND TP PPF Laser Disc 2 Transport Control L...

Page 34: ...word Variables protected setup password 0 9999 Example SEND_COMMAND TP PRO 1988 Sets the touch panel s Protected Setup page password to 1988 PWD Sets the password for the Page Flip on the touch panel Syntax PWD page flip password Variables page flip password 0 9999 Example SEND_COMMAND TP PWD 1988 Sets the page flip password to 1988 SSL Changes the Sleep string sent to the Controller when the touc...

Page 35: ... button colors see the Colors and Programming Numbers table on page 26 Syntax CALL variable text address data Variables You must have the variable text assignments to change button colors variable text address 1 255 data 6 color number series for FILL COLOR ON FILL COLOR OFF BORDER COLOR ON BORDER COLOR OFF TEXT COLOR ON TEXT COLOR OFF Example SEND_COMMAND TP CALL1 87 72 87 72 72 87 Sets variable ...

Page 36: ...ill color to the specified color Syntax CFON variable text address color _number Variables variable text address 1 255 color number See the Colors and Programming Numbers table on page 26 Example SEND_COMMAND TP CFON1 87 Sets the ON feedback fill color to Black for variable text button 1 CPAGE Sets the back ground page color to the specified color Syntax CPAGE color_number page name Variables colo...

Page 37: ...text color to White for variable text button 1 Variable Text Send_Commands B Sets a specific button to On or Off Syntax B variable text address 1 255 ON OFF 0 1 Variables variable text address 1 255 ON 0 OFF 1 Example SEND_COMMAND TP B 128 1 Sets button 128 Off BTOF Sets a specific button s active state to Off Syntax BTOF variable text address Variables variable text address 1 255 Example SEND_COM...

Page 38: ...mple SEND_COMMAND TP F 1 6 Changes variable text button one font to hollow medium FONT Changes the font size or style of the text in a spe cific button Syntax FONT variable text address font size Variables variable text address 1 255 font size See the Font Styles and Programming Numbers table on page 26 Example SEND_COMMAND TP FONT 1 6 Changes variable text button one font to hollow medium I Short...

Page 39: ...mple SEND_COMMAND TP T 1 VCR PLAY Changes the variable text button one title to VCR PLAY TEXT Enters text on a button Use the character to display text on multiple lines Syntax TEXT variable text address new button text Variables variable text address 1 255 button text Enter button text to appear on button Example SEND_COMMAND TP TEXT2 VCR PLAY Sets the VCR and PLAY text on variable button 2 The c...

Page 40: ...Numbers table on page 26 T button text ASCII characters empty is clear P bitmap Bitmap filename empty is clear I icon 1 255 icon numbers are assigned in TPDesign3 project file J text alignment 1 9 as shown the following alignment chart For C1 C6 see the Colors and Programming Numbers table on page 26 C1 on state fill color C2 off state fill color C3 on state border color C4 off state border color ...

Page 41: ...riable text channel 128 This button will stop responding to pushes completely until it is sent an Enable command Nothing short of a touch panel Softrom firmware reload will re enable the button Reloading the touch panel file reloading the Axcess program or resetting power on the panel or master will not re enable the but ton It must be sent an Enable command once it has been Disabled FON Sets the ...

Page 42: ...multiple lines Syntax TXT variable text address text Variables variable text address 1 255 button text Enter button text to appear on button Example SEND_COMMAND TP TXT 2 VCR PLAY Sets the VCR and PLAY text on variable button 2 The character places VCR above PLAY on the button UNI Adds Unicode text to a button Syntax UNI variable text address text Variables variable text address 1 255 button text ...

Page 43: ...number variable text The variable text number value on the touch panel data 0 59 characters Example SC 1 TXT 2 TEXT The string is sends the command to put text on a button with a variable text value of 2 It is crucial that all the correct and be used with no spaces after the commas Example SC 1 SLEEP Sets a touch panel to sleep SL Activates sleep mode on a wireless touch panel This command does no...

Page 44: ...tches the sleep time the panel goes to sleep Syntax ST sleep timeout Variables sleep timeout 1 Off 120 minutes Example ST 5 Sets the touch panel s sleep time to 5 minutes TO Sends touch coor dinates out through the pro gram port Syntax TO touch output enabling via the program port Variables touch output enabling 0 Input Touch Only 1 Input and Output Touch Example TO 0 Sets the panel only to input ...

Page 45: ...he center of the circuit card 5 Gently tilt the circuit card down towards the connector side and pull backwards until you clear the connector housing Then slowly rotate the circuit card backwards until you can lay it down flat with the EPROMs exposed as seen in FIG 16 EPROMS have stickers indicating the firmware version 6 Carefully remove each EPROM individually by inserting a Phillips screwdriver...

Page 46: ...eady mounted to a surface remove it at this time Refer to the Installation section on page 3 for more information 1 Discharge the static electricity from your body by touching a grounded object 2 Remove the 2 pin power connector from the rear side of the panel If you are using power via AXlink remove the AXlink connector 3 Flip the touch panel face down onto a soft cloth and remove the seven Phill...

Page 47: ...he circuit card back to the original position and place it in the touch panel housing 11 Plug the 2 pin power or AXlink connector back into the touch panel for approximately 1 minute Once you can confirm the panel is receiving power remove the connector align the screw hole and insert the Phillips head screw and tighten 12 Replace the housing on the touch panel and align the screw holes Insert the...

Page 48: ...Upgrading the Firmware 44 Color Passive Matrix LCD Touch Panels ...

Page 49: ... 3 Flip the touch panel face down onto a soft cloth and remove the seven Phillips head screws from the bottom panel Then gently remove the panel 4 Remove the Phillips head screw located in the center of the circuit card 5 Gently tilt the circuit card down towards the connector side and pull backwards until you clear the connector housing Then slowly rotate the circuit card backwards until you can ...

Page 50: ...ch panel 1 Discharge the static electricity from your body by touching a grounded object and unscrew the Decor style faceplate 2 Using a flat blade tool unscrew the Decor style faceplate 3 Remove the four 6 32 mounting screws and carefully lean the touch panel backward to expose the connectors 4 Disconnect all the connectors and remove the touch panel from the Back Box or equipment rack 5 Flip the...

Page 51: ...Replacing the Batteries 47 Color Passive Matrix LCD Touch Panels ...

Page 52: ...ive richardson TX 75082 USA 469 624 8000 800 222 0193 fax 469 624 7153 technical support 800 932 6993 036 004 1794 7 03 2003 AMX Corporation All rights reserved AMX the AMX logo the building icon the home icon and the light bulb icon are all trademarks of AMX Corporation AMX reserves the right to alter specifications without notice at any time In Canada doing business as Panja Inc ...

Reviews: