background image


Rev 13 Nov 2013 00:23 | Page 4

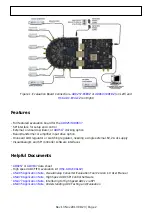
The evaluation board provides the support circuitry required to operate the 

AD9257

 and 

AD9637

 in

their various modes and configurations. Figure 1 shows the typical bench characterization setup used
to evaluate AC performance. It is critical that the signal sources used for the analog input and clock
have very low phase noise (ideally ~100 fs rms jitter) to realize the optimum performance of the
signal chain. Proper filtering of the analog input signal to remove harmonics and lower the integrated
or broadband noise at the input is necessary to achieve the specified noise performance.

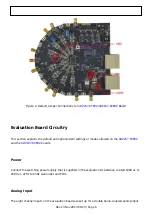
See 

AD9257/9637 Design Support <Coming Soon>

 for the complete schematics and layout diagrams.

These diagrams demonstrate the routing and grounding techniques that should be applied at the
system level when designing application boards using these converters.

Power Supplies

This evaluation board comes with a wall-mountable switching power supply that provides a 6V, 2A
maximum output. Connect the supply to a 100V ac to 240V ac, 47Hz to 63Hz wall outlet. The output
from the supply is provided through a 2.1mm inner diameter jack that connects to the printed circuit
board (PCB) at P101. The 6V supply is fused and conditioned on the PCB before connecting to the low
dropout linear regulators that supply the proper bias to each of the various sections on the board.

The evaluation board can be powered in a nondefault condition using external bench power supplies.
To do this, remove the E101, E102, E104, E105, E111, E112, E113, E114, E115 and E116 ferrite beads
to disconnect the bench supply traces from the on-board LDOs. Note that in some board
configurations some of these might already be uninstalled. P102 and P103 need to be installed to
connect external bench supplies to the board. E106, E107, E108 and E109 need to be populated to
connect P102 and P103 to the board power domains. A 1.8V , 0.5A supply is needed for
1.8V_DUT_AVDD and 1.8V_DRVDD. Although the voltage requirements are the same for
1.8V_DUT_AVDD and 1.8V_DRVDD, it is recommended that separate supplies be used for each of
these.

Two additional supplies, 5.0V_AVDD and 3.3V_AVDD, are used to bias the optional input path
amplifiers and optional 

AD9517-4

 clock chip. If used, these supplies should each have at least 0.5A

current capability.

Input Signals

When connecting the ADC clock and analog source, use clean signal generators with low phase noise,
such as the Rohde & Schwarz SMA, or an equivalent. Use a shielded, RG-58, 50Ω coaxial cable
(optimally 1 m or shorter) for connecting to the evaluation board. Enter the desired frequency and
amplitude (see the Specifications section in the data sheet of the respective part). When connecting
the analog input source, use of a multipole, narrow-band band-pass filter with 50Ω terminations is
recommended. Analog Devices uses band-pass filters from TTE and K&L Microwave, Inc. Connect the
filters directly to the evaluation board.

If an external clock source is used, it should also be supplied with a clean signal generator as
previously specified for the analog input signals. Analog Devices evaluation boards typically can

Summary of Contents for AD9257

Page 1: ...devices is also described Though the information on this page applies generally to the currently released version of the AD9257 65EBZ and AD9637 80EBZ the specifics i e photos jumper labels etc are fo...

Page 2: ...rive option On board LDO regulator or switching regulator needing a single external 6V 2A dc supply VisualAnalog and SPI controller software interfaces Helpful Documents AD9257 or AD9637 data sheet Hi...

Page 3: ...ard to the data capture board as shown in Figure 1 1 Connect one 6V 2 5A switching power supply such as the CUI Inc EPS060250UH PHP SZ that is 2 supplied to the AD9257 65EBZ or AD9637 80EBZ Connect on...

Page 4: ...wer supplies To do this remove the E101 E102 E104 E105 E111 E112 E113 E114 E115 and E116 ferrite beads to disconnect the bench supply traces from the on board LDOs Note that in some board configuratio...

Page 5: ...he ADC Using the SPI the PDWN pin can be configured to be STBY standby J1001 and J1002 These jumpers enable the optional ADL5565 amplifiers on Channels G and H respectively Connect pin 2 to pin 3 for...

Page 6: ...ault and optional ADC settings or modes allowed on the AD9257 65EBZ and the AD9637 80EBZ boards Power Connect the switching power supply that is supplied in the evaluation kit between a rated 100V ac...

Page 7: ...facilitate usage with higher frequency clocks When using the internal divider and a higher input clock frequency remove CR1101 to preserve the slew rate of the clock signal The AD9257 65EBZ and AD9637...

Page 8: ...Additional information on the Standalone PIN Mode is provided in the AD9257 and AD9637 data sheets Default Mode To operate the device under test DUT using the SPI follow the jumper settings for J301 a...

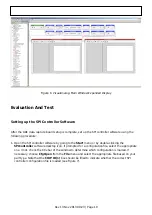
Page 9: ...ge To change features to settings other than the default settings click the Expand Display button 3 located on the bottom right corner of the window see Figure 5 to see what is shown in Figure 6 Chang...

Page 10: ...tware by going to the Start menu or by double clicking the 1 SPIController software desktop icon If prompted for a configuration file select the appropriate one If not check the title bar of the windo...

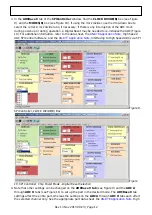
Page 11: ...Rev 13 Nov 2013 00 23 Page 11 Figure 7 SPI Controller CHIP ID 1 Box Click the New DUT button in the SPIController window see Figure 8 2 Figure 8 SPI Controller New DUT Button...

Page 12: ...er to the data sheet the AN 878 Application Note High Speed ADC SPI Control Software and the AN 877 Application Note Interfacing to High Speed ADCs via SPI Figure 9 SPI Controller CLOCK DIVIDE B Box F...

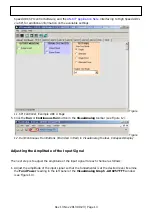
Page 13: ...n the VisualAnalog toolbar see Figure 12 5 Figure 12 Run Continuous Run Buttons Encircled in Red in VisualAnalog Toolbar Collapsed Display Adjusting the Amplitude of the Input Signal The next step is...

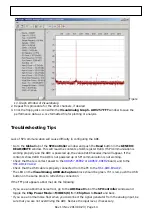
Page 14: ...ecimal will appear If the contents show 0x00 the ADC is not powered up or SPI communication is not working Check that there is correct power to the AD9257 65EBZ or AD9637 80EBZ board and to the HSC AD...

Page 15: ...isualAnalog see Figure 12 is clicked do the following Make sure that the evaluation board is securely connected to the HSC ADC EVALCZ board Make sure that the FPGA has been programmed by verifying tha...

Reviews: