Copyrights 2000 – 2012, Analog Technologies, Inc. All Rights Reserved. Updated on 11/22/2012
5
Analog Technologies
VC97
Multimeter
2352 Walsh Ave. Santa Clara, CA 95051. U. S. A. Tel.: (408) 748-9100, Fax: (408) 748-9111 www.analogtechnologies.com
OPERATION
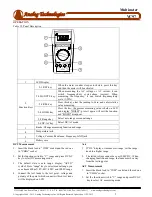
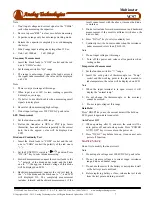
Table 12. Panel Description
1 LCD
Display
2
Function Keys
2-1 RST key
When the meter is under sleep or lock state, press this key
and then the meter will be activated.
2-2 Hz/DUTY key
When measuring the AC voltage or AC current, it can
switch frequency/duty cycle/voltage (current). When
measuring the frequency, it can switch frequency/duty
cycle (1-99%).
2-3
REL key
Press this key, clear the reading to Zero, and enter relative
value measuring.
2-4 HOLD key
Press the key, the present measuring value is held on LCD
and display “HOLD”; press it again will exit the function
and “HOLD” disappear.
2-5 Range key
Select auto range or manual range
2-6 DC/AC key
Select DC/AC mode
3
Knobe: Change measuring function and range.
4
Temperature jack.
5
Voltage, Current, Resistance, Frequency, GND jack
6
Battery case
DCV Measurement
1. Insert the black lead to “COM” socket and the red one
to “V
Ω
Hz” socket.
2. Set the function switch to “V” range and press DC/AC
key to select DC measuring mode.
3. The default state is auto range, display “AUTO”
symbol. Press “range” key to select manual range, you
can choose 400mV, 4V, 40V, 400V and 1000V range.
4. Connect the test leads to the test point, voltage and
polarity of the point which connect with red test leads
will be displayed on LCD.
Note
1.
If “OL” displays, it means over-range, set the range
knob to a higher range.
2.
The tested voltage cannot be over 1000V DC. When
changing function and range, the leads must be away
from the testing point.
ACV Measurement
1. Insert the black lead to “COM” socket and the red one
to “V
Ω
Hz” socket.
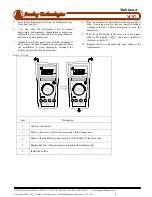
2. Set the function switch to “V” range and press DC/AC
key to select AC measuring mode.


