background image

Using driver default on device /dev/lirc1

irrecord -  application for recording IR-codes for usage with lirc

Copyright (C) 1998,1999 Christoph Bartelmus(lirc@bartelmus.de)

This program will record the signals from your remote control

and create a config file for lircd.

A proper config file for lircd is maybe the most vital part of this

package, so you should invest some time to create a working config

file. Although I put a good deal of effort in this program it is often

not possible to automatically recognize all features of a remote

control. Often short-comings of the receiver hardware make it nearly

impossible. If you have problems to create a config file READ THE

DOCUMENTATION at https://sf.net/p/lirc-remotes/wiki

If there already is a remote control of the same brand available at

http://sf.net/p/lirc-remotes you might want to try using such a

remote as a template. The config files already contains all

parameters of the protocol used by remotes of a certain brand and

knowing these parameters makes the job of this program much

easier. There are also template files for the most common protocols

available. Templates can be downloaded using irdb-get(1). You use a

template file by providing the path of the file as a command line

parameter.

Please take the time to finish the file as described in

https://sourceforge.net/p/lirc-remotes/wiki/Checklist/ an send it

to  <lirc@bartelmus.de> so it can be made available to others.

Press RETURN to continue.

Checking for ambient light  creating too much disturbances.

Please don't press any buttons, just wait a few seconds...

No significant noise (received 0 bytes)

Enter name of remote (only ascii, no spaces) :hifi

Using hifi.lircd.conf as output filename

Now start pressing buttons on your remote control.

It is very important that you press many different buttons randomly

and hold them down for approximately one second. Each button should

generate at least one dot but never more than ten dots of output.

Don't stop pressing buttons until two lines of dots (2x80) have

been generated.

Press RETURN now to start recording.

................................................................................

Got gap (45034 us)}

Please keep on pressing buttons like described above.

...............................................................................

Please enter the name for the next button (press <ENTER> to finish recording)

KEY_POWER

Now hold down button "KEY_POWER".

Please enter the name for the next button (press <ENTER> to finish recording)

Checking for toggle bit mask.

Please press an arbitrary button repeatedly as fast as possible.

Make sure you keep pressing the SAME button and that you DON'T HOLD

Summary of Contents for Infrared pHAT

Page 1: ...ing and observe good engineering practice standards As such the goods being provided are not intended to be complete in terms of required design marketing and or manufacturing related protective considerations including product safety and environmental measures typically found in end products that incorporate such semiconductor components or circuit boards There is no warranty for the design mater...

Page 2: ...pported Peripherals ANAVI Infrared pHAT Raspberry Pi HAT has an infrared receiver and an infrared transmitter Up to 3 I2C sensors can be also easily attached to the pHAT Sensors The officially supported I2C sensor modules by ANAVI Infrared pHAT are Temperature and barometric pressure BMP180 Temperature and humidity HTU21 Light BH1750 You may also attach any other I2C sensors but you will have to t...

Page 3: ...gh Raspberry Pi It is recommended to use the official Raspberry Pi Power Supply or another 2 5A USB power supply from reputable retailer CHAPTER 3 Software Installation In order to work correctly ANAVI Infrared pHAT requires an up to date kernel I2C to be enabled and a few libraries to get started After booting microSD card with Raspbian open a terminal and follow the steps below Ensure your APT p...

Page 4: ...n rpi gpio wiringpi i2c tools Download the examples for ANAVI Infrared pHAT cd git clone https github com AnaviTechnology anavi examples git cd anavi examples Sensors It is mandatory to enable I2C to use any of the sensors supported by ANAVI Infrared pHAT Temperature Sensor BMP180 Follow the steps below to use the BMP180 I2C temperature and barometric pressure sensor with ANAVI Infrared pHAT Conne...

Page 5: ...urce application for sending and receiving data over infrared on GNU Linux distributions This chapter provides guidelines how to enable ANAVI Infrared pHAT infrared receiver and transmitter on Raspbian and to use LIRC In 2019 lirc_rpi the Linux kernel module provided with Raspbian before was replaced with gpio ir and gpio ir tx This tutorial is updated for Raspbian Buster If you need to setup ANAV...

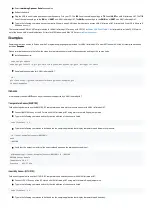
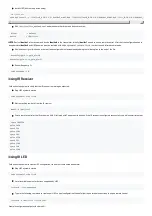
Page 6: ...pin 17 Reboot Raspberry Pi sudo shutdown r 0 Using IR Receiver Follow the steps below to verify that the IR receiver is working as expected Stop LIRC systemd service sudo systemctl stop lircd Start outputting raw data from the IR receiver mode2 d dev lirc1 Point a remote control at the IR receiver on ANAVI Infrared pHAT and press its buttons If the IR receiver is configured successfully you will s...

Page 7: ...ded using irdb get 1 You use a template file by providing the path of the file as a command line parameter Please take the time to finish the file as described in https sourceforge net p lirc remotes wiki Checklist an send it to lirc bartelmus de so it can be made available to others Press RETURN to continue Checking for ambient light creating too much disturbances Please don t press any buttons j...

Page 8: ... systemctl start lircd List all saved keys for example NOTE Please adapt the command below depending on your name of remote irsend LIST hifi Test the configuration file by sending recorded IR command for example POWER please note the exact command may vary for different LIRC configuration files IR devices and IR remote controls NOTE Please adapt the command below depending on your name of remote i...

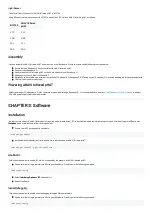
Page 9: ...berry Pi Component Pins I2C 3 5 EEPROM 27 28 IR LED 11 IR receiver 12 UART 1 8 9 10 I2C The sensors that can be connected to ANAVI Infrared pHAT communicate with a host microcontroller via a communications standard called I2C Inter Integrated Circut I2C uses two wires labelled SDA Serial Data and SCL Serial Clock To function properly I2C requires a pullup resistor on each of those lines therefore ...

Page 10: ...g on a commercial product and you would like to use the software under alternative commercial license CHAPTER 7 Revision History Document Revision Date Changes Modified pages Author 15 February 2017 Initial manual release All Leon Anavi 16 September 2017 Update for Raspbian Stretch All Leon Anavi 08 July 2019 Update for Raspbian Buster All Leon Anavi ANAVI Infrared pHAT Revision Revision Notable c...

Reviews: