9
STEP 6
a.
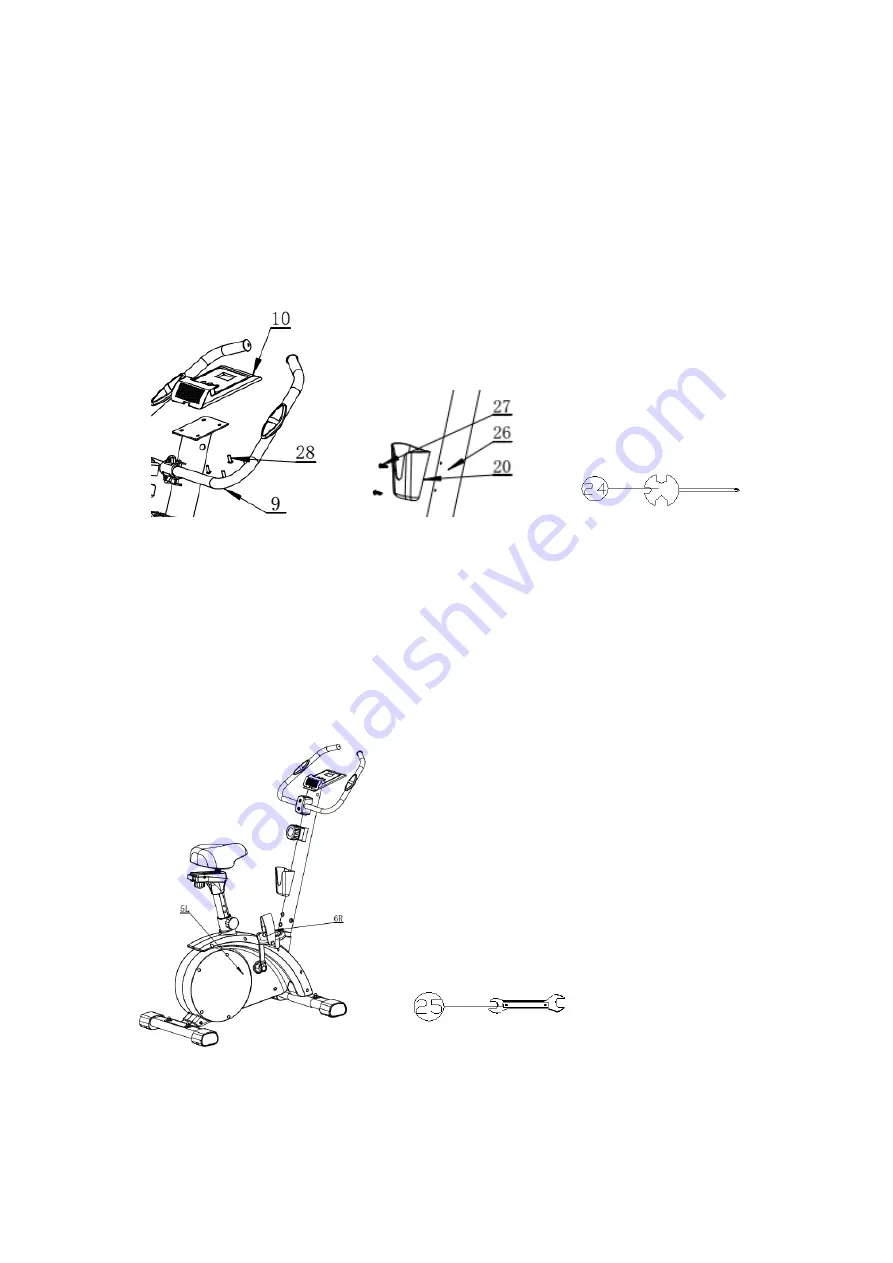
Unscrew the two Screws (28) pre-fitted on the Computer (10).
b.
Fix the Computer (10) on the bracket with 2 x Screws (28) by the provided Multi-function Screwdriver
(24).
c.
Unscrew the two Self-tapping Screws (27) pre-fitted on the handlebar support tube, then fix the
Water Bottle (20) on it with the two Self-tapping Screws (27) by the provided Screwdriver (24).
STEP 7
a.
Firmly fix the left pedal (5L) to the crank arm marked (L) in a anti-clockwise direction by 13-15
Wrench (25) until tight.
b.
Now firmly fix the right pedal (6R) to the crank arm marked (R) in a clockwise direction.
Failure to follow the above instructions could result in damage to the cranks and pedals.
Most Important
After all above 7 steps finished, the most important thing is to make sure all the bolts and parts
are securely fixed before you are riding on the bike.
Summary of Contents for MAGNETIC BIKE
Page 4: ...4 EXPLODED VIEW ...


