22
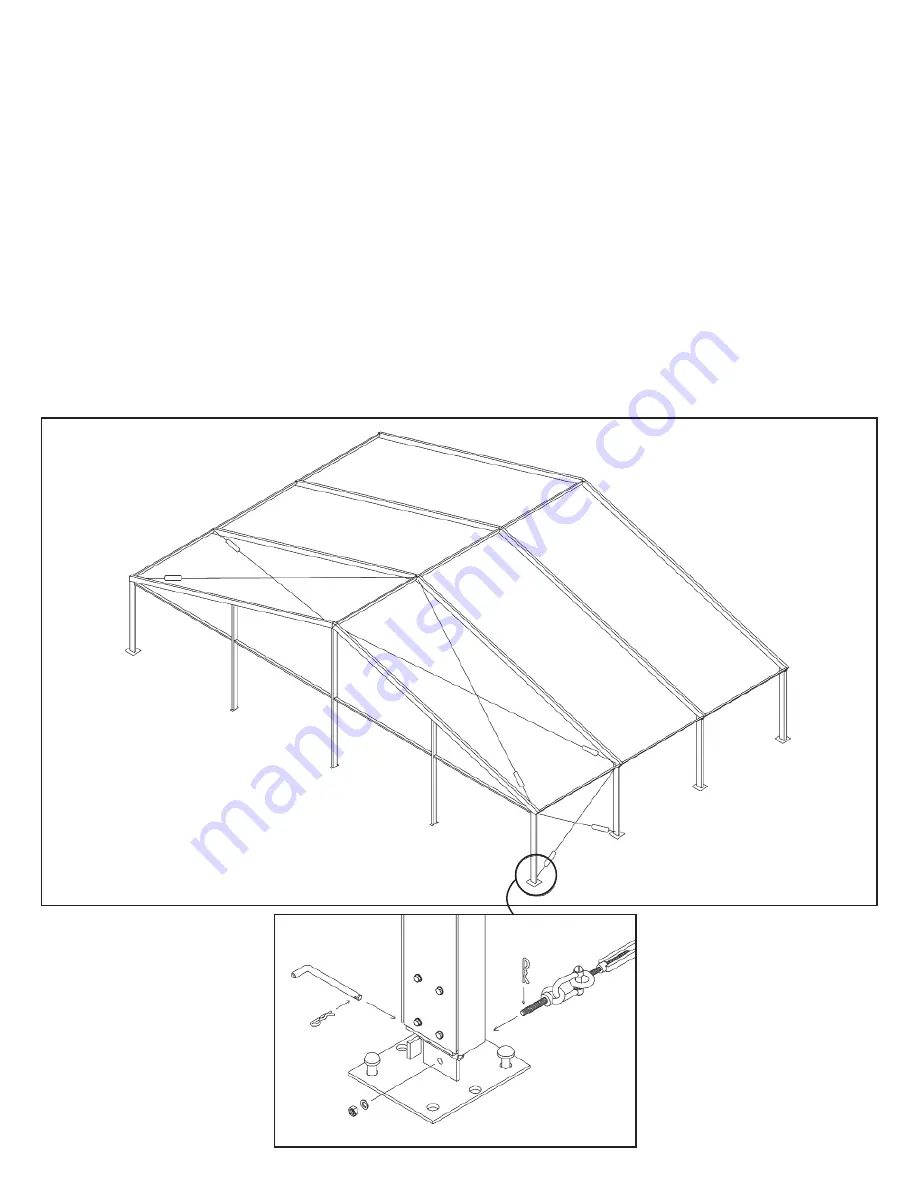
3.4 Completing Installation of Upright and Roof Cable Bracing:
Turnbuckles may need to be fully extended
to attach cables. Refer to
Figure 3.4
for cable configurations required for the Upright and Roof Cable Bracing.
3.4.1 The Upright Cables connect to the base plates by inserting an Eyebolt attached to the loose end of the cable
assembly thru the hole in the base plate vertical tab as shown in
Figure 3.4a.
Secure the Eyebolt with the
washer and nut provided. NOTE: The R-Clip provided will be used later to secure the wall ground rails at the End
Arches if the gable end walls are installed. Adjust the tension of the cables using the turnbuckles, tension only
enough to make frame stable. After the Upright Cables have been installed and tensioned, remove the Diagonal
Beam Braces.
3.4.2 The Roof Cables connect to the Eye-Nuts at the rafter eaves by using the shackle attached to the loose end of the
cable assembly. Adjust the tension of the cable using the turnbuckles.
IMPORTANT:
The Roof Cables must
be installed below the Roof Purlins.
3.4.3 The installation of the remaining cable braced bays will utilize the same technique described in steps 3.4.1 and
3.4.2.
3.4.4 Before erecting additional arches, plumb the first bay of uprights by adjusting the tension of the upright cables until
the uprights are vertically aligned. Next, adjust the roof cable to align the rafters vertically with the uprights. Once
the first bay of framing is plumb, continue erecting remaining arches as described in steps 3.3.1 thru 3.3.3.
Figure 3.4
Figure 3.4a


