17
53
54
Installation of Gabled End Fabric Panels
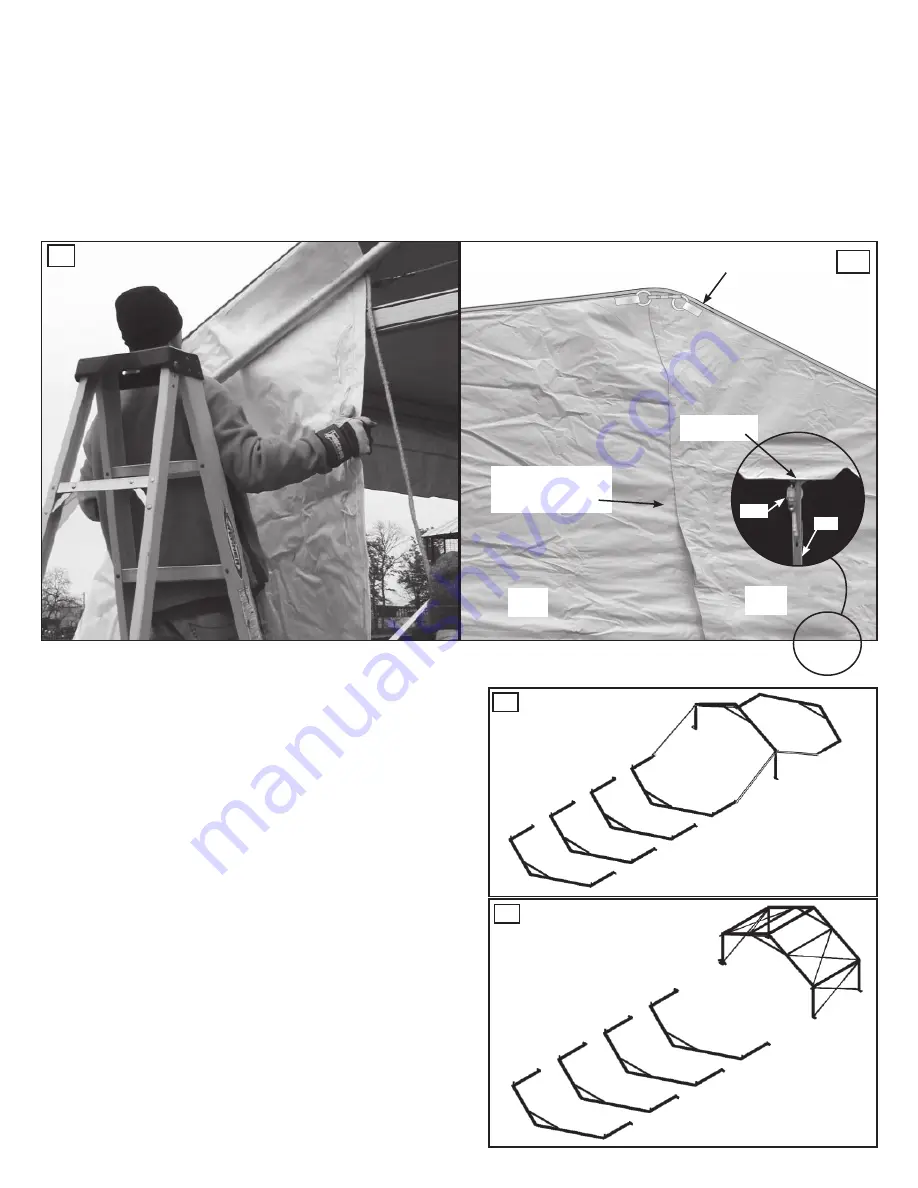
To install the gabled end fabric, first insert one of the wheeled panel guides and bracket on the end beam with the wheels facing out.
Insert the fabric kedar of one half the end into the upper channel and use the push pole to slide the half panel to the peak (fig. 53).
Repeat this from the other side of the structure. Then join the two half panels at the peak using the carabiner to fasten the rings and
lace down the center line using a standard loop and grommet tent lacing pattern.
Attach the web ratchet to the triangular metal ring and to the tension hole in the end upright and ratchet into tension (fig. 54).
GU
WR
GABLED END
VALANCE
RIGHT
SIDE
LEFT
SIDE
STANDARD LOOP &
GROMMET LACE WITH
WEATHER FLAP.
TOP CHANNEL
A structure with (2) Gabled Ends lacks the initial stability
normally provided by the hip end frame during installation
of the first middle beams. To compensate for this, we have
provided Installation Safety Guys to stabilize the first standing
beam until additional beams are connected.(see fig. 55)
Notice that the first beam raised is actually the second beam
of the frame system (fig. 55). In this way, the first beam
raised can be safely guyed to the base plates of the adjacent
beams on each side.
Next, the first beam of the layout is raised and joined to the
second (fig. 56).
When X-cabling has been installed in this first bay (see fig.
56), the structure is secure for standing the remaining beams
in the same way previously shown for standing middle beams
(fig. 57).
55
56
UNITS WITH 2 GABLED ENDS -
FRAME SAFETY


