PRODUCT MANUAL
68/72ST Above Deck Compact Motor
™
14
STEP 6
Prepare the power cables
6.1 Choose the shortest and most direct route possible for the cables, in order to minimise voltage drop between the
battery and the motor.
6.2 Measure the distance from the battery to the motor, and back again via the circuit breaker, to determine the necessary
total cable length.
6.3 Consult the table in the Winch Data Sheet for the model and voltage corresponding to your Andersen Compact Motor™
Electric Winch, to determine the minimum wire size for your cables according to the total cable length required for your
installation. If in doubt, consider choosing a thicker cable as this will help to minimise voltage drop.
6.4 Make up the cables with lugs to suit the terminals of your battery and the M8 terminals of the motor and circuit
breaker. The circuit breaker can accept cable lug size for max. wire size 50mm
2
.
STEP 7
Install the circuit breaker
7.1 Choose a suitable location for the circuit breaker [A13] in
an easily accessible position as close as possible to the
battery.
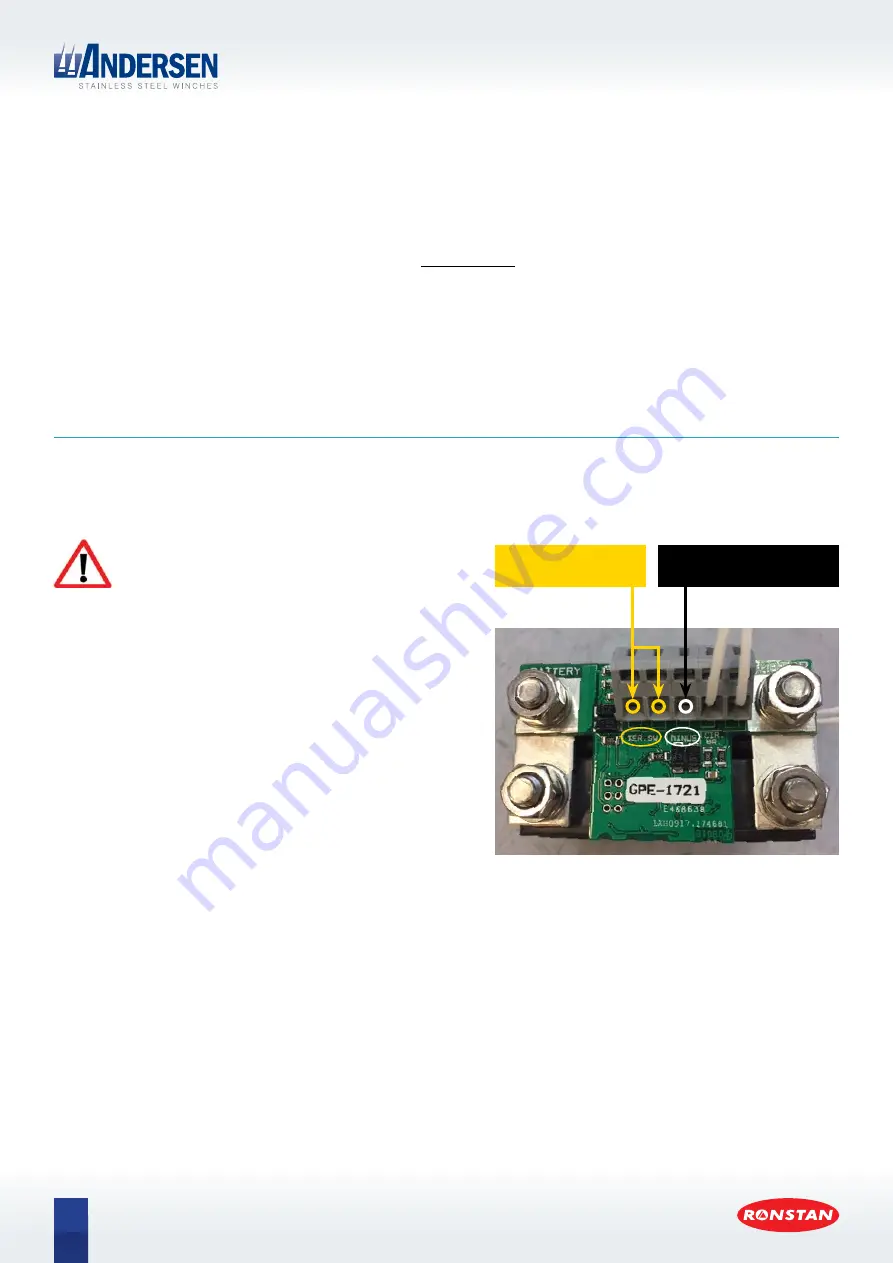
7.2 Connect the two thermal sensor wires from the motor to
the terminals marked “TER. SW” on the back of the circuit
breaker.
7.3 Use a 0.75mm
2
wire to connect the terminal marked
“MINUS” on the back of the circuit breaker to the
NEGATIVE (–) terminal of the battery.
Ensure that the circuit breaker is switched
to the “OFF” position before making any
wiring connections.
Connect thermal sensor
wires from motor
Connect cable from Negative (-)
terminal of the battery
Circuit breaker wiring connections


